
A rotavator, also known as a rotary tiller, is one of the most valuable and widely used agricultural machines for soil preparation. It is designed to break up, churn, and aerate the soil, making it ready for sowing seeds or planting crops. Over the years, it has replaced manual ploughing in many parts of the world due to its efficiency, speed, and ability to save labor costs. This article will cover every aspect of a rotavator, including its history, working principle, advantages, types, operating tips, and maintenance practices, so you can understand why it is considered essential in modern agriculture.
Introduction to the Rotavator
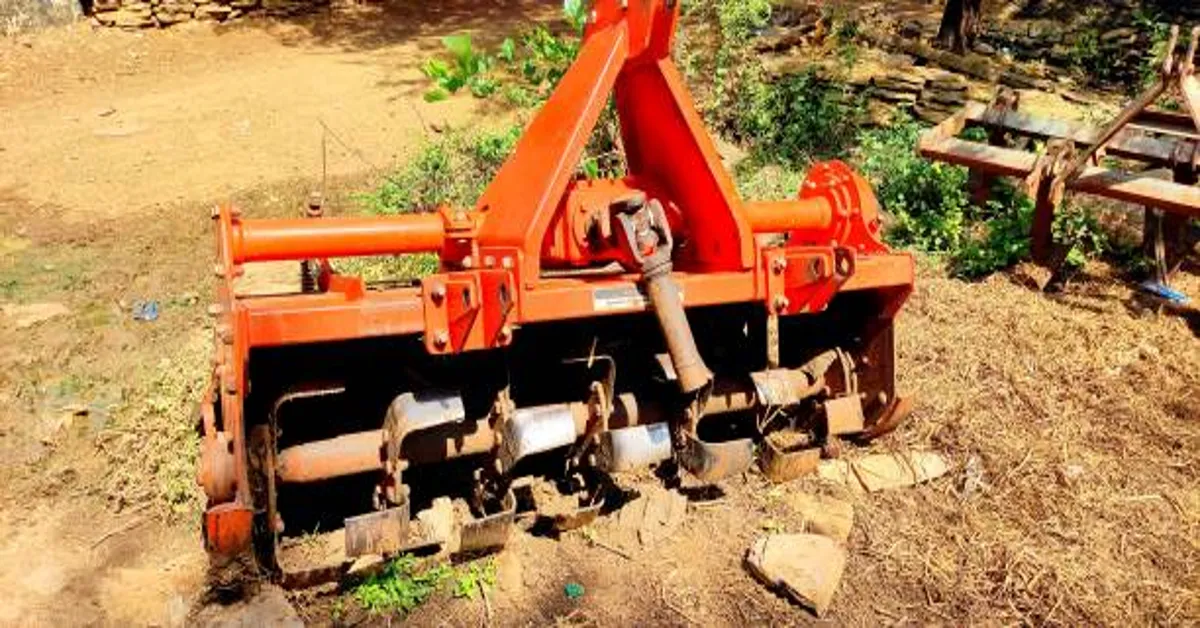
The rotavator is a tractor-powered implement equipped with a series of curved blades or tines that rotate at high speeds to dig into the soil. As the blades turn, they cut through hard ground, crush clumps, and mix crop residues into the earth. This process not only prepares the field for sowing but also improves soil aeration, water penetration, and nutrient distribution.
The machine is typically attached to the tractor’s three-point linkage and is powered through the power take-off (PTO) shaft. Depending on the model, the working width can range from a small unit suitable for gardens to a large agricultural implement covering several meters in one pass.
Rotavators are widely used for multiple purposes — from seedbed preparation in large farms to soil turning in small horticultural plots. Their versatility makes them useful not only in farming but also in landscaping, horticulture, and land reclamation projects.
History and Development of Rotavators
The concept of mechanized soil tillage dates back to the early 20th century. Before that, farmers relied on ploughs drawn by animals or humans. These manual methods were time-consuming, labor-intensive, and often inefficient for large areas. As tractors became more common, inventors started creating implements that could use the tractor’s engine power for soil cultivation.
The modern rotavator design emerged in the mid-1900s, evolving through multiple innovations. Early models were heavy, required more fuel, and had limited blade designs. Today’s rotavators are lighter, more durable, and have adjustable features that allow operators to control depth, speed, and soil texture.
Components of a Rotavator
A rotavator consists of several key parts that work together for efficient soil preparation:
a. Frame
The sturdy metal frame supports the entire structure and connects to the tractor. It must withstand vibrations, impacts, and heavy loads during operation.
b. Blades or Tines
These are the heart of the machine. Made from hardened steel, the blades rotate to cut and pulverize soil. The shape of the blades can be L-shaped, C-shaped, or straight, depending on the type of work.
c. Rotor Shaft
The central rotating shaft holds the blades. It is connected to the gearbox and spins at a controlled speed to achieve the desired tilling effect.
d. Gearbox
The gearbox transfers power from the tractor’s PTO to the rotor shaft, adjusting speed and torque for different soil conditions.
e. Side Transmission
This can be chain-driven or gear-driven, transmitting power from the gearbox to the rotor.
f. Depth Control Mechanism
Levers or skid plates allow operators to adjust how deep the blades cut into the soil.
g. PTO Shaft
The Power Take-Off shaft connects the tractor to the rotavator’s gearbox, delivering rotational energy.
h. Hood or Shield
A curved cover at the back controls soil flow, helps mix organic matter, and prevents debris from being thrown toward the operator.
Working Principle of a Rotavator
The rotavator’s operation relies on converting engine power from the tractor into rotary motion of the blades. Here’s a step-by-step breakdown:
- Attachment and Power Transfer – The rotavator is attached to the tractor’s three-point linkage, and the PTO shaft connects to the gearbox.
- Blade Rotation – As the PTO turns, the gearbox transmits power to the rotor shaft, causing the blades to spin.
- Soil Cutting and Mixing – The rotating blades dig into the soil, breaking clods, uprooting weeds, and mixing crop residues.
- Soil Leveling – The rear hood directs soil evenly, leaving a level seedbed.
- Depth Control – Operators adjust the skids or levers to achieve the desired tillage depth, which can range from shallow surface cultivation to deep tilling.
Types of Rotavators
Rotavators can be classified based on size, transmission type, and blade design.
a. Based on Size
- Mini Rotavators – Light, compact, ideal for gardens, greenhouses, and small plots.
- Medium Rotavators – Suitable for small to medium farms; can handle various crops.
- Heavy-Duty Rotavators – Large working widths and strong frames for large farms and tough soils.
b. Based on Transmission
- Chain Drive Rotavators – Use a chain to transfer power; economical and easy to maintain.
- Gear Drive Rotavators – More durable and efficient; suitable for heavy work but often costlier.
c. Based on Blade Shape
- L-Shaped Blades – Best for deep cultivation and weed control.
- C-Shaped Blades – Better for breaking hard soil while reducing power consumption.
- Straight Blades – Useful for shallow tillage and mixing compost.
Advantages of Using a Rotavator
Time and Labor Savings
A rotavator can prepare a field in a fraction of the time compared to manual methods or animal-drawn ploughs.
Better Soil Aeration
By churning the soil, rota vators enhance air exchange, benefiting root development and soil microorganisms.
Weed Control
Rota vators uproot and bury weeds, reducing competition for crops.
Improved Soil Structure
They mix organic matter evenly, promoting better water retention and nutrient distribution.
Versatility
Useful for a variety of crops, soil types, and land conditions.
Limitations and Considerations
While rotavators are highly effective, they have some limitations:
- Fuel Consumption – They require tractor power, which consumes fuel.
- Soil Over-Tilling – Excessive use can damage soil structure and increase erosion risks.
- Initial Cost – Purchasing a quality rota vator can be expensive.
- Maintenance Needs – Blades and mechanical parts require regular care.
Operating Tips for Efficiency
- Choose the Right Size – Match the rota vator’s working width to your tractor’s horsepower.
- Adjust Blade Depth – Too deep can waste energy; too shallow may not prepare the soil properly.
- Monitor Speed – Maintain appropriate rotor speed for soil type.
- Avoid Wet Soil – Tilling wet soil can cause compaction.
- Inspect Before Use – Check bolts, blades, and lubrication.
Maintenance Practices
Proper maintenance extends the life of a rota vator:
- Clean After Use – Remove soil, stones, and plant debris.
- Lubricate Regularly – Grease bearings, chain drives, and moving parts.
- Sharpen or Replace Blades – Dull blades increase fuel consumption and reduce efficiency.
- Check Gearbox Oil – Maintain correct oil levels to prevent damage.
- Inspect PTO Shaft – Ensure guards are in place and joints are secure.
Safety Precautions
Rotavators have sharp blades and powerful moving parts, so safety is critical:
- Never approach the blades while the machine is running.
- Keep bystanders, especially children, away.
- Wear protective gear — gloves, boots, and eye protection.
- Always disengage the PTO and turn off the tractor before maintenance.
Role of Rotavators in Modern Agriculture
In modern farming, time and efficiency are crucial. Rota vators allow farmers to prepare land quickly between cropping cycles, integrate crop residues into the soil, and improve yields. They also contribute to sustainable practices by reducing the need for chemical weed control and enabling organic matter recycling.
Environmental Considerations
While rota vators help in organic matter incorporation, over-tillage can harm soil health. Farmers should adopt responsible usage patterns, such as alternating with no-till methods and monitoring soil moisture before tilling. Using cover crops between seasons can help restore soil structure.
Choosing the Right Rotavator
When selecting a rota vator, consider:
- Tractor Horsepower – Match implement size to tractor power.
- Soil Type – Hard clay requires stronger models; sandy soil needs lighter units.
- Purpose – Seedbed preparation, weed control, or residue incorporation.
- Budget and Brand Reputation – Quality often justifies the higher initial cost.
Innovations in Rotavator Technology
Recent advancements include:
- Adjustable Blade Angles – For customized soil finishing.
- Hydraulic Depth Control – More precise tillage without manual adjustments.
- Improved Gear Systems – Reduced power loss and higher durability.
- Low-Vibration Designs – Enhanced operator comfort.
Conclusion
The rotavator has transformed the way farmers prepare land, making the process faster, more efficient, and less labor-intensive. By understanding its components, operation, and maintenance, farmers can make the most of this powerful implement while protecting soil health. Used responsibly, it can significantly boost agricultural productivity and sustainability.
ALSO READ: Horseplop: Meaning, Culture, Humor, and the Curious Digital Tale of an Odd Word
Frequently Asked Questions (FAQs)
1. What is the main function of a rotavator?
A rotavator’s main function is to break, churn, and mix the soil to prepare it for planting or sowing. It also helps in weed control and mixing organic matter.
2. How deep can a rotavator till the soil?
The tilling depth depends on the model and settings but typically ranges from 4 to 8 inches, with some heavy-duty models going deeper.
3. Can a rotavator be used in wet soil?
It is not recommended to use a rotavator in wet soil, as it can cause compaction, damage soil structure, and increase fuel use.
4. How often should rotavator blades be replaced?
Blade replacement depends on usage and soil type. In normal farming conditions, blades may last one or more seasons before needing replacement or sharpening.
5. Is a rotavator suitable for all types of crops?
Yes, rotavators are versatile and can prepare land for a wide range of crops, from cereals to vegetables, though adjustments may be needed for specific soil and crop requirements.