
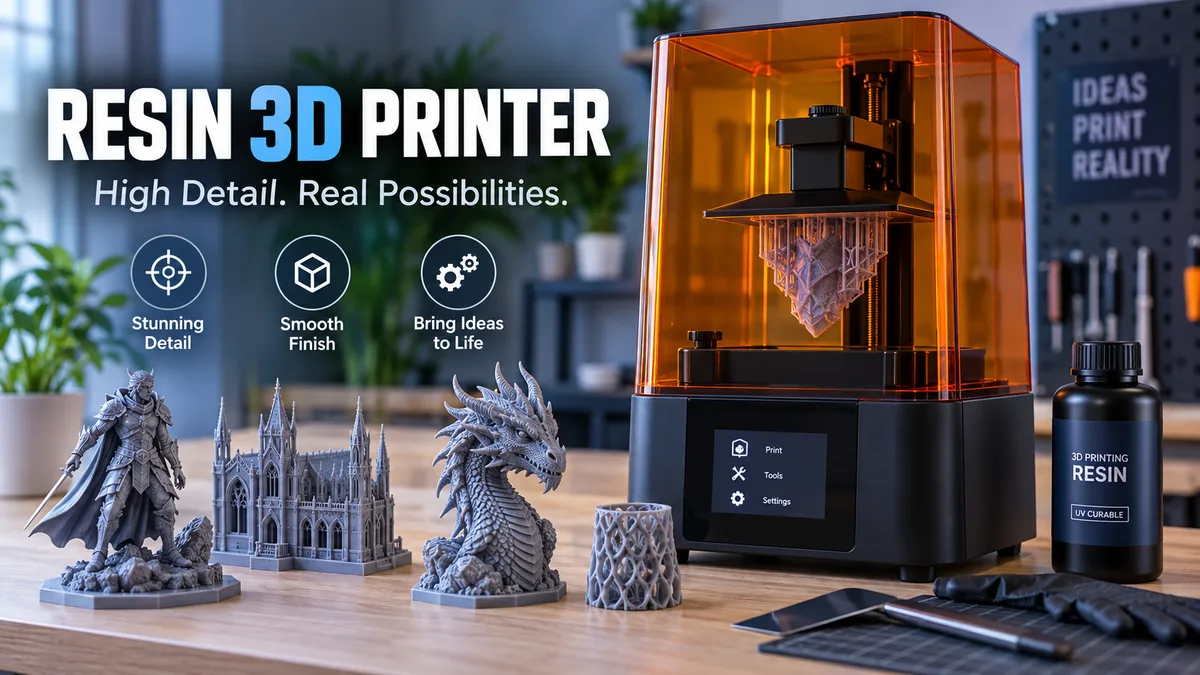

A resin 3d printer can reproduce tiny facial features, fine lettering, jewelry patterns, miniature textures, and smooth curved surfaces that are difficult for ordinary filament printers to match. That precision is the main reason resin printing has become popular for miniatures, models, prototypes, dental applications, jewelry, and other detail-heavy work.
The trade-off is the workflow. Instead of feeding a spool of solid plastic into a hot nozzle, resin printing starts with a vat of liquid photopolymer. The finished object must then be removed, washed, fully cured, and handled with appropriate safety precautions.
A resin 3d printer creates three-dimensional objects by selectively exposing liquid photopolymer resin to light, solidifying one thin layer at a time. Technologies such as SLA, DLP, LCD, and MSLA use different methods to deliver that light, but all belong to the broader family of vat photopolymerization processes.
This guide explains the complete process—from what happens inside the machine to resin selection, slicing, supports, washing, curing, troubleshooting, safety, and how resin compares with FDM printing.
What Is a resin 3d printer?
A resin 3d printer is an additive-manufacturing machine that builds solid objects from a photosensitive liquid material called photopolymer resin.
The printer starts with a digital 3D model. Slicing software divides that model into many extremely thin cross-sectional layers. Inside the machine, controlled light exposes the required shape of each layer and causes the liquid resin in those areas to polymerize and harden.
The process repeats until the entire object has been formed.
Most consumer resin machines use MSLA, also called masked stereolithography or LCD resin printing. A UV light source shines through an LCD mask that determines which portions of each layer are exposed. Other resin systems use a laser or digital projector instead.
The underlying principle remains the same:
Digital model → sliced layers → controlled light exposure → hardened resin → finished 3D object
Why does resin printing look so detailed?
A filament printer normally creates each layer by moving a nozzle along a path and depositing melted thermoplastic.
A resin printer can expose an entire pattern of very small areas in liquid resin. Modern desktop systems commonly work with extremely thin layers; roughly 0.02–0.05 mm is a typical fine-detail range discussed for resin printing, although the actual capabilities depend on the machine, resin, settings, and geometry.
This makes resin particularly effective for:
- Tabletop miniatures
- Figurines and busts
- Jewelry masters
- Dental models
- Scale models
- Detailed prototypes
- Decorative pieces
- Molds and casting patterns
- Small architectural models
- Fine text and surface textures
Resolution is more complicated than simply looking at a printer’s advertised “4K,” “8K,” “12K,” or similar screen label. XY pixel size, layer height, optical system, resin behavior, exposure, model orientation, anti-aliasing, and mechanical accuracy all influence the result.
How Does a resin 3d printer Work?
Most desktop machines use an inverted vat-photopolymerization arrangement.
A transparent-bottomed vat holds the liquid resin. The build plate sits above it and moves vertically along the Z-axis.
The basic cycle works like this:
- The build plate moves into position. A very thin gap remains between the plate or previous printed layer and the transparent film at the bottom of the vat.
- Light exposes the layer. The printer selectively illuminates the areas corresponding to that cross-section of the model.
- The resin polymerizes. Exposed photopolymer changes from liquid into solid material.
- The build plate lifts. The newly formed layer separates from the vat film.
- Fresh resin flows underneath. The machine prepares for the next exposure.
- The process repeats. Thousands of layers may eventually form the complete object.
- The print is removed and washed. Liquid resin remaining on its surface must be cleaned away.
- The part receives final UV curing. Post-curing helps the printed material reach its intended final properties.
This print-wash-cure workflow is one of the biggest practical differences between resin and filament printing.
What does the LCD screen actually do?
In an MSLA machine, the LCD works as a mask rather than being the primary UV source.
An LED array provides light, while the LCD controls where that light passes through. The illuminated pattern corresponds to the cross-section that needs to be cured.
This allows many points across a layer to be exposed during the same exposure cycle.
SLA vs DLP vs MSLA Resin Printing
“Resin printer” describes a family of technologies rather than one exact mechanism.
Three terms appear frequently: SLA, DLP, and MSLA.
| Technology | Light Delivery | How a Layer Is Formed | Common Context |
|---|---|---|---|
| SLA | Laser | Laser scans the required geometry | Professional and desktop systems |
| DLP | Digital projector | Projects the layer image | Professional/industrial systems |
| MSLA/LCD | LED light through LCD mask | LCD defines exposed pixels | Consumer desktop printers |
SLA
Stereolithography (SLA) is one of the foundational vat-photopolymerization technologies.
A controlled light source cures photopolymer according to the geometry of each layer. Laser-based SLA traditionally scans the layer geometry rather than exposing it through an LCD mask.
DLP
Digital Light Processing (DLP) uses a digital projection system.
Instead of tracing the geometry with a laser, a projected image forms the exposure pattern.
MSLA or LCD printing
Masked stereolithography (MSLA) places an LCD mask between the UV source and resin.
MSLA has become especially important in compact desktop resin printers. Advances in LCD technology have helped make high-detail resin printing much more accessible than it once was.
Is LCD printing really SLA?
Terminology varies across manufacturers and communities. LCD printing is commonly described as MSLA because the process uses a mask to selectively expose photopolymer.
The broader technical category encompassing these processes is vat photopolymerization.
That term is useful because it focuses on what all these technologies have in common: liquid photosensitive material contained in a vat is selectively cured to form solid layers.
Main Parts of a Resin Printer
Understanding the hardware makes troubleshooting considerably easier.
Resin vat
The vat is the container holding liquid photopolymer.
Its bottom includes a transparent film or interface through which exposure takes place. Depending on the machine and design, you may encounter terms such as FEP, PFA/nFEP, or other release-film materials.
A damaged or contaminated film can contribute to failed prints and may eventually need replacement.
Build plate
The model attaches to the build plate during printing.
Good first-layer adhesion is essential. If the initial layers do not attach correctly, the object may remain stuck to the vat film instead of growing on the plate.
Light source
The light source provides the wavelength required by the compatible photopolymer system. 405 nm is widely associated with many desktop resin printers and compatible resins, but users should always match material requirements to their specific machine.
LCD or optical system
An MSLA machine uses an LCD mask to control exposure.
SLA and DLP systems use different optical arrangements to accomplish the same fundamental objective: selectively curing the required geometry.
Z-axis
The Z-axis raises and lowers the build platform.
Accurate, stable vertical movement matters because even small mechanical problems can influence layer consistency.
resin 3d printer Resolution and Print Quality
Resolution is one of the most misunderstood specifications in resin printing.
A printer with a higher-resolution display does not automatically produce a visibly superior model.
XY resolution
XY resolution describes detail across the horizontal plane.
On an MSLA machine, pixel size is particularly useful. Smaller pixels can potentially reproduce finer geometry, assuming the optical system, resin, exposure settings, and mechanics can take advantage of them.
Z resolution and layer height
Vertical detail is affected heavily by layer height.
Resin machines can operate at very small layer heights, with values around 25–50 microns frequently used for detailed printing.
Thinner layers can reduce the staircase effect on slopes and curves, but they also increase the total number of layers.
More resolution is not always useful
Imagine printing a large, smooth geometric block.
Moving from an already fine pixel size to an even smaller one may make almost no visible difference.
Print a highly detailed 28–32 mm miniature face, however, and small improvements in effective resolution can become much easier to see.
For practical print quality, consider the entire system rather than a single marketing number.
What Types of Resin Are Used?
“Resin” is not one universal material.
Different photopolymer formulations are designed around different combinations of detail, strength, flexibility, temperature resistance, color, casting behavior, or other properties.
Standard resin
Standard photopolymer is commonly used for:
- Figurines
- Display models
- Miniatures
- Decorative objects
- General prototypes
It usually provides good detail but may be relatively brittle compared with engineering-focused formulations.
ABS-like resin
ABS-like products aim to provide greater toughness than basic standard resin.
Despite the name, ABS-like resin is not the same material as thermoplastic ABS filament. The term generally describes a desired property profile rather than identical chemistry.
Tough or engineering resin
Engineering-oriented materials can be formulated for improved mechanical performance.
Applications may include prototypes, fixtures, housings, and functional components, depending on the particular resin’s technical specifications.
Flexible resin
Flexible photopolymers produce softer or more elastic parts.
They can be useful for specialized prototypes, grips, flexible features, and models requiring some deformation.
Castable resin
Castable materials are particularly relevant to jewelry and investment casting workflows.
A high-detail master can be printed and incorporated into a casting process.
Water-washable resin
Water-washable resin is formulated so uncured residue can be cleaned according to the manufacturer’s specified water-based workflow rather than requiring the same solvent process as many conventional resins.
“Water washable,” however, does not mean harmless or safe to wash down a household drain.
The contaminated wash liquid can contain uncured photopolymer. It needs to be handled and disposed of according to the resin manufacturer’s safety data and applicable local waste requirements.
Resin Printing Safety: The Part You Should Learn First
The spectacular miniature on the build plate gets most of the attention. The liquid left in the vat deserves more.
Uncured photopolymer should be treated as a chemical material rather than ordinary craft paint. Safety guidance for beginner resin printing consistently emphasizes preparing the workspace, ventilation, protective equipment, and controlled cleanup before beginning.
Avoid direct skin contact
Wear suitable chemical-resistant gloves, commonly nitrile gloves when compatible with the resin manufacturer’s safety guidance.
Do not intentionally touch liquid resin with bare skin.
If contamination occurs, follow the product’s Safety Data Sheet (SDS) and manufacturer instructions rather than improvising with solvents.
Protect your eyes
Splashes can happen while pouring resin, removing a build plate, scraping a print, filtering material, or cleaning equipment.
Appropriate eye protection is therefore a sensible part of the workspace.
Ventilation matters
Odor is not a reliable measure of chemical exposure.
A resin that smells mild should not automatically be considered safer than one with a stronger odor. Set up the workspace according to the resin and printer manufacturer’s ventilation requirements.
A dedicated work area away from normal living, food-preparation, child, and pet spaces is preferable.
Isopropyl alcohol requires care too
Isopropyl alcohol (IPA) is commonly used for washing compatible resin prints.
IPA is flammable. Keep it away from flames, sparks, heaters, and other ignition sources, and follow its storage and handling instructions.
Read the SDS
Before using a new material, find its Safety Data Sheet.
The SDS provides product-specific information covering hazards, protective equipment, first aid, storage, accidental releases, and disposal.
Generic internet advice should never replace the safety documentation for the chemical actually sitting on your workbench.
Quick Takeaway: Treat uncured resin, resin-contaminated tools, wash liquid, and solvent as chemical materials. Gloves, eye protection, an appropriate workspace, ventilation, careful storage, and correct waste handling belong in the basic workflow—not as optional upgrades.
What Equipment Do You Need for Resin Printing?
The printer itself is only one component of a functional resin-printing setup.
A typical workspace may include:
- Resin printer
- Compatible photopolymer resin
- Slicing software
- Nitrile gloves
- Eye protection
- Wash containers or wash station
- Appropriate cleaning liquid
- UV curing equipment
- Silicone work mat or protected surface
- Resin filters
- Scraper or print-removal tool
- Paper towels or suitable disposable wipes
- Waste containers
- Basic maintenance tools
You also need a stable, level workspace with enough room to move a resin-covered build plate without bumping other objects.
That last detail sounds trivial until you have a dripping plate in one hand and nowhere clean to put it.
How to Use a resin 3d printer Step by Step
The easiest way to understand resin printing is to follow one object through the entire workflow.
1. Get the 3D model
The process begins with a digital 3D model, commonly distributed in formats such as STL or 3MF.
Before printing, inspect the geometry for obvious problems.
2. Import the model into a slicer
Popular resin-printing workflows use slicers such as CHITUBOX, Lychee Slicer, and manufacturer-specific software.
The slicer converts the model into the individual layers the printer needs.
3. Orient the model
Orientation has a major effect on print success and surface quality.
Placing every object perfectly flat against the plate is not automatically ideal. Angling a model can reduce problematic cross-sectional areas, change where support marks appear, and improve how forces develop during the peel/release cycle.
The ideal orientation depends on geometry.
4. Add supports
Overhanging regions and isolated features often require supports.
Supports connect otherwise unsupported geometry to the build structure.
Too few can produce failed islands or missing features. Too many waste resin, increase cleanup, and leave unnecessary marks.
Auto-support tools are useful starting points, but important models deserve manual inspection.
5. Check for islands
An island is geometry that begins curing without being properly connected to an earlier layer or support.
Unsupported islands can remain in the vat, cause defects, or contribute to later failures.
This is why reviewing the sliced layers can be more valuable than simply pressing “print” after auto-supporting a model.
6. Hollow large models when appropriate
A large solid resin model can consume unnecessary material.
Hollowing reduces resin usage and weight, but introduces another responsibility: drainage.
A hollow model needs properly positioned drain and vent holes so uncured liquid does not remain trapped inside.
Trapped resin is not merely wasted material. It can create long-term problems with the printed object.
7. Select the correct exposure
Exposure time determines how long each layer receives light.
The correct setting depends on factors including:
- Resin formulation
- Printer
- Layer height
- Temperature
- Light source
- Desired properties
Do not assume another person’s exposure value is automatically correct for your machine.
A manufacturer’s tested profile is usually a better starting point, followed by calibration when needed. Beginner guidance increasingly recommends starting with a known profile rather than changing many settings simultaneously.
8. Prepare the printer
Before starting, check:
- Vat condition
- Build plate
- Release film
- Resin compatibility
- Resin level
- Machine leveling/setup
- File selection
Keep direct sunlight away from exposed liquid resin because stray UV can initiate unwanted curing.
9. Start the print
Once printing begins, the machine repeats its exposure and lifting cycle automatically.
Unlike FDM, an MSLA printer exposes a layer as an image. Consequently, filling more of the XY build area does not necessarily multiply print time in the same way as making the model much taller.
Z-height and layer count can have a major influence on total print duration.
This is why printing several similarly tall miniatures together can be an efficient use of an MSLA build plate.
10. Remove the finished object
After printing, allow excess resin to drain according to the recommended workflow.
Wear appropriate PPE when handling the build plate and uncured print.
Use the proper removal tool carefully so you do not injure yourself or damage the build surface.
Washing and Curing Resin Prints
A model is not finished the moment the printer stops.
It still needs post-processing.
Washing
Freshly printed parts normally carry uncured resin on their surfaces.
The part must be cleaned using a method compatible with its resin. For many conventional formulations this involves IPA or another manufacturer-approved cleaning solution.
A dedicated wash station can make this process more consistent, but simple containers can also work when used safely.
Do not wash indefinitely. Excessive solvent exposure can negatively affect some materials.
Drying
Allow the cleaned model to dry before final UV curing.
If solvent remains pooled on the surface, curing immediately can contribute to undesirable surface appearance.
Support removal
The best point for removing supports can vary with resin, geometry, and workflow.
Supports are often easier to remove before final curing because the material has not yet reached its fully post-cured state. However, delicate models need careful handling.
UV post-curing
The washed model receives additional UV exposure to complete the intended post-processing cycle.
Curing time varies by:
- Resin
- Part thickness
- UV intensity
- Curing equipment
- Geometry
Follow the resin manufacturer’s recommended process.
“Longer” does not automatically mean “better.” Excessive curing can adversely affect some material properties.
resin 3d printer vs FDM Printer
This is one of the most common questions among people entering 3D printing.
An FDM printer melts thermoplastic filament such as PLA, PETG, ABS, or other compatible materials and extrudes it through a nozzle.
A resin machine cures liquid photopolymer with light.
Neither process is universally better.
| Feature | Resin Printing | FDM Printing |
|---|---|---|
| Fine detail | Excellent | Good |
| Smooth small surfaces | Excellent | More visible layer lines |
| Large objects | Less convenient on many desktop machines | Often better suited |
| Miniatures | Excellent | Usable, but generally less detailed |
| Functional material choices | Specialized | Broad thermoplastic selection |
| Post-processing | Washing + curing required | Often minimal |
| Liquid chemicals | Yes | No liquid resin |
| Cleanup | More involved | Generally simpler |
| Small intricate models | Major strength | More limited |
| Large prototypes | Possible, but often less practical | Major strength |
Current comparisons consistently identify fine detail and surface quality as resin’s strongest advantages, while FDM tends to be easier for larger, functional, and lower-mess projects.
Is resin stronger than filament?
Not inherently.
“Resin” and “filament” each describe large families of materials.
A brittle standard photopolymer cannot be meaningfully compared with a tough engineering thermoplastic simply by saying one technology is stronger.
Mechanical performance depends on the exact material, print orientation, geometry, post-curing, loading direction, temperature, and application.
If strength is important, compare actual technical data sheets for the candidate materials rather than generic resin-versus-filament claims.
Advantages of a resin 3d printer
Exceptional fine detail
This is resin printing’s defining advantage.
Tiny textures, facial details, engraving, thin lettering, and decorative patterns can be reproduced remarkably well.
Smooth surface finish
Thin layers and fine XY resolution can make layer transitions less noticeable, especially on small organic shapes.
Excellent miniature printing
For tabletop gaming, figurines, busts, and similar small models, resin is particularly well suited.
This is why miniature printing is repeatedly highlighted as a primary desktop-resin application.
Efficient batch printing
With MSLA, exposing a layer containing several objects can take roughly the same exposure time as a layer containing one object, provided the objects share similar Z-height and the machine has sufficient build area.
This makes batches of small parts attractive.
Specialized materials
The ecosystem includes standard, tough, flexible, castable, dental-oriented, and other application-specific photopolymers.
Disadvantages of Resin Printing
The impressive print quality comes with genuine drawbacks.
Liquid resin requires careful handling
This is the biggest difference beginners should understand before buying a machine.
The workflow involves uncured chemicals rather than only solid filament.
Every print needs post-processing
Printing is only part of the job.
You still need to:
Drain → remove → wash → dry → remove supports → post-cure → clean the workspace
Consumables extend beyond resin
Ongoing costs may include:
- Cleaning solvent
- Gloves
- Filters
- Release films
- Cleaning materials
- Replacement vats or components
- UV curing equipment
- Waste-management supplies
Build volume can be smaller
Many consumer resin machines emphasize precision over enormous build areas.
Large resin printers exist, but large resin objects also consume significant material and create larger post-processing jobs.
Standard resin may be brittle
A beautifully detailed model is not automatically mechanically tough.
Choose materials according to their intended properties.
What Is a resin 3d printer Best Used For?
Resin becomes particularly compelling when small-scale detail matters more than simple handling or large build volume.
Miniatures and tabletop models
Fine armor, facial expressions, hair, fabric, weapons, scales, and surface textures benefit directly from resin’s precision.
Jewelry
Jewelry workflows can use high-detail and castable photopolymers to produce intricate masters and patterns.
Dental applications
Professional resin technologies are used for applications such as dental models and other specialized workflows, using validated equipment, software, and application-specific materials where required.
Resin printing’s role extends well beyond hobby miniatures; professional vat photopolymerization is also used for prototyping, tooling, manufacturing aids, and end-use applications.
Prototyping
Product designers can use resin when appearance, fit, fine features, or surface finish need to be evaluated.
Scale modeling
Small vehicle components, architectural details, figures, accessories, and other fine parts are natural candidates.
Molds and casting patterns
Specialized materials can support casting, molding, and tooling workflows where their documented properties are appropriate.
How Fast Is Resin 3D Printing?
Print speed needs context.
An MSLA machine exposes an entire layer simultaneously. That means adding more objects across the build plate may have a relatively small effect on exposure time compared with increasing the total number of layers.
Imagine printing one 40 mm-tall miniature.
Now place six 40 mm-tall miniatures on the same plate.
Assuming the same settings and no unusual machine behavior, the second job does not necessarily require six times the exposure time because each layer can contain pixels belonging to all six objects.
But print a single model that is 160 mm tall and the machine needs many more layers.
For MSLA printing, model height, layer height, exposure, lift/retract movement, and machine design all affect completion time.
So statements such as “resin is faster than FDM” are too simplistic.
The answer depends heavily on what is being printed.
How Much Resin Does a Print Use?
Resin consumption depends mainly on the object’s physical volume plus supports, rafts, and any losses associated with the workflow.
Slicing software can estimate material usage before printing.
For large objects, hollowing can substantially reduce consumption, provided the geometry is suitable and drainage is properly designed.
Suppose a decorative model occupies 120 mL when solid. Hollowing it with an appropriate wall thickness might reduce material use substantially—but the exact result depends entirely on the geometry.
Do not hollow solely to save a few milliliters.
A poorly designed hollow print with trapped uncured material is worse than a properly printed solid model.
Common resin 3d printer Problems
Failed prints are frustrating, but the shape of the failure often points toward the cause.
Nothing is attached to the build plate
Possible causes include:
- Build plate setup or leveling
- Inadequate bottom-layer exposure
- Poor first-layer adhesion
- Incorrect slicer settings
- Mechanical issues
Inspect the vat before simply restarting. A cured layer may be stuck to the release film.
Supports print, but the model disappears
This often indicates that the support structure survived while the model separated from it.
Check:
- Support placement
- Support contact size
- Model orientation
- Exposure
- Cross-sectional forces
Part of the model is missing
Look for unsupported islands, insufficient supports, slicing problems, or damaged/contaminated areas in the vat interface.
Layers separate
Delamination can result from exposure problems, mechanical forces, resin conditions, temperature, or support/orientation issues.
Fine details look swollen
Overexposure can cause small features to lose definition.
Do not immediately change five settings.
Change one variable at a time and use a suitable calibration model when tuning exposure.
Prints suddenly fail after previously working
Check physical components before assuming the slicer is responsible.
Inspect:
- Release film
- Vat
- Build plate
- LCD/exposure system
- Z-axis
- Resin condition
- Temperature
- Recent profile changes
Quick Takeaway: Troubleshooting becomes much faster when you identify where the print stopped behaving correctly—build plate, supports, individual layers, or surface detail—then test one likely cause at a time.
Supports, Orientation, and Hollowing: Three Skills That Matter Most
Modern printers automate much of the mechanical process, but successful resin printing still depends heavily on model preparation.
Orientation controls more than surface quality
Orientation changes:
- Support requirements
- Peel/release forces
- Where marks appear
- Cross-sectional area
- Print height
- Drainage behavior
A slightly longer print can sometimes be worthwhile if the new orientation produces a cleaner and more reliable model.
Supports are structural engineering in miniature
Supports need to hold the object against forces created during printing without becoming so heavy that they damage its surface.
For display pieces, place support contacts on areas that will be less visible whenever geometry permits.
Hollow prints need drainage and ventilation
Never treat hollowing as a simple “save resin” checkbox.
A cavity needs a path for liquid resin and cleaning fluid to leave. Hole placement should also allow air and liquid movement during printing and cleaning.
Inspect hollow models carefully before final curing.
How to Get Better Resin Prints
A reliable process beats endless random setting changes.
Start with a known resin profile
Use manufacturer-recommended settings as your baseline whenever available.
Then calibrate systematically.
Control temperature
Photopolymer behavior can change with temperature.
If prints work during warm afternoons and fail consistently in a cold workspace, environmental conditions deserve investigation before radically changing the model.
Use the operating range specified by the resin manufacturer.
Keep the vat clean
After a failure, inspect for cured fragments.
A loose piece left inside can interfere with later prints and potentially damage components.
Don’t chase the thinnest possible layer
Extremely thin layers sound impressive, but they are not necessary for every model.
Choose layer height according to the detail the object actually needs.
Learn manual support inspection
Automatic supports save time.
They do not understand every model perfectly.
Review islands, thin features, heavy sections, contact points, and areas where cosmetic marks would be undesirable.
Change one setting at a time
This is one of the most useful habits in 3D printing.
If you simultaneously change exposure, lift speed, orientation, supports, and layer height and the next model works, you have learned almost nothing about what fixed it.
Is a resin 3d printer Good for Beginners?
Yes—but only for beginners comfortable with the full workflow.
The machine itself can be straightforward. Modern resin printers and slicers automate many processes that once demanded extensive manual adjustment.
The learning curve comes largely from everything surrounding the machine:
- Chemical handling
- Workspace preparation
- Supports
- Orientation
- Exposure calibration
- Washing
- Curing
- Failure cleanup
- Waste management
Beginner guides consistently frame resin printing as more than simply loading a file and pressing start. A successful setup requires planning the work area and post-processing process from the beginning.
If your main goal is highly detailed miniatures or similar small objects, learning resin printing can make sense from day one.
If you mainly want household parts, organizers, brackets, large prototypes, toys, or functional components, an FDM machine may provide a simpler introduction.
Can You Use a Resin Printer Indoors?
A resin printer should not simply be placed anywhere indoors because it physically fits on a desk.
Your setup needs to account for the specific resin’s handling requirements, ventilation, spill containment, cleaning chemicals, storage, and access by children or pets.
A bedroom, kitchen counter, or frequently occupied living area is generally a poor choice for an uncontrolled resin workspace.
Consult the printer documentation and SDS for the specific resin and cleaning chemicals you use. Workspace safety should be designed around those requirements rather than assumptions based on smell.
How Long Do Resin Prints Need to Cure?
There is no universal curing time.
Required post-curing varies with material formulation, model thickness, curing wavelength/intensity, temperature, geometry, and the manufacturer’s intended material properties.
A tiny miniature and a thick engineering component should not automatically receive identical treatment.
Use the material manufacturer’s documented curing procedure where available.
The goal is not simply to make the surface feel hard. Correct post-curing is part of obtaining the material properties for which the resin was designed.
Is Water-Washable Resin Safer?
The name can be misleading.
Water-washable resin changes the cleaning method; it does not automatically turn uncured photopolymer into an environmentally harmless substance.
Wear appropriate protective equipment and follow the product’s SDS.
Most importantly, do not interpret “water washable” as permission to rinse contaminated water directly into a sink. Manage contaminated wash water according to manufacturer instructions and applicable local waste regulations.
How to Handle Resin Waste
Waste management should be planned before your first print.
Potentially contaminated materials can include:
- Failed prints
- Supports
- Disposable gloves
- Paper towels
- Filters
- Resin-contaminated cleaning material
- IPA or other wash solution
- Uncured resin
Do not pour liquid photopolymer or resin-contaminated wash solution down a household drain.
The exact disposal requirements vary by material and jurisdiction, so follow the Safety Data Sheet, manufacturer guidance, and local hazardous-waste requirements.
This is one area where a generic online rule should not replace product-specific instructions.
How Long Does a Resin Printer Last?
There is no fixed lifespan for the entire machine.
Different components age at different rates.
Consumable or wear-related items may include the release film, vat components, LCD on MSLA machines, build surfaces, fans, and other mechanical parts.
Useful maintenance habits include:
- Keeping optical surfaces clean
- Checking the vat after failures
- Replacing damaged release film
- Avoiding cured debris in the vat
- Maintaining the Z-axis as specified
- Keeping resin away from electronics
- Following firmware and maintenance instructions
A well-maintained machine can remain useful long after individual consumable components have been replaced.
What Should You Look for When Evaluating a Resin Printer?
Even from a purely informational perspective, knowing the specifications helps you understand why two machines may behave differently.
Pay attention to:
Build volume: Determines the maximum practical model dimensions and batch capacity.
XY pixel size or optical resolution: More informative for potential horizontal detail than screen-resolution marketing alone.
Layer-height range: Indicates available vertical slicing options.
Light system: Influences exposure behavior and uniformity.
Release-film/vat design: Affects maintenance and the printing cycle.
Z-axis mechanics: Stability matters for consistent layers.
Slicer compatibility: Determines how easily models can be prepared.
Material compatibility: Confirm wavelengths and supported resin systems.
Replacement components: Release films, vats, LCDs, and other wear items eventually matter.
Workflow: Washing, curing, ventilation, cleanup, and waste handling should be considered part of the system—not separate afterthoughts.
The Most Common Beginner Mistakes
Several mistakes repeatedly create unnecessary problems.
Buying the printer without planning the workspace. Decide where washing, curing, storage, and waste handling will happen before opening the resin.
Touching uncured material casually. Build safe handling habits from the first print.
Trusting auto-support blindly. Inspect the sliced model.
Using random exposure settings from the internet. Start with settings appropriate for your printer and resin.
Ignoring temperature. Material behavior is affected by environmental conditions.
Leaving debris after a failure. Always inspect the vat.
Hollowing without drain holes. Trapped liquid can ruin an otherwise successful model.
Assuming higher screen resolution guarantees better prints. Effective detail depends on the entire printing system.
Skipping post-curing. Washing and curing are fundamental stages of the resin workflow.
Changing many settings simultaneously. Controlled troubleshooting produces repeatable results.
Is Resin 3D Printing Worth Learning?
A resin 3d printer makes the most sense when fine detail, small features, and smooth surface quality are central to the project.
Its strongest applications—miniatures, figurines, jewelry patterns, dental models, detailed prototypes, and scale components—take advantage of exactly what vat photopolymerization does well. The technology can reproduce detail that is difficult to achieve with conventional FDM printing.
But the printer should never be evaluated by print quality alone.
Resin printing is an entire workflow involving model preparation, orientation, supports, photopolymer exposure, washing, UV post-curing, maintenance, PPE, ventilation, and responsible waste handling. For some users, those extra steps are easily justified by the results. For others, FDM is the more practical technology.
If you are starting with a resin 3d printer, focus first on a safe workspace and a repeatable workflow. Use a manufacturer-tested resin profile, begin with a simple supported model, learn how washing and curing work, and change only one setting at a time when troubleshooting. Once those fundamentals become routine, achieving detailed, consistent resin prints becomes far more predictable.
