
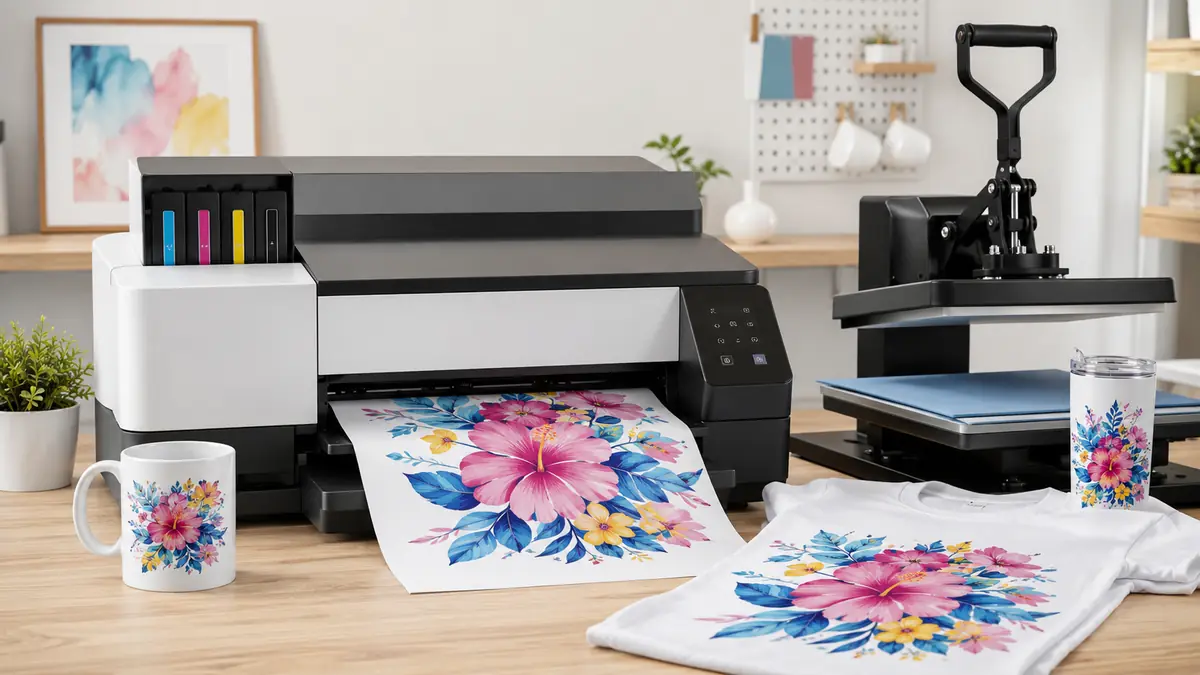

A regular inkjet printer can put an image on paper. A sublimation printer helps place that image permanently inside polyester fabric or a polymer-coated object. The difference becomes clear after pressing: colors turn vibrant, the surface stays smooth, and the design does not form a layer that can crack or peel.
A sublimation printer uses special dye-based ink to print a mirrored design onto coated transfer paper. A heat press then applies controlled heat and pressure, releasing the dye so it diffuses into polyester fibers or a polymer coating. Once cooled, the design becomes part of the material rather than sitting on its surface.
This guide explains the complete process, compatible materials, essential equipment, benefits, limitations, color management, and common troubleshooting steps.
What Is a Sublimation Printer?
A sublimation printer is a digital printer designed—or adapted—to work with dye-sublimation ink. Most desktop systems use inkjet printheads to place the ink on sublimation transfer paper.
The printer does not normally print the finished object directly. Instead, it produces an intermediate transfer that must be applied with heat.
The basic workflow is:
- Create a digital design.
- Mirror the design horizontally.
- Print it on sublimation paper.
- Position the printed sheet against a compatible blank.
- Apply the recommended time, temperature, and pressure.
- Remove the paper and allow the item to cool.
The process is called dye sublimation because heat causes the printed dye to diffuse into the receiving material. It is commonly described as changing from a solid into a gas without becoming liquid first. More precisely, heat mobilizes the dye so it penetrates and bonds within the polyester or polymer layer.
That distinction matters because the design is not an adhesive film. There is no raised edge, vinyl-like texture, or separate printed layer to peel away.
Sublimation printer versus photo dye-sublimation printer
The term can refer to two related but different technologies:
- Transfer sublimation printers print special ink onto transfer paper for application to shirts, mugs, tumblers, signs, and similar products.
- Compact dye-sublimation photo printers use a thermal printhead and dye-coated ribbon to produce photographs directly on compatible media.
This article focuses primarily on transfer sublimation, which is the system used for personalized apparel and merchandise.
How Does a Sublimation Printer Work?
A complete sublimation print depends on four connected components: the printer, ink, transfer paper, and receiving material. The heat press activates the actual transfer.
1. The design is prepared digitally
Artwork can be created in programs such as Adobe Photoshop, Adobe Illustrator, CorelDRAW, Canva, Cricut Design Space, Affinity Designer, or dedicated manufacturer software.
Raster images should have enough resolution for the intended print size. Approximately 300 pixels per inch is a practical target for detailed artwork viewed at close range, although lower resolutions can work for large signs viewed from a distance.
Text and directional artwork usually need to be mirrored before printing because the paper is placed face down on the blank. Some printer software mirrors automatically, so check the preview to avoid reversing the image twice.
2. Sublimation ink is printed on transfer paper
Sublimation ink contains disperse dyes formulated to respond to heat. The printer deposits cyan, magenta, yellow, and black—commonly described as CMYK—onto specially coated paper.
The image often looks dull or washed out at this stage. That is normal. Sublimation colors usually develop their intended vibrancy only after heat pressing.
Transfer paper is engineered to hold the ink near its surface and release it efficiently during pressing. Ordinary copy paper may absorb too much ink, reducing transfer density and color quality.
3. Heat and pressure activate the transfer
The printed side of the paper is secured against the item with heat-resistant tape. A heat press then supplies:
- Controlled temperature
- Consistent pressure
- Even contact
- A repeatable pressing time
Many polyester and coated products are pressed somewhere near 350–400°F, or approximately 175–205°C. However, there is no universal setting. Polyester fabric, ceramic mugs, coated aluminum, acrylic, and glass can require different combinations.
The blank manufacturer’s instructions should always take priority over a generic heat-press chart.
4. The dye enters the material
During heating, the dye leaves the transfer paper and diffuses into the polyester fibers or polymer coating. When the item cools, the dye becomes locked into that structure.
The result is a smooth, full-color image that generally resists normal washing, scratching, cracking, and peeling. Durability still depends on the quality of the blank, ink, coating, transfer settings, and exposure to ultraviolet light.
Quick takeaway: The printer creates only the transfer. Heat, pressure, and a compatible polymer-based surface create the finished sublimated product.
What Can You Make With a Sublimation Printer?
Sublimation supports photographs, gradients, fine details, repeating patterns, and multicolored artwork without requiring separate screens or layers.
Common projects include:
- Polyester T-shirts and sports jerseys
- Leggings, socks, bags, and fabric panels
- Ceramic mugs with a sublimation coating
- Polymer-coated tumblers and water bottles
- Coasters and mousepads
- Phone cases
- Keychains and luggage tags
- Coated aluminum photo panels
- Awards, plaques, and name badges
- Polyester banners, flags, and soft signage
- Neoprene products
- Compatible acrylic and glass blanks
- Home décor and promotional merchandise
A product described only as “ceramic,” “metal,” or “acrylic” is not automatically suitable. Hard objects generally need a factory-applied polymer coating made to accept sublimation dye.
Can a sublimation printer print on cotton?
Traditional sublimation ink does not bond permanently with untreated cotton. It needs polyester or a polymer-based receiving layer.
A blended shirt may accept some dye if it contains polyester, but the result changes with the fabric composition:
- High-polyester fabric normally produces strong, vivid color.
- A medium-polyester blend creates a softer, faded appearance.
- Low-polyester or 100% cotton fabric produces weak and unreliable results.
Cotton can be decorated indirectly with a compatible sublimation coating, printable heat-transfer material, specialty vinyl, or a hybrid system. In those cases, the dye bonds to the added layer rather than directly to the cotton fibers.
Direct-to-garment, direct-to-film, heat-transfer vinyl, or screen printing may be more appropriate when cotton is the primary material.
Can it print on dark shirts?
Standard sublimation ink is transparent and does not include an opaque white underbase. The original fabric color remains visible through the design.
A blue design may look vivid on a white shirt but become difficult to see on a black one. White areas in the artwork are left unprinted because the process assumes the blank itself provides the white background.
For predictable results, use white or light-colored polyester. Dark garments require an additional light-colored transfer layer or a different printing method, such as DTF.
Equipment Needed for Sublimation Printing
A functional setup involves more than the printer. Every component affects the final transfer.
Sublimation printer and ink
You can use either:
- A purpose-built dye-sublimation printer
- A compatible inkjet printer converted while new and unused
Purpose-built models from manufacturers such as Epson and Sawgrass are designed around sublimation ink, print settings, and color-management workflows. Examples include the Epson SureColor dye-sublimation range and Sawgrass desktop systems.
Converted Epson EcoTank models are also widely used by hobbyists. However, conversion may void the original warranty, provide less manufacturer support, and require more manual color management.
Never pour sublimation ink into a printer that has already circulated ordinary ink unless a proper cleaning and conversion procedure is supported. Mixing the two formulations can contaminate the ink system, alter colors, and contribute to clogged nozzles.
A printer assigned to sublimation should remain dedicated to it.
Sublimation transfer paper
The paper coating controls ink absorption and release. Its performance can influence:
- Color density
- Fine-detail reproduction
- Drying time
- Transfer efficiency
- Wheel or roller marks
- Ink bleed at high saturation
Load the correct printable side. Depending on the paper, it may be brighter, whiter, or slightly tacky. Follow the paper manufacturer’s markings rather than relying only on appearance.
Heat press
A press supplies more consistent heat and pressure than a household iron. The best press style depends on the object:
| Heat equipment | Suitable projects | Main consideration |
|---|---|---|
| Flat heat press | Shirts, mousepads, aluminum panels | Platen must heat evenly |
| Mug press | Straight-sided mugs | Diameter and heating-area limits |
| Tumbler press | Tumblers and bottles | Requires compatible attachments |
| Convection oven | Irregular drinkware and multiple items | Must be dedicated to crafting |
| Calendar press | Fabric rolls and large-format work | Intended for higher production volume |
A heat gun or infrared thermometer can detect major temperature differences, but a surface probe or heat-test strips may provide more useful platen measurements.
Do not use food-preparation equipment for sublimation after it has been exposed to inks, coated blanks, adhesives, or transfer fumes.
Sublimation blanks
A blank is the undecorated product receiving the design. For reliable results, it should be labeled as sublimation-ready and should include pressing instructions.
Coating quality varies. A cheap mug with an uneven polymer layer can cause faded patches even when the printer and press are working correctly.
Supporting supplies
Useful accessories include:
- Heat-resistant tape
- Protective butcher paper
- Lint roller
- Heat-resistant gloves
- Clean scissors or paper trimmer
- Pressing pillow or pad when appropriate
- Blowout paper for fabric
- Alignment ruler or jig
- Replacement maintenance parts
- Well-ventilated workspace
Protective paper should generally be discarded after one press. Reusing it can transfer residual dye to another item or the heat platen.
Purpose-Built Versus Converted Sublimation Printers
Choosing between a dedicated machine and a conversion affects setup, support, color accuracy, and maintenance.
| Factor | Purpose-built printer | Converted inkjet printer |
|---|---|---|
| Original design | Engineered for sublimation | Engineered for standard inkjet use |
| Setup | Usually guided and integrated | Requires compatible third-party ink |
| Warranty | Typically covers approved use | Conversion may void coverage |
| Color workflow | Manufacturer profiles or software | May require manual ICC setup |
| Support | Centralized manufacturer support | Split between printer and ink suppliers |
| Initial cost | Often higher | Often lower |
| Troubleshooting | More predictable system | More variables to isolate |
| Ink choice | Usually manufacturer-specific | Wider third-party selection |
| Maintenance | Documented for dye-sub use | Depends on printer and conversion |
A converted machine can produce excellent results, but it is not automatically equivalent to a purpose-built system. The ink, paper, driver settings, and ICC profile must work together.
If predictable support matters more than minimizing initial cost, a dedicated model is usually the simpler path. If you are comfortable managing drivers, profiles, nozzle checks, and third-party supplies, a carefully chosen conversion may be practical.
How to Use a Sublimation Printer Step by Step
The following workflow applies to most transfer-based projects.
1. Confirm the blank is compatible
Verify the material, coating, recommended temperature, pressing time, and pressure. Check whether any protective film must be removed.
2. Measure the printable area
Do not assume the whole object can be pressed. A mug handle, tapered tumbler, garment seam, or beveled edge may prevent full contact.
Build the design around the actual pressable area.
3. Prepare the artwork
Set the correct canvas dimensions and use a suitable resolution. Convert or embed fonts when necessary. Review spelling, orientation, transparency, and crop boundaries.
4. Apply the correct color settings
Select the intended printer, paper, ink, and ICC profile. Avoid allowing both the design program and printer driver to manage color simultaneously unless the workflow specifically requires it.
Double color correction is a frequent cause of dull or inaccurate output.
5. Mirror and print
Mirror any design containing text or directional elements. Print on the coated side of the sublimation paper using the recommended quality setting.
Allow the transfer to dry before handling heavily inked areas.
6. Prepare the blank
Remove dust, hair, moisture, or protective film. A lint roller is particularly useful on garments because invisible fibers can turn into permanent blue or dark marks when heated.
Some blanks benefit from a brief pre-press to remove moisture. Follow the supplier’s instructions because excessive preheating can distort certain materials.
7. Position and secure the transfer
Place the printed face against the receiving surface. Tape it firmly enough to prevent movement without covering an essential part of the design.
Movement during opening or removal can create a second faint outline known as ghosting.
8. Protect the equipment
Place clean butcher paper or another approved protective sheet above and below the project as appropriate. This catches dye that might otherwise contaminate the platen, pressing pad, or future items.
9. Press at the specified settings
Apply the blank manufacturer’s time, temperature, and pressure. More heat is not always better. Excessive heat can brown polyester, blur details, deform a blank, or drive dye beyond its optimal point.
10. Remove the transfer correctly
Use heat-resistant gloves where necessary. Some blanks require immediate paper removal, while others should cool first. Lift the paper cleanly without sliding it across the image.
Record successful settings for each blank, paper, ink, and press combination. A simple production log saves considerable testing later.
Sublimation Temperature, Time, and Pressure
Many failed projects come from treating a generic chart as a guaranteed formula.
Typical starting points often fall near the following ranges, but they are not substitutes for product-specific instructions:
| Material | Common starting range | Variables to check |
|---|---|---|
| Polyester fabric | Around 375–400°F for 35–60 seconds | Fabric weight, scorching, moisture |
| Ceramic mug | Around 350–400°F for 150–300 seconds | Coating, press type, mug temperature |
| Coated metal | Around 385–400°F for 45–75 seconds | Coating and panel thickness |
| Neoprene | Around 385–400°F for 40–60 seconds | Compression and odor |
| Sublimation acrylic | Often lower or more specialized settings | Acrylic type and viewing side |
| Glass | Product-specific, often longer pressing | Coating orientation and thermal shock |
Three factors work together:
- Temperature activates and mobilizes the dye.
- Time determines how long transfer can occur.
- Pressure maintains contact between the paper and substrate.
Changing one can affect the others. Heavy pressure will not correct a cold area in the platen, and extra time will not repair an incompatible coating.
Test one variable at a time and keep notes. Randomly changing all three makes it difficult to identify the real cause.
Why Sublimation Colors Look Different Before Pressing
A transfer normally looks less vibrant on paper than it will after pressing. That difference alone is not evidence of a printing defect.
Color passes through several systems:
- The monitor displays light using RGB.
- The software converts the artwork for printing.
- The printer produces color with its ink set.
- The paper holds and releases the dye.
- Heat develops the transferred color.
- The blank’s coating and base color influence the result.
An ICC profile translates color for a specific combination of printer, ink, paper, driver settings, and substrate conditions. Changing the ink or paper can make an existing profile less accurate.
Practical color-management tips
- Calibrate or sensibly adjust the monitor.
- Use the ICC profile supplied for the exact ink and printer.
- Keep printer-driver settings consistent with the profile instructions.
- Turn off unwanted automatic color enhancement.
- Print a color chart before a large production run.
- Judge color after pressing, not from the paper alone.
- Use the same blank supplier for repeat orders where consistency matters.
Fluorescent screen colors, metallic effects, and extremely saturated tones may fall outside the printer’s achievable color gamut. A profile improves translation; it cannot reproduce colors the ink and substrate cannot physically create.
Sublimation Printer Benefits and Limitations
Understanding both sides helps determine whether the process fits a particular project.
Main benefits
- Produces full-color photographs and gradients
- Creates no raised surface on polyester fabric
- Supports fine details and complex patterns
- Requires no cutting or weeding for ordinary transfers
- Resists cracking and peeling under normal use
- Works well for one-off personalized items
- Scales from desktop crafts to wide-format textile production
- Allows the same basic workflow across many compatible products
Main limitations
- Works most reliably on polyester and polymer-coated surfaces
- Performs best on white or light-colored materials
- Cannot print opaque white with a standard CMYK setup
- Requires separate heat-transfer equipment
- Heat settings must be tested for different blanks
- Converted printers may lack warranty support
- Inkjet printheads can clog if neglected
- Output size is limited by the printer, paper, and press
- Coated blanks usually cost more than untreated products
- Heat, ink, coatings, and consumables require appropriate handling and ventilation
Sublimation is particularly strong for polyester sportswear, personalized drinkware, photo panels, and colorful merchandise. It is less suitable for black cotton shirts, uncoated household mugs, or designs requiring thick specialty textures.
Sublimation Printing Compared With Other Methods
No printing process is best for every material.
| Method | Best suited to | Surface feel | Dark garments | Typical strength |
|---|---|---|---|---|
| Sublimation | Light polyester and coated blanks | No added layer | Poor without an added layer | Full-color durability |
| DTF | Cotton, polyester, blends, dark fabric | Transfer layer | Yes | Broad garment compatibility |
| DTG | Primarily cotton garments | Soft ink layer | Yes, with white ink | Detailed garment prints |
| Heat-transfer vinyl | Cotton, polyester, simple designs | Noticeable film | Yes | Names, numbers, simple graphics |
| Screen printing | Medium or large production runs | Ink layer | Yes | Repeatability at volume |
| Traditional inkjet | Paper, labels, photos | Ink on media | Not a garment-transfer process | Everyday document and photo output |
A sublimation printer differs from an ordinary inkjet mainly in its ink and intended workflow. Standard inkjet ink is not designed to diffuse into polyester under heat. Printing regular ink on sublimation paper does not convert it into sublimation ink.
A Cricut or similar cutting machine is optional. It can help contour-cut a transfer or create complementary vinyl elements, but standard sublimation artwork can be trimmed with scissors and pressed without cutting or weeding.
Common Sublimation Problems and How to Fix Them
Most defects can be traced to compatibility, printer health, color settings, contamination, or pressing conditions.
Faded or weak colors
Possible causes include:
- Insufficient heat or pressing time
- Low polyester content
- Poor or absent polymer coating
- Printing on the wrong side of the paper
- Incorrect driver or color settings
- Incompatible ink and ICC profile
- Expired or poorly stored supplies
First perform a nozzle check. If the printer output is complete, test the recommended press settings on a known compatible blank.
Horizontal lines or missing colors
Banding usually begins in the printer. Run a nozzle check and use the manufacturer’s cleaning process only when needed.
Repeated aggressive cleaning wastes ink and can fill the maintenance system without correcting air, contamination, or hardware problems. If patterns remain incomplete after reasonable maintenance, consult the relevant printer or ink supplier.
Ghosting or doubled edges
Ghosting occurs when the transfer shifts while the dye remains active. Secure the paper with heat-resistant tape and lift the press smoothly. Remove the transfer without dragging it across the hot surface.
Tiny blue or dark specks
Lint and dust can absorb dye or react under heat. Clean the press area and lint-roll fabric immediately before pressing. Store blank garments away from loose fibers.
Brown or scorched fabric
The temperature may be too high, the press time too long, or the fabric sensitive to heat. Reduce one variable at a time based on the material instructions.
Some polyester garments also show temporary press marks caused by heat and pressure rather than burning.
Blurry details
Blurring can result from excessive heat, too much time, ink bleeding on oversaturated paper, an enlarged low-resolution file, or poor paper-to-blank contact.
Check the original artwork at its final output size before changing press settings.
Uneven transfer
Pale areas often indicate cold spots, inconsistent pressure, seams, zippers, curved surfaces, or an uneven coating. Test platen temperature and use appropriate pads or jigs when the product shape requires them.
Small colored dots or roller marks
Ink may still be wet, the paper may be oversaturated, or printer rollers may be contacting the printed area. Try the correct paper preset, reduce excessive ink deposition, and let the sheet dry before pressing.
Sublimation Printer Maintenance and Safety
Inkjet sublimation systems perform best when used consistently. Long idle periods can allow ink to dry around the nozzles.
Good maintenance practices include:
- Print a small color pattern regularly.
- Run nozzle checks before critical jobs.
- Keep the printer powered and stored as directed.
- Use compatible ink rather than mixing brands casually.
- Protect paper and blanks from humidity, dust, and skin oils.
- Keep spare ink sealed and within its recommended storage conditions.
- Replace maintenance components when prompted.
- Avoid touching encoder strips, printheads, or internal parts unnecessarily.
Heat pressing can release vapors from ink, fabric treatments, polymer coatings, adhesives, or the blank itself. Work in a well-ventilated area and consult the safety data sheets for the exact ink and materials being used.
Wear appropriate heat-resistant gloves, keep liquids away from electrical equipment, and prevent children or pets from approaching a hot press. Never leave heating equipment unattended.
How to Choose the Right Sublimation Printer
Start with the products you intend to make rather than focusing only on the machine’s purchase price.
Maximum print size
A letter- or A4-sized printer may handle mugs, coasters, small shirts, and accessories. Larger garments, all-over patterns, banners, and wide panels require a wider printer and matching heat equipment.
Remember that printable width is not always identical to borderless output width.
Purpose-built support or manual flexibility
A dedicated sublimation system generally provides a more coordinated combination of ink, software, profiles, and technical support.
A converted printer may reduce entry cost but places more responsibility on the user for compatibility and troubleshooting.
Ink delivery and operating frequency
Refillable tanks can provide practical ink capacity, but printhead maintenance still matters. Cartridge-based systems may offer a tightly controlled workflow with different consumable costs.
Consider how often the printer will run. Occasional use can be harder on an inkjet system than steady, routine printing.
Color-management workflow
Check whether the manufacturer supplies:
- ICC profiles
- Print-management software
- Current operating-system drivers
- Instructions for supported design applications
- Technical support for color problems
Reliable color is a system outcome, not a printer specification alone.
Complete production size
A wide printer is of limited value if the heat press cannot cover the artwork. Evaluate the printer, paper, workspace, power requirements, press, and blanks as one production system.
Is a Sublimation Printer Worth Using?
A sublimation printer is a strong choice when the intended products are light-colored polyester garments or certified polymer-coated blanks. It offers detailed, durable, full-color decoration without adding a noticeable layer to the surface.
It is not the most flexible solution for natural fabrics or dark garments. Anyone working mainly with cotton should compare DTF, DTG, screen printing, and heat-transfer vinyl before choosing a process.
For a first project, begin with a known sublimation-ready blank, matching ink and paper, and the blank manufacturer’s press instructions. Run a nozzle check, print a small color test, record the settings, and change only one variable if the result needs adjustment. That controlled approach is the fastest way to understand a sublimation printer and produce repeatable transfers.
