
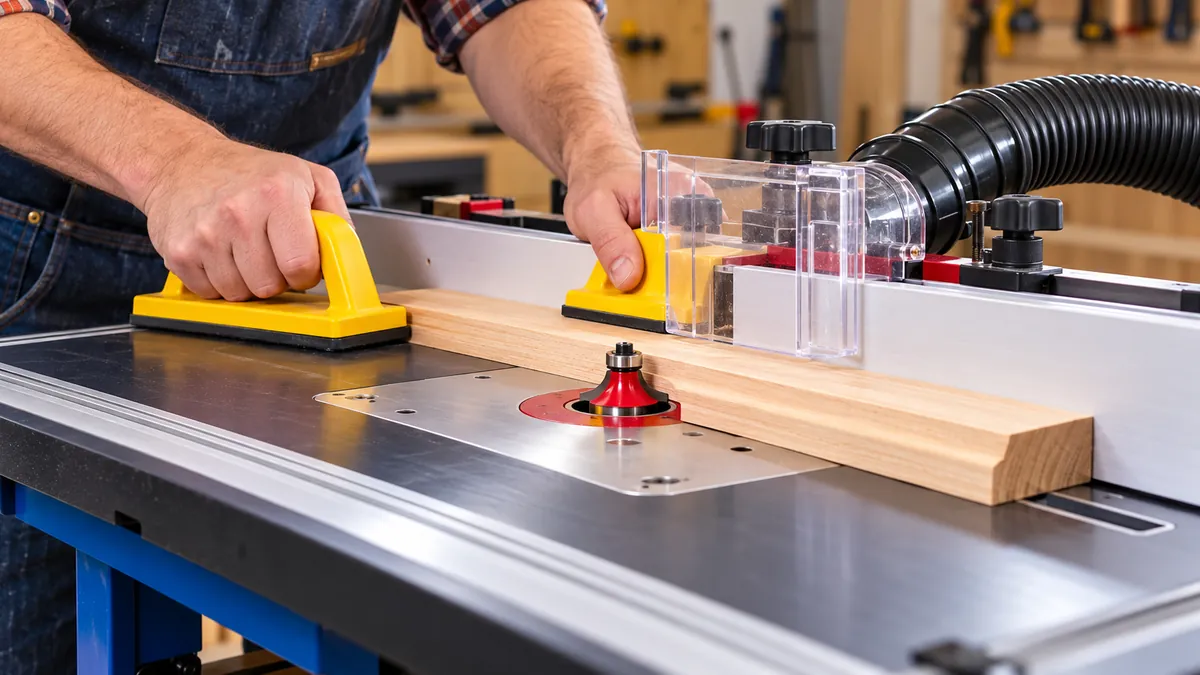

A router table can look intimidating the first time you see a sharp router bit spinning above the tabletop. But once you understand the setup, feed direction, and basic safety rules, it becomes one of the most controlled and versatile tools in a woodworking shop.
If you want to learn how to use a router table, start by disconnecting the router from power, installing the correct bit, setting the bit height and fence, and making a test cut on scrap wood. During normal fence-guided routing, feed the workpiece from right to left while maintaining steady pressure against the table and fence. Use shallow passes rather than trying to remove too much material at once.
A router table is useful for much more than decorative edges. With the correct router bits and setup, you can cut grooves, dados and rabbets, trim parts to templates, joint edges, and produce repeatable components for furniture and cabinetry.
What Is a Router Table?
A router table is a flat work surface that holds a woodworking router underneath the table. The router is mounted upside down so its bit projects upward through an opening or insert plate.
Instead of holding the router and moving it across stationary wood, you do the opposite: the router remains fixed while you guide the workpiece across the table.
That difference is important.
A handheld router works well when the workpiece is too large or awkward to move conveniently. A router table is particularly useful when you want repeatable cuts, need to work with smaller components, or want a fence to guide the material accurately.
Typical router-table components include:
- Router and router base
- Flat tabletop
- Insert plate or mounting plate
- Router bit
- Adjustable fence
- Bit guard
- Dust-collection port
- Power switch
- Miter slot or T-track
- Featherboards, push blocks, and other work-holding accessories
The fence is especially important because it supports and guides the workpiece while controlling its position relative to the cutter. Split fences can also close the opening around the router bit, providing better workpiece support and dust collection.
How to Use a Router Table Step by Step
Learning how to use a router table is mostly about developing a consistent setup routine. Do the preparation while the machine is disconnected from power, verify everything with scrap material, and only then make the final cut.
1. Disconnect the Router From Power
Before touching the router bit, fence, insert plate, or router itself, disconnect the machine from its power source.
Do not rely solely on the power switch.
This is especially important when installing or removing a router bit because your hands will be close to the cutter.
Make power disconnection part of your routine:
Power off → unplug → adjust → inspect → reconnect.
Following the same sequence every time reduces the chance of accidentally working on an energized machine. Router-table safety guidance consistently emphasizes disconnecting power before bit changes or adjustments.
2. Choose the Correct Router Bit
The router bit determines the shape and type of cut.
Common router bits include:
| Router Bit | Typical Use |
|---|---|
| Straight bit | Grooves, dados and general cutting |
| Round-over bit | Rounded decorative edges |
| Chamfer bit | Beveled edges |
| Rabbeting bit | Rabbets along board edges |
| Flush-trim bit | Copying templates and trimming edges flush |
| Pattern bit | Template-guided shaping |
| Cove bit | Concave decorative profiles |
| Ogee bit | Decorative furniture and trim profiles |
| Slot-cutting bit | Slots and grooves |
| Rail-and-stile bits | Cabinet-door frames |
| Raised-panel bit | Shaping cabinet-door panels |
Use a bit designed for the operation you intend to perform and make sure its shank size is compatible with the router’s collet.
Larger cutters require particular care. Follow the router and bit manufacturer’s instructions regarding suitable router speed, table use, and maximum cutter diameter rather than assuming one speed is appropriate for every bit.
3. Install the Router Bit Correctly
With the router unplugged, loosen the collet and insert the bit according to the router and bit manufacturer’s instructions.
Do not bottom the bit’s shank hard against the inside of the collet. Seat it correctly, then tighten the collet securely using the specified wrench or wrench combination.
Check that:
- The shank is clean.
- The collet is clean.
- The bit is properly seated.
- The collet is firmly tightened.
- The cutter can rotate without contacting the insert plate or fence.
After installation, rotate the cutter manually while the router remains unplugged to check for interference.
4. Set the Bit Height
The amount of router bit extending above the table determines the vertical position or depth of many cuts.
A bit-height gauge, setup block, combination square, or accurate ruler can help.
For a decorative edge profile, the correct height depends on how much of the profile you want to expose. For a groove, the bit height determines the groove depth.
Avoid immediately setting up an aggressive cut just because the final profile requires it. Several controlled passes are generally preferable to forcing a large cutter to remove a substantial amount of wood in one pass.
5. Adjust the Router-Table Fence
The fence determines the horizontal relationship between the workpiece and router bit.
Move the fence toward or away from the cutter until the required portion of the bit is exposed.
Then lock the fence securely.
With a split fence, move the two fence faces reasonably close to the cutter while maintaining safe clearance. A smaller opening gives the workpiece more continuous support as it moves past the bit. Woodcraft similarly recommends minimizing unnecessary space around the cutter to reduce the chance of an edge catching in the opening.
For some bearing-guided operations, the bearing rather than the fence establishes the final cutting depth. The fence may still provide useful support depending on the operation.
6. Install Featherboards When Appropriate
Featherboards apply controlled pressure to the workpiece.
Depending on their position, they can hold stock:
- Against the fence
- Down against the tabletop
- In a consistent path through the cutter
They are especially helpful for long or narrow boards and repeated cuts.
A correctly positioned featherboard helps maintain consistent contact without requiring your hands to work unnecessarily close to the bit. Featherboards can also resist backward movement of the stock and improve consistency during a cut.
Never position a featherboard where it forces the freshly cut section of a workpiece sideways into the cutter.
7. Connect Dust Collection
Router tables can produce a surprising amount of chips and fine dust.
Many router-table fences have a dust port directly behind the cutter. Connect a compatible shop vacuum or dust-collection system before routing.
Good dust collection does more than keep the shop clean. Removing chips from around the cutter can improve visibility and reduce debris accumulating around the fence and workpiece.
Some tables also support collection underneath the insert plate or inside an enclosed router cabinet.
8. Make a Test Cut
Never make your first setup test on an expensive project component.
Use scrap wood with approximately the same thickness—and preferably the same species—as your final workpiece.
Make a short test pass and inspect:
- Cut depth
- Profile
- Fence position
- Surface quality
- Tear-out
- Burning
- Workpiece stability
Adjust the setup while the router is disconnected from power.
A test cut may take an extra minute, but it can prevent ruining a finished component.
Router Table Feed Direction Explained
Feed direction is one of the most important concepts to understand before operating a router table.
For a normal fence-guided operation, when standing at the front of a conventional router table, the workpiece is generally fed from right to left.
Why?
The goal is to feed the material against the cutting action so you maintain resistance and control. Standard router-table instructions from woodworking sources consistently specify right-to-left feeding for ordinary fence-guided cuts.
Think:
Fence cut = right to left.
Maintain contact with both the tabletop and fence throughout the pass.
What Happens If You Feed the Wrong Direction?
Feeding in the direction that allows the cutter to pull the workpiece along is commonly called climb cutting.
Instead of feeling controlled resistance, the cutter may grab and accelerate the workpiece unexpectedly.
That can cause:
- Loss of control
- Kickback
- Poor surface quality
- An inconsistent cut
- Workpiece damage
- Increased risk of injury
For routine router-table work, beginners should not intentionally climb-cut.
How to Make Your First Router Table Cut
A simple edge profile is an excellent first router-table project.
A round-over bit is particularly easy to understand because you can clearly see how the cutter changes the edge.
Prepare the Workpiece
Start with a straight, flat board.
The edge riding against the fence should be reasonably straight, and the face contacting the tabletop should sit flat without rocking.
Warped material is difficult to route consistently because its relationship to the cutter changes during the pass.
Set Up the Bit and Fence
Install the round-over bit with the router disconnected.
Set the height according to the profile you want.
If the bit has a guide bearing, adjust the setup so the bearing can properly guide the workpiece where required.
Lock all adjustments.
Start the Router
Put on appropriate eye and hearing protection and start your dust collection.
Make sure the workpiece is clear of the cutter before switching on the router.
Allow the router to reach operating speed.
Listen for unusual vibration or noise. If something sounds wrong, switch off the machine, wait for the cutter to stop completely, disconnect the power, and inspect the setup.
Feed the Board
Place the board flat against the table and fence.
For a standard fence-guided cut, feed it from right to left.
Apply pressure in useful directions:
Downward pressure keeps the board against the tabletop.
Sideways pressure keeps it against the fence.
Forward pressure moves it steadily through the cutter.
Do not suddenly stop in the middle of the cut unless necessary. Pausing against a spinning bit can leave burn marks or an indentation.
Continue until the entire workpiece has cleared the cutter.
Inspect the Result
Switch the router off and wait for the bit to stop.
Look at the routed edge.
If the profile is too shallow, disconnect the router and adjust the setup slightly.
If the wood is burning, possible causes include feeding too slowly, a dull or dirty bit, excessive cutter speed for the application, or attempting too heavy a cut.
Why Shallow Passes Usually Work Better
Trying to remove the entire amount of material in one heavy pass is a common beginner mistake.
A heavy cut places more load on:
- The router
- The bit
- The workpiece
- Your ability to control the stock
Taking multiple lighter passes generally produces a more manageable operation and can improve the finished surface. This is particularly useful with larger profiles and deeper cuts.
For example, if a decorative profile requires substantial material removal, expose only part of the cutter initially. Complete that pass, disconnect the router, adjust the setup, and make another pass.
The exact appropriate depth per pass depends on the bit, router, material, cutter diameter, grain direction, and manufacturer’s instructions, so avoid treating one fixed measurement as a universal rule.
Common Cuts You Can Make With a Router Table
Once you are comfortable with basic operation, the router table can handle a wide variety of woodworking tasks.
Edge Profiles
Decorative edge routing is one of its most common jobs.
Bits such as round-over, chamfer, cove, and ogee cutters can transform a plain board edge into a finished furniture profile.
The router table is particularly convenient when several pieces need the same profile because the router and fence remain in a fixed position.
Rabbets
A rabbet is a rectangular recess cut along the edge of a board.
Rabbets are commonly used for:
- Cabinet backs
- Shelves
- Drawer construction
- Frames
- Panels
They can be made using a rabbeting bit with a bearing or, depending on the setup, a straight bit and fence.
When the rabbet requires substantial material removal, use progressive passes rather than forcing the full cut at once.
Dados and Grooves
A groove is a channel generally running with the grain, while a dado commonly runs across the grain.
These joints are useful for:
- Shelves
- Cabinet dividers
- Drawer bottoms
- Panels
- Box construction
A straight or spiral bit can be used.
The fence establishes the location of a groove running along a workpiece. Cross-grain operations require an appropriate jig, sled, or other safe work-support method rather than simply attempting to control a short board by hand.
Flush Trimming and Pattern Routing
A bearing-guided flush-trim or pattern bit can duplicate a template.
The bearing follows the template while the cutting edges remove excess material from the workpiece.
This technique is useful when making multiple identical:
- Furniture components
- Curved pieces
- Signs
- Decorative parts
- Cabinet components
Secure the template firmly to the workpiece before routing.
Edge Jointing
A properly configured split router-table fence can also perform light edge-jointing operations.
The outfeed fence is offset slightly from the infeed side. The cutter removes a small amount from the board, and the newly cut edge then rides along the offset outfeed fence.
This can produce a straight edge on appropriately sized stock. Some router-table fences are specifically designed to accept thin shims behind the outfeed face for this purpose.
It does not make a router table a complete replacement for a jointer in every situation, particularly for flattening board faces or processing large stock.
Using Bearing-Guided Bits Without a Fence
Not every router-table operation uses the fence.
Curved workpieces and templates are often routed using a bearing-guided bit. In that situation, the bearing establishes the cutting path.
A starting pin can provide a controlled pivot point when bringing an irregular workpiece into a bearing-guided cutter. The work is first supported against the pin and then carefully introduced to the bearing. Woodcraft specifically demonstrates a guide pin for this type of operation.
Freehand table routing requires additional control and should not be treated exactly like a straight fence-guided operation.
Beginners should become comfortable with basic fence work before moving to irregular shapes.
How to Use a Router Table Safely
Knowing how to use a router table includes knowing when not to make a cut.
A router can operate at very high rotational speeds, and the cutter is exposed above the tabletop. Safe setup and stock control matter every time.
Wear Eye and Hearing Protection
Safety glasses protect your eyes from chips and debris.
Routers are also loud enough that hearing protection should be part of normal shop practice.
Depending on the material and dust-collection effectiveness, suitable respiratory protection may also be appropriate.
Keep Hands Away From the Cutter
Never let your fingers become the work-holding system near an exposed bit.
Use suitable accessories such as:
- Push blocks
- Push sticks
- Featherboards
- Hold-downs
- Jigs
- Sleds
The correct accessory depends on the workpiece and cut.
If a component is too small to control without placing your fingers near the cutter, redesign the setup rather than attempting to hold it directly.
Use a Bit Guard
Keep the router-table guard in place whenever the operation allows it.
A guard creates a physical barrier around part of the exposed cutter and can also contribute to more effective dust collection.
Support Long Workpieces
A long board can act like a lever.
If one end drops as you feed it, the opposite end can shift at the cutter and spoil the cut.
Use appropriate infeed and outfeed support for long stock, ensuring those supports are aligned with the router-table surface and do not interfere with normal movement.
Never Adjust a Spinning Router
Wait until the cutter has stopped completely.
Then disconnect the power before changing:
- Bit height
- Router bit
- Insert ring
- Fence clearance
- Major work-holding accessories
Trying to save a few seconds is not worth working close to a cutter that can start unexpectedly.
Router Table Mistakes Beginners Should Avoid
Most poor router-table results come from a handful of setup and technique problems.
Feeding the Wood in the Wrong Direction
For conventional fence routing, feeding left to right can create a climb-cutting condition in which the cutter pulls the stock rather than giving you controlled resistance.
For normal fence-guided cuts, remember:
Right to left.
Taking Too Much Material at Once
If the router sounds heavily loaded and the workpiece becomes difficult to control, the cut may be too aggressive.
Back off and use progressive passes.
Routing Without a Test Cut
A fence that appears correctly positioned can still be off enough to ruin a joint.
Scrap wood lets you discover that before cutting your project.
Moving Too Slowly
Feeding excessively slowly can allow heat to build up where the cutter contacts the wood.
This may leave dark burn marks.
Maintain a controlled, continuous feed rate instead of lingering in one spot.
Moving Too Quickly
The opposite extreme also causes problems.
Feeding faster than the cutter can remove material may produce:
- Rough surfaces
- Chatter
- Tear-out
- Excessive load on the router
Aim for a smooth feed where the router is cutting freely without being forced.
Routing Damaged or Unstable Wood
Inspect every workpiece before routing.
Loose knots, splits, foreign objects, severe warping, or poorly supported small pieces can make a cut unpredictable.
Letting the Workpiece Leave the Fence
With a fence-guided operation, consistent fence contact is what keeps the cut consistent.
If the board pivots away from the fence, the bit can remove more material than intended.
Featherboards and push blocks can help maintain stable contact.
How to Reduce Tear-Out and Burning
A clean router-table cut depends on more than simply choosing the right bit.
Keep Router Bits Clean and Sharp
Pitch and resin can accumulate on cutters, particularly after routing resinous woods.
A dirty or dull cutter generates more heat and may leave a rougher finish.
Inspect and maintain bits according to their manufacturer’s recommendations.
Understand Grain Direction
Wood grain can change direction even within the same board.
Routing difficult grain can lift fibers before the cutter cleanly severs them, creating tear-out.
Light passes can help.
When routing end grain on appropriate projects, a sacrificial backer board can support fibers at the trailing edge and reduce breakout.
Don’t Pause Against the Bit
If the workpiece stops while remaining in contact with a spinning cutter, the bit continues rubbing and cutting the same spot.
That often leaves a visible burn or divot.
Maintain a deliberate, continuous movement through the cut.
Router Table vs. Handheld Router
Both methods use a router, but each has advantages.
| Router Table | Handheld Router |
|---|---|
| Router stays stationary | Workpiece stays stationary |
| Excellent for repeatable edge work | Excellent for large workpieces |
| Fence provides consistent guidance | Edge guides and templates provide guidance |
| Convenient for many small parts when properly jigged | Convenient when the work cannot be moved easily |
| Useful for joinery and profiles | Useful for field work and large panels |
| Workpiece moves past the bit | Router moves across the workpiece |
A router table doesn’t replace a handheld router.
They complement each other.
If you’re shaping several pieces of trim, a router table may be easier. If you’re cutting a recess in the middle of a large tabletop, moving a handheld router over the work is usually more practical.
Useful Router Table Accessories
You don’t need every available accessory to start routing, but several items can make the table safer and more accurate.
Featherboards
Featherboards maintain pressure against the fence or tabletop and are particularly valuable for repeated operations.
Push Blocks
A push block gives you a larger, safer gripping surface and helps maintain downward and forward pressure.
Miter Gauge or Sled
Certain cross-grain operations need proper workpiece support.
A suitable sled or jig can keep the material stable and square during the cut.
Do not assume that simply combining a fence and miter gauge is safe for every operation; trapping a workpiece between guides can create dangerous binding conditions.
Router Lift
A router lift allows convenient bit-height adjustment from above the table on compatible systems.
It isn’t essential, but frequent router-table users often appreciate the faster and more precise adjustments.
Insert Rings
Interchangeable insert rings reduce the opening around different bit diameters.
Keeping the opening reasonably close to the cutter provides better support for narrow workpieces and edges.
Stop Blocks
Stop blocks are useful when you need a cut to start or finish at a repeatable position.
They can be attached to a compatible fence or jig.
For stopped cuts, the entire setup and sequence must prevent the workpiece from becoming trapped or unexpectedly contacting the cutter.
A Simple Router Table Setup Checklist
Before each routing session, run through the same basic sequence:
- Disconnect the router from power.
- Inspect the router bit for damage or contamination.
- Install and secure the correct bit.
- Set the required bit height.
- Position and lock the fence.
- Check cutter clearance around the fence and insert ring.
- Install featherboards, guards, push blocks, or jigs as needed.
- Connect dust collection.
- Prepare a suitable scrap test piece.
- Put on eye and hearing protection.
- Reconnect power.
- Start dust collection.
- Start the router with the workpiece clear of the bit.
- Allow the router to reach normal operating speed.
- Make a controlled test cut.
- Inspect the result and disconnect power before making adjustments.
- For normal fence routing, feed the final workpiece from right to left.
This routine removes much of the guesswork from router-table operation.
Final Thoughts on How to Use a Router Table
Learning how to use a router table comes down to three fundamentals: accurate setup, correct feed direction, and controlled workpiece movement.
Disconnect the router before making adjustments, install the appropriate bit, set the height and fence carefully, and test everything on scrap wood. For conventional fence-guided routing, feed the workpiece from right to left while keeping it firmly supported against the tabletop and fence. Use guards, featherboards, push blocks, dust collection, and other appropriate work-holding equipment whenever the operation calls for them.
Start with a simple round-over or chamfer rather than complicated joinery. Once you can produce a smooth, repeatable edge safely, move on to rabbets, grooves, dados, templates, and other router-table techniques.
The goal isn’t to push wood through the cutter as quickly as possible. A good router-table cut should feel predictable from the moment the workpiece enters the bit until it clears the cutter.
