
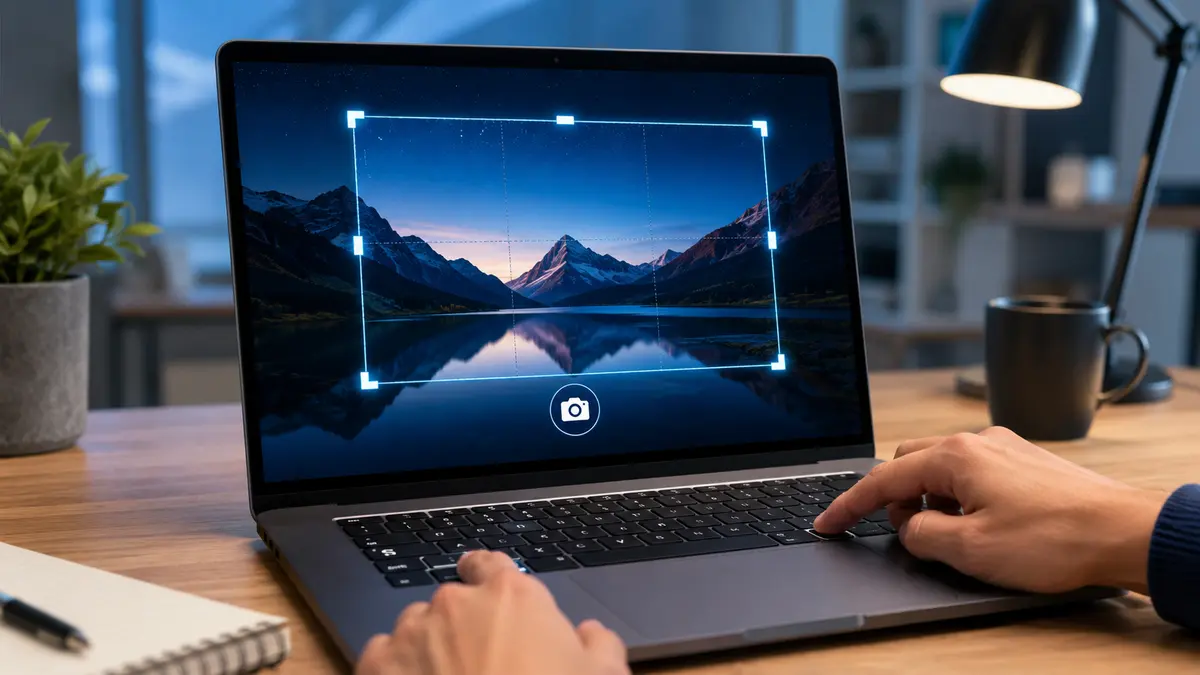

Taking a screenshot should be simple, yet laptop keyboards and operating systems use different buttons. You may also need to capture only one window, select a specific area, or save the image automatically instead of copying it.
To take a screenshot on most Windows laptops, press Windows + Shift + S, select the area you want, and click the preview to edit or save it. For the entire screen, use Windows + PrtSc. On a Mac, press Shift + Command + 3; on a Chromebook, press Ctrl + Show Windows.
Quick shortcuts for how to screenshot in laptop
Use this table to find the correct shortcut for your laptop:
| Laptop or operating system | What you want to capture | Keyboard shortcut |
|---|---|---|
| Windows 10 or 11 | Selected area | Windows + Shift + S |
| Windows 10 or 11 | Entire screen and save automatically | Windows + PrtSc |
| Windows | Entire screen to clipboard | PrtSc |
| Windows | Active window only | Alt + PrtSc |
| MacBook | Entire screen | Shift + Command + 3 |
| MacBook | Selected area | Shift + Command + 4 |
| MacBook | Screenshot toolbar | Shift + Command + 5 |
| Chromebook | Entire screen | Ctrl + Show Windows |
| Chromebook | Selected area or window | Shift + Ctrl + Show Windows |
| Chromebook tablet | Entire screen | Power + Volume Down |
The exact label on a Windows keyboard may be PrtSc, PrtScn, Print Scr, or Print Screen. On compact laptops, you may have to hold the Fn key while pressing it.
How to screenshot in laptop with Windows 11 or Windows 10
The best Windows method depends on whether you want to select an area, capture one application window, or save the entire screen immediately.
Capture a selected area with Windows + Shift + S
For most people, the Snipping Tool shortcut is the most useful option:
- Arrange the content you want to capture.
- Press Windows + Shift + S.
- Wait for the screen to darken.
- Choose a capture mode from the toolbar.
- Drag the pointer around the required area.
- Click the notification preview to edit the screenshot.
- Select the Save icon or press Ctrl + S.
Windows offers four snipping modes:
- Rectangle: Draw a rectangular box around the content.
- Freeform: Draw a custom shape.
- Window: Capture one open application window.
- Full screen: Capture everything visible across the display.
The screenshot is copied to the Windows clipboard, so you can also paste it directly into Paint, Word, an email, or a messaging application using Ctrl + V. Microsoft identifies Windows + Shift + S as the standard shortcut for opening the Snipping Tool image overlay. Microsoft Support
Capture the entire screen with PrtSc
Press PrtSc to copy an image of the entire screen to the clipboard.
The capture may appear to do nothing because it is not necessarily saved as a file. Open Microsoft Paint, press Ctrl + V, and then save the image as a PNG or JPEG file.
If your laptop uses the Print Screen key for another function, try:
- Fn + PrtSc
- Fn + Windows + PrtSc
- Fn + Windows + Spacebar
The required combination varies according to the keyboard design and manufacturer.
Save a full-screen screenshot automatically
Press Windows + PrtSc when you want Windows to capture the whole screen and create an image file automatically.
The screen normally dims for a moment. Windows saves the PNG file in:
File Explorer > Pictures > Screenshots
If the shortcut does not work, press Fn + Windows + PrtSc. Microsoft also recommends Fn + Windows + Spacebar on devices without a dedicated PrtSc key. Microsoft Support
Screenshot one active window
Click the window you want to capture, then press Alt + PrtSc. Windows copies only that active window—not the taskbar, desktop, or other open applications—to the clipboard.
Next:
- Open Paint or another image editor.
- Press Ctrl + V.
- Crop or annotate the image if necessary.
- Press Ctrl + S to save it.
On some keyboards, the correct shortcut is Fn + Alt + PrtSc.
Use the Snipping Tool application
You can open the complete application when you need delayed captures or editing controls:
- Open the Start menu.
- Search for Snipping Tool.
- Open the application.
- Choose a capture mode.
- Set a delay if you need time to open a menu or tooltip.
- Select New and capture the required content.
- Crop, mark up, copy, share, or save the image.
A delayed snip is particularly useful for capturing dropdown menus that disappear when you press another key.
Quick takeaway: Use Windows + Shift + S for a selected area, Alt + PrtSc for one window, and Windows + PrtSc when you want the complete screen saved automatically.
How to take a screenshot on an HP, Dell, Lenovo, or ASUS laptop
Most HP, Dell, Lenovo, Acer, and ASUS laptops run Windows, so their basic screenshot methods are identical. The main difference is the keyboard layout.
Look along the top row or near the upper-right corner for a key labeled:
- PrtSc
- PrtScn
- Print Scr
- Prt Sc SysRq
Compact models commonly combine Print Screen with another function. In that case, hold Fn while using the required shortcut.
| Laptop type | Shortcut to try |
|---|---|
| Standard Windows keyboard | Windows + PrtSc |
| Compact keyboard | Fn + Windows + PrtSc |
| No visible Print Screen key | Fn + Windows + Spacebar |
| Any Windows laptop | Windows + Shift + S |
The Windows + Shift + S shortcut is usually the safest choice because it does not depend on the position of the Print Screen key.
How to screenshot in laptop on a MacBook
MacBooks use Command-based shortcuts rather than Print Screen. Screenshots normally save to the desktop as PNG files.
Capture the entire Mac screen
Press and release:
Shift + Command + 3
A thumbnail may appear in the lower-right corner. Click it to crop, annotate, delete, or share the screenshot. Otherwise, wait for the file to save to the desktop.
Capture part of the screen
Press:
Shift + Command + 4
The pointer becomes a crosshair. Drag over the area you want to capture, then release the mouse or trackpad button.
You can also:
- Press Esc to cancel.
- Hold the Spacebar while dragging to reposition the selected area.
- Hold Control with the shortcut to copy the capture to the clipboard instead of saving it as a file.
Capture one window or menu
Use the following sequence:
- Open the required window or menu.
- Press Shift + Command + 4.
- Press the Spacebar.
- Move the camera pointer over the window.
- Click to capture it.
Hold Option while clicking if you want to exclude the window’s shadow.
Open the Mac Screenshot toolbar
Press Shift + Command + 5 to open macOS screenshot controls. From this toolbar, you can capture:
- The entire screen
- A selected window
- A selected portion
- A full-screen recording
- A recording of a selected area
The Options menu lets you set a timer, choose a save location, show or hide the pointer, and control the floating thumbnail. Apple documents these shortcuts as the standard screenshot controls in macOS. Apple Support
Quick takeaway: On a MacBook, use Shift + Command + 3 for everything on screen, Shift + Command + 4 for a selected area, and Shift + Command + 5 for advanced controls.
How to take a screenshot on a Chromebook
A Chromebook uses the Show Windows key, which usually looks like a rectangle with two short lines beside it.
Capture the full Chromebook screen
Press:
Ctrl + Show Windows
ChromeOS captures the complete screen and displays a notification. The image is generally available through the Files application.
Capture a selected area or window
Press:
Shift + Ctrl + Show Windows
When the Screen Capture toolbar appears:
- Select Screenshot instead of Screen Record.
- Choose full screen, partial screen, or window capture.
- Select the content you want.
- Open the notification to view or edit the image.
If an external keyboard does not have a Show Windows key, use Ctrl + Shift + F5 to open the capture controls.
On a Chromebook tablet, press Power + Volume Down at the same time. Google lists these as the standard ChromeOS screenshot methods. Google Chromebook Help
Where are screenshots saved on a laptop?
The destination depends on the shortcut and operating system.
| System or method | Usual destination |
|---|---|
| Windows + PrtSc | Pictures > Screenshots |
| Windows + Shift + S | Clipboard and potentially the Screenshots folder |
| PrtSc or Alt + PrtSc | Clipboard |
| Mac keyboard shortcut | Desktop |
| Chromebook | Downloads or the Screenshots folder in Files |
| OneDrive screenshot backup | OneDrive > Pictures > Screenshots |
A clipboard capture is temporary. It must be pasted into an application before another copied item replaces it.
If you cannot find a Windows screenshot, open File Explorer and search for:
kind:=picture datetaken:today
On a Mac, open Finder and search for Screenshot, then sort the results by date. You can change the Mac save destination by opening Shift + Command + 5, selecting Options, and choosing another folder.
How to edit, crop, and share a screenshot
A raw screenshot often contains browser tabs, notifications, account names, or other unnecessary details. Review it before sharing.
Edit on Windows
Click the Snipping Tool notification after capturing the image. You can then:
- Crop unwanted edges
- Draw with the pen or highlighter
- Add shapes or annotations
- Copy text from supported captures
- Save or share the result
Microsoft
Meta Title: how to screenshot in laptop: Easy Methods
Meta Description: Learn how to screenshot in laptop using simple shortcuts for Windows, Mac, and Chromebook, then find, edit, and save your capture.
How to Screenshot in Laptop: A Complete Guide
Need to save an error message, capture an online receipt, or share part of your screen? Your laptop already has everything required—no camera or extra software needed.
To take a screenshot on a laptop, use Windows + Shift + S on Windows, Shift + Command + 3 on a Mac, or Ctrl + Show Windows on a Chromebook. These shortcuts capture your entire screen or let you select a specific area. The exact saving location depends on the operating system and shortcut used.
Quick Ways to Screenshot in Laptop
The best keyboard shortcut depends on what you want to capture.
| Laptop system | Entire screen | Selected area | Active window |
|---|---|---|---|
| Windows 10 or 11 | Windows + PrtScn | Windows + Shift + S | Alt + PrtScn |
| MacBook | Shift + Command + 3 | Shift + Command + 4 | Shift + Command + 4, then Space |
| Chromebook | Ctrl + Show Windows | Shift + Ctrl + Show Windows | Use the Screen Capture toolbar |
The Show Windows key on a Chromebook usually looks like a rectangle with two lines beside it. If your external keyboard does not have that key, use Ctrl + Shift + F5 to open the Screen Capture toolbar.
How to Screenshot in Laptop Running Windows
Most HP, Dell, Lenovo, ASUS, Acer, Samsung, and Microsoft laptops run Windows. Although their keyboards may look different, the built-in screenshot methods are generally the same.
Capture a Selected Area with Windows + Shift + S
For most people, Windows + Shift + S is the most useful screenshot shortcut.
- Open the page, application, or message you want to capture.
- Press Windows + Shift + S simultaneously.
- The screen will darken and the Snipping Tool toolbar will appear.
- Select a capture mode.
- Drag the pointer around the desired area.
- Click the notification preview to edit or save the screenshot.
Windows provides four snipping modes:
- Rectangle: Draw a rectangular capture area.
- Freeform: Draw an irregular shape around the content.
- Window: Capture one open application window.
- Full screen: Capture everything visible across the display.
The image is copied to the Windows clipboard after capture. You can immediately paste it into WhatsApp Web, an email, Microsoft Word, Paint, or another compatible application by pressing Ctrl + V.
On current versions of Windows, Snipping Tool may also save captures automatically. Open the app’s settings if you want to enable or disable automatic saving. Microsoft’s current instructions confirm that Windows + Shift + S opens the image-capture overlay. Microsoft Support
Capture and Save the Entire Screen Automatically
Press:
Windows + PrtScn
The display may briefly dim, indicating that Windows captured the screen. Unlike pressing PrtScn alone, this shortcut normally creates an image file automatically.
To find it:
- Open File Explorer.
- Select Pictures.
- Open the Screenshots folder.
Windows normally saves the file in PNG format. If OneDrive backup is enabled, the capture may instead appear inside OneDrive > Pictures > Screenshots.
Use the Print Screen Key
Pressing PrtScn, PrtSc, or Print Screen captures the full display and copies it to the clipboard on many Windows laptops.
The capture does not always appear as a file immediately. To save it:
- Press PrtScn.
- Open Paint or another image editor.
- Press Ctrl + V.
- Crop or annotate the image if necessary.
- Select File > Save As.
- Choose PNG or JPEG and save the file.
On some Windows installations, pressing PrtScn opens Snipping Tool instead. This behavior can be controlled under the keyboard accessibility settings.
Capture Only the Active Window
If several applications are open but you need only one, select that window and press:
Alt + PrtScn
Windows copies the active window to the clipboard without including the taskbar, desktop, or other applications. Paste it into Paint, Word, an email, or another program using Ctrl + V.
This method is especially useful for capturing a dialog box, browser window, or application error without exposing unrelated content.
What If the PrtScn Key Does Not Work?
Laptop manufacturers often assign multiple functions to the same key. If a normal press does nothing, try:
- Fn + PrtScn
- Fn + Windows + PrtScn
- Windows + Fn + Spacebar
- Windows + Shift + S
Microsoft recommends Fn + Windows + Spacebar on compatible devices that lack a dedicated Print Screen key. Microsoft Support
You can also open the Start menu, search for Snipping Tool, and launch it manually.
How to Screenshot in Laptop Without Print Screen Button
A missing or damaged Print Screen key does not prevent you from capturing the display.
On Windows:
- Open the Start menu.
- Type Snipping Tool.
- Open the application.
- Select New.
- Choose the area or window you want to capture.
- Use the editor to crop, annotate, copy, or save it.
You can also use the on-screen keyboard:
- Search for On-Screen Keyboard from Start.
- Open it.
- Select PrtScn on the virtual keyboard.
- Paste the capture into Paint with Ctrl + V.
For touchscreen Windows devices, open Quick Settings or search for Snipping Tool. Some tablets and detachable laptops also support combinations involving the physical power and volume buttons, although these vary by model.
Quick takeaway: On a Windows laptop without a working PrtScn key, use Windows + Shift + S. It is faster and gives you more control than a full-screen capture.
How to Take a Screenshot on a MacBook
Apple laptops use the Command key instead of the Windows and Print Screen keys.
Capture the Entire Mac Screen
Press:
Shift + Command + 3
The screenshot is normally saved to the desktop as a PNG file. A thumbnail may briefly appear in the lower-right corner. Click it to crop, annotate, delete, or share the image.
Apple documents Shift + Command + 3 as the standard full-screen shortcut. Apple Support
Capture a Selected Portion
Press:
Shift + Command + 4
The pointer changes into a crosshair. Click and drag over the area you want, then release the mouse or trackpad button.
You can also:
- Press Escape to cancel.
- Hold Spacebar while dragging to reposition the selected area.
- Hold Shift while adjusting to constrain one side of the selection.
Capture One Window or Menu
- Open the window or menu.
- Press Shift + Command + 4.
- Press the Spacebar.
- Move the camera pointer over the window.
- Click to capture it.
Hold Option while clicking if you want to exclude the window’s shadow.
Open the Mac Screenshot Toolbar
Press:
Shift + Command + 5
This opens the Screenshot app, where you can:
- Capture the entire display.
- Capture a selected window.
- Capture a chosen portion.
- Record the entire screen.
- Record a selected area.
- Set a timer.
- Show or hide the pointer.
- Change the saving location.
To copy a Mac screenshot to the clipboard instead of creating a file, hold Control with the relevant shortcut. For example, Control + Shift + Command + 3 copies the full-screen capture so you can paste it elsewhere.
How to Screenshot on a Chromebook Laptop
ChromeOS includes a Screen Capture tool for screenshots and screen recordings.
Capture the Entire Chromebook Screen
Press:
Ctrl + Show Windows
The screenshot is captured immediately. A preview and notification normally appear near the bottom-right corner.
Capture Part of the Screen
Press:
Shift + Ctrl + Show Windows
When the toolbar appears:
- Select Screenshot.
- Choose the partial-screen option.
- Drag over the desired area.
- Select Capture.
The same toolbar can capture a particular window or record the screen. Google also allows users to open it from Quick Settings > Screen Capture. Google Chromebook Help
If your Chromebook has a dedicated Screenshot key, press it to open the toolbar. On a Chromebook tablet, press Power + Volume Down to capture the full screen.
Chromebook screenshots are generally available in the Downloads folder and through the Tote area on the shelf. Recent captures may also appear in the notification panel for quick editing or sharing.
Where Do Screenshots Go on a Laptop?
A screenshot can either be saved as a file or temporarily held on the clipboard.
| System and method | Usual location |
|---|---|
| Windows + PrtScn | Pictures > Screenshots |
| Windows + Shift + S | Clipboard and, depending on settings, Screenshots folder |
| PrtScn or Alt + PrtScn | Clipboard |
| Mac screenshot shortcuts | Desktop |
| Chromebook capture | Downloads folder |
| OneDrive-enabled Windows laptop | OneDrive > Pictures > Screenshots |
The clipboard is temporary storage. If you capture something with PrtScn and then copy other text or an image, the newer copied item may replace the screenshot. Paste and save important captures promptly.
If you cannot find a saved image, search File Explorer or Finder for:
screenshotscreen shot.png
Sort the results by Date modified so the newest image appears first.
How to Edit, Crop, and Share a Screenshot
Capturing the display is only the first step when the image contains unnecessary details.
Edit on Windows
Click the capture notification to open Snipping Tool. Depending on your Windows version, you can:
- Crop the image.
- Draw with a pen or highlighter.
- Add shapes or text.
- Copy text from the captured image.
- Redact sensitive text.
- Save or share the result.
For simple edits, Microsoft Paint also works well. Paste the screenshot, use Select and Crop, then save it as PNG or JPEG.
Edit on macOS
Click the floating thumbnail immediately after taking the screenshot. Apple’s Markup tools let you crop, rotate, draw, add text, insert shapes, or add a signature.
If the thumbnail disappears, double-click the file on the desktop to open it in Preview.
Edit on ChromeOS
Select the screenshot notification or open the image from the Files app. The Gallery editor provides cropping, rotation, resizing, and basic annotation tools.
Before sharing any screen capture, inspect it carefully for passwords, email addresses, account numbers, private messages, browser tabs, and notification previews.
How to Capture a Scrolling Webpage
Standard keyboard shortcuts capture only what is currently visible. A long webpage, document, or conversation may require a full-page screenshot.
In browsers that support full-page capture, look for an option such as Capture full-size screenshot or Capture full page. Microsoft Edge includes a built-in web capture feature, while Chrome offers full-page capture through its developer tools. Browser extensions can also do this, but review their permissions before installing one.
Another reliable option is to save the page as a PDF:
- Press Ctrl + P on Windows or Chromebook, or Command + P on Mac.
- Select Save as PDF.
- Choose the required pages.
- Save the document.
A PDF is usually better than multiple screenshots when text must remain readable or the page is several screens long.
Why Is My Laptop Not Taking Screenshots?
Most screenshot failures come from keyboard behavior, clipboard confusion, restricted content, or incorrect saving assumptions.
The Shortcut Does Nothing
Try these fixes:
- Hold the Fn key with PrtScn.
- Use Windows + Shift + S instead.
- Search for and open Snipping Tool manually.
- Restart the laptop.
- Check whether another application has reassigned the shortcut.
- Test the key using the on-screen keyboard.
Gaming software, cloud-storage utilities, and third-party capture programs may override Print Screen.
The Screenshot Was Taken but Cannot Be Found
It may have been copied to the clipboard instead of saved. Open Paint or a blank document and press Ctrl + V.
Also inspect the Pictures, Screenshots, Downloads, Desktop, and OneDrive folders. On a Mac, use Finder and search for filenames beginning with “Screenshot.”
The Screenshot Is Black or Blank
Streaming platforms, banking applications, password managers, remote desktops, and protected workplace software may intentionally block screen capture. Hardware-accelerated applications can also occasionally produce blank results.
Try capturing a different window to determine whether the problem affects the whole system or only one protected application. Do not attempt to bypass security restrictions on confidential or copyrighted material.
Both Monitors Appear in the Capture
PrtScn may capture the entire extended desktop when multiple displays are connected. Use Windows + Shift + S to select one display, or use Window Snip to capture a single application.
On a Mac, Shift + Command + 3 may create a separate image for each connected display. Use Shift + Command + 4 if you need only one area.
Choosing the Right Screenshot Method
Use Windows + Shift + S when you need precision on a Windows laptop. Choose Windows + PrtScn when you want the entire display saved automatically, and Alt + PrtScn when only the active application matters.
On a MacBook, use Shift + Command + 3 for the whole screen, Shift + Command + 4 for a selected area, or Shift + Command + 5 for the complete Screenshot toolbar. Chromebook users can rely on Ctrl + Show Windows or open the Screen Capture toolbar for more choices.
Once you know how to screenshot in laptop, take a moment to crop irrelevant areas and remove sensitive details. Then save the image with a descriptive filename so it is easy to find and share later.
