

Need to save an error message, payment confirmation, conversation, image, or anything else displayed on your screen? Taking a screenshot is usually much faster than downloading, copying, or photographing the screen.
If you’re searching for how to take screenshot in laptop, the right method mainly depends on your operating system. Windows laptops offer Print Screen and Snipping Tool shortcuts, MacBooks use Command-based shortcuts, and Chromebooks have their own Screen Capture controls.
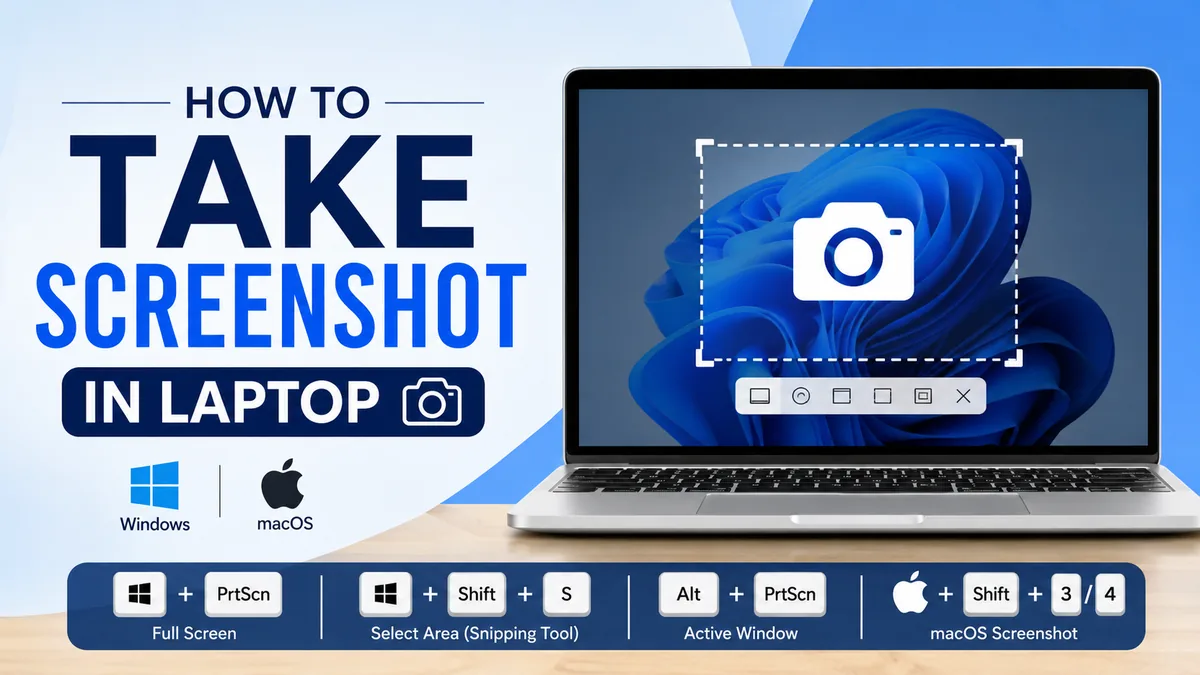
Quick answer: On a Windows laptop, press Windows + Shift + S to open the Snipping Tool and select the part of the screen you want to capture. For the entire screen, Windows + PrtScn can capture and save it automatically. Mac users can press Shift + Command + 3, while Chromebook users can use Ctrl + Show Windows.
how to take screenshot in laptop on Windows 11 and Windows 10
Most HP, Dell, Lenovo, ASUS, Acer, MSI, Samsung, and Microsoft laptops run Windows, so the screenshot methods are largely the same regardless of the manufacturer.
The main difference is the keyboard. Some laptops have a dedicated PrtSc, PrtScn, or Print Screen key, while compact models may require you to hold the Fn key as well.
Here are the most useful Windows screenshot shortcuts:
| What you want to capture | Shortcut | What happens |
|---|---|---|
| Selected area | Windows + Shift + S | Opens screen-capture controls |
| Entire screen | PrtScn | Copies screenshot to clipboard |
| Entire screen and save it | Windows + PrtScn | Saves screenshot automatically |
| Active window | Alt + PrtScn | Copies active window |
| Laptop without PrtScn | Fn + Windows + Space | Captures the screen on supported devices |
Microsoft confirms that Windows 10 and Windows 11 support Windows + PrtScn, while devices without a Print Screen button can use Fn + Windows + Space Bar as an alternative.
Method 1: Use Windows + Shift + S
For most everyday situations, Windows + Shift + S is the most flexible method.
Press these three keys together:
Windows + Shift + S
The screen dims and the Windows capture interface appears. Depending on your Windows version, you can choose options such as a rectangular selection, a specific window, or the full screen.
Then:
- Press Windows + Shift + S.
- Choose the capture mode you need.
- Select the area or window.
- Windows copies the captured image to the clipboard.
- Open the screenshot notification if you want to edit or save it.
- Alternatively, paste it directly into a compatible application with Ctrl + V.
Microsoft recommends the Snipping Tool for taking screenshots, and Windows + Shift + S is a supported shortcut for opening the capture interface.
This method works particularly well when you only need a small part of a webpage, error dialog, document, or application.
Method 2: Use the Print Screen key
Look near the top-right section of your laptop keyboard for a key labeled:
- PrtSc
- PrtScn
- Print Scr
- Print Screen
- PrtSc/SysRq
Pressing PrtScn traditionally captures the screen to the Windows clipboard.
The clipboard is temporary storage. That means you may not immediately see an image file after pressing the key.
Open an application such as Paint, Word, PowerPoint, an email composer, or another image-compatible program and press:
Ctrl + V
Your captured screen should appear.
You can then save or edit it.
Quick Takeaway: If you press PrtScn and can’t find a new image in your Pictures folder, the screenshot may simply be sitting on your clipboard waiting to be pasted.
Method 3: Automatically save a full-screen screenshot
If you don’t want to paste the screenshot into another application first, use:
Windows + PrtScn
This is one of the easiest answers to how to take screenshot in laptop when you need a permanent image of everything currently visible on your display.
Microsoft states that screenshots captured with this shortcut can be found by opening File Explorer > Pictures > Screenshots.
On some laptop keyboards, you may need:
Fn + Windows + PrtScn
The exact combination depends on how the manufacturer configured the function keys.
Method 4: Capture only the active window
Sometimes you don’t want your taskbar, desktop, notifications, or other open programs appearing in the image.
First click the window you want to capture so it becomes active.
Then press:
Alt + PrtScn
The active window is copied to the clipboard.
Open Paint or another compatible application and press Ctrl + V.
This is especially useful when creating tutorials or sending software screenshots because it avoids unnecessary desktop clutter.
Using Snipping Tool for more control
Keyboard shortcuts are fast, but Windows’ built-in Snipping Tool gives you more control over the capture.
To open it:
- Select Start.
- Search for Snipping Tool.
- Open the application.
- Choose the capture option you need.
- Select the area, window, or screen.
- Edit or save the result.
Microsoft includes Snipping Tool on current Windows systems, including Windows 11, and supports opening its screenshot controls with Windows + Shift + S.
The tool is useful when you want to capture only relevant information rather than the entire display.
Depending on your Windows version and current Snipping Tool release, available controls and interface elements can vary.
Can Snipping Tool capture a specific part of the screen?
Yes. This is one of its main advantages.
Suppose a website shows an error in the middle of the page. Instead of capturing your entire browser—including tabs, bookmarks, and unrelated information—you can select only the error message.
That produces a cleaner screenshot and can also reduce accidental sharing of private information.
Can you edit a screenshot after taking it?
Yes.
Opening a capture in Snipping Tool gives you access to basic editing and annotation features. For more extensive editing, you can open the image in another application.
For simple tasks, however, cropping and marking the relevant area is usually enough.
Where are screenshots saved on a Windows laptop?
One of the most common problems isn’t taking the screenshot. It’s finding it afterward.
The location depends on the method you used.
If you press:
Windows + PrtScn
check:
File Explorer > Pictures > Screenshots
Microsoft identifies this as the standard location for screenshots captured with that shortcut.
If you use PrtScn or Alt + PrtScn, the image may initially exist only on your clipboard. You need to paste it into an application before saving it as a file.
If you use Snipping Tool, you can interact with the resulting capture and save it where appropriate.
Clipboard vs. saved screenshot
This distinction causes a lot of confusion.
Copied to clipboard means the image is temporarily available for pasting.
Saved screenshot means an actual image file has been created somewhere on your storage drive.
For example:
PrtScn → clipboard → Ctrl + V → save
Whereas the Windows screenshot shortcut can provide a more direct route:
Windows + PrtScn → Pictures → Screenshots
Once you understand that difference, finding screenshots becomes much easier.
how to take screenshot in laptop without Print Screen button
Not every laptop has a dedicated PrtScn key.
Thin laptops and compact keyboards often combine several functions into the same physical keys. Fortunately, you don’t actually need Print Screen to capture your display.
On Windows 10 or Windows 11, try:
Windows + Shift + S
This opens the built-in screenshot interface without requiring the Print Screen key.
Microsoft also documents another shortcut for compatible Windows devices without a PrtScn button:
Fn + Windows + Space Bar
You can also search for Snipping Tool from the Start menu and use it without remembering any keyboard shortcut.
What if the screenshot shortcut doesn’t work?
Pressing the right keys and seeing nothing happen can be frustrating, but the keyboard itself is often the reason.
Try the Fn key
Laptop manufacturers frequently assign multiple functions to individual keys.
If PrtScn does nothing, try:
Fn + PrtScn
or, depending on what you want to capture:
Fn + Windows + PrtScn
The required combination varies by laptop model.
Use Windows + Shift + S instead
If Print Screen remains unreliable, skip it entirely.
Press:
Windows + Shift + S
If Snipping Tool opens normally, you can continue taking screenshots without troubleshooting the physical Print Screen key.
Search for Snipping Tool manually
Open Start and type:
Snipping Tool
If it opens, create the screenshot from there.
This approach is also useful if you’re using an unusual external keyboard or have remapped keyboard shortcuts.
Check where the screenshot went
A shortcut can work even when it seems like nothing happened.
For example, PrtScn may copy the image to your clipboard without creating an obvious file.
Try opening Paint and pressing:
Ctrl + V
If your screen appears, the screenshot worked.
How to take a screenshot on an HP laptop
HP laptops running Windows generally use the same Windows screenshot commands.
Try:
Windows + Shift + S for a selected area.
For a full-screen capture, use:
PrtScn
or:
Windows + PrtScn
On HP models where Print Screen shares a key with another function, you may need to hold Fn while pressing it.
The important point is that screenshot behavior is primarily determined by Windows and the keyboard configuration—not simply by the HP brand.
How to take a screenshot on a Dell laptop
Dell laptops also use standard Windows screenshot methods.
The easiest option is:
Windows + Shift + S
For a full-screen capture that you can paste elsewhere, try:
PrtScn
For an active application window:
Alt + PrtScn
If your Dell keyboard assigns Print Screen as a secondary function, add the Fn key.
How to take a screenshot on a Lenovo laptop
Most Lenovo Windows laptops support the same combinations:
- Windows + Shift + S — select an area
- PrtScn — capture to clipboard
- Windows + PrtScn — full-screen capture and save
- Alt + PrtScn — active window
Compact Lenovo keyboards may require Fn for certain key combinations.
Instead of memorizing a brand-specific procedure, check the labels on your keyboard and remember that Windows’ Snipping Tool works even when the physical Print Screen arrangement is different.
How to take a screenshot on an ASUS or Acer laptop
ASUS and Acer laptops running Windows follow the same general rule.
Use Windows + Shift + S when you want precise control.
Use Windows + PrtScn when you want a quick full-screen image saved to your screenshots folder.
ASUS also documents PrtSc-based capture and Windows + Shift + S as screenshot methods for Windows 10 and Windows 11 laptops.
Some keyboards require Fn + PrtScn, particularly when Print Screen is assigned as a secondary key function.
how to take screenshot in laptop on a MacBook
MacBooks use macOS rather than Windows, so Print Screen shortcuts don’t apply.
Apple provides several built-in combinations for capturing the entire screen, a selected region, or a particular window.
Capture the entire Mac screen
Press:
Shift + Command + 3
macOS captures the entire screen.
Apple says a thumbnail may appear in the corner, allowing you to edit the image. Otherwise, you can wait for the screenshot to save.
Capture part of the screen
Press:
Shift + Command + 4
Your pointer changes into a crosshair.
Click and drag across the part of the screen you want to capture, then release your mouse or trackpad button.
You can press Esc to cancel before taking the screenshot. Apple also allows you to hold the Space bar while dragging to reposition the selected area without changing its dimensions.
Capture one window on a Mac
Press:
Shift + Command + 4
Then press:
Space bar
The pointer changes to a camera icon. Click the window or menu you want to capture.
Apple notes that holding the Option key while clicking can exclude the window’s shadow.
Open the Mac Screenshot app
Press:
Shift + Command + 5
On macOS Mojave 10.14 and later, this opens Apple’s Screenshot app. It provides controls for screenshot capture and options such as choosing a save location and setting a timer.
Where do Mac screenshots go?
By default, macOS saves screenshots to the desktop with a filename containing the date and time.
The Screenshot app also allows you to change the default save location.
If you’d rather copy a screenshot to the clipboard, Apple supports adding the Control key to screenshot combinations. For example:
Control + Shift + Command + 3
copies the full-screen capture to the clipboard instead of following the normal desktop-saving workflow.
How to take a screenshot on a Chromebook
Chromebooks use ChromeOS, so their shortcuts differ from both Windows and macOS.
For a full-screen screenshot, Google documents:
Ctrl + Show Windows
The Show Windows key usually has an icon resembling a window or rectangle with lines beside it.
For additional screenshot controls, press:
Shift + Ctrl + Show Windows
The Screen Capture interface lets you choose between full-screen, partial, and window screenshots.
If an external keyboard doesn’t have a Show Windows key, Google says you can use:
Ctrl + Shift + F5
Where are Chromebook screenshots saved?
Google states that screenshots are automatically copied to the clipboard and normally saved in the Downloads folder.
You can change the destination through the Screen Capture settings and choose another folder.
How do you take a partial screenshot?
Capturing only part of the screen is often better than taking a full screenshot and cropping it later.
On Windows:
Windows + Shift + S
On Mac:
Shift + Command + 4
On Chromebook:
Shift + Ctrl + Show Windows
These shortcuts all give you a way to focus on a specific part of the display.
Partial screenshots are especially useful for:
- Error messages
- Charts and graphs
- Sections of documents
- Online receipts
- Maps
- Website elements
- Software instructions
- Support conversations
They also help you avoid exposing unrelated tabs, notifications, usernames, or other private information.
How to screenshot only one window
If several applications are open but you only need one, capturing a specific window produces a much cleaner result.
On Windows, select the window and press:
Alt + PrtScn
Then paste the image with Ctrl + V where needed.
Alternatively, Windows + Shift + S provides a window-capture option through the Windows screenshot interface.
On a Mac, use:
Shift + Command + 4, then Space bar
and click the required window.
Chromebook’s Screen Capture tool also includes a window screenshot option.
How to take a long or scrolling screenshot on a laptop
A normal screenshot captures only what is currently visible on the screen.
That’s a limitation when you need an entire webpage, long conversation, or document extending below the visible area.
A scrolling screenshot combines content beyond the current viewport into a longer image.
The exact method depends on the browser or application you’re using. Some browsers and applications provide full-page capture functionality, while other situations may require a dedicated screenshot utility.
Before installing anything, check whether your browser already offers a built-in full-page capture feature. For ordinary screenshots, Windows Snipping Tool, macOS Screenshot, and ChromeOS Screen Capture are usually sufficient.
What image format are screenshots saved in?
The format depends on your operating system and capture method.
PNG is particularly common for screenshots because it preserves sharp text, menus, icons, and interface elements without the visual artifacts that can occur with heavy JPEG compression.
However, screenshots may eventually be saved or converted to formats such as:
- PNG
- JPEG/JPG
- GIF
- HEIF on supported workflows
Apple’s current Screenshot app documentation notes that supported Mac models using macOS Tahoe 26 or later can offer SDR captures in PNG and HDR captures in HEIF.
For most ordinary screenshots containing text, PNG is a sensible choice.
Screenshot vs. screen recording: what’s the difference?
A screenshot is a still image of your display at one moment.
A screen recording captures activity over time as video.
Use a screenshot when you need to show:
- One error message
- A confirmation page
- A particular software setting
- A chart or image
- A single conversation message
Use screen recording when demonstrating a sequence of actions or documenting behavior that changes over time.
Current Windows 11 systems can use Snipping Tool for screen recording, while Google includes recording options within Chromebook’s Screen Capture interface.
Mac’s screenshot interface opened with Shift + Command + 5 also provides screen-capture controls.
Tips for taking clearer and safer screenshots
A screenshot can accidentally reveal much more than the information you intended to share.
Before capturing your screen, close or hide unrelated windows and check for visible notifications.
Pay particular attention to:
- Email addresses
- Phone numbers
- Account information
- Payment details
- Browser tabs
- Private conversations
- File names
- Desktop notifications
- QR codes
- Authentication information
For technical support, capture the complete error message when possible. Error codes and application names can be more useful than a tightly cropped image showing only a few words.
At the same time, don’t expose unrelated personal information just to provide extra context.
If you need to highlight something, use the built-in editing or annotation tools rather than repeatedly taking new screenshots.
Quick Takeaway: Capture enough context to make the screenshot understandable, but remove anything the recipient doesn’t need to see.
Which screenshot method should you use?
There isn’t one shortcut that’s best for every situation.
If you’re on Windows 10 or Windows 11, Windows + Shift + S is usually the most versatile choice because you can select exactly what you need.
Use Windows + PrtScn when you want to capture the whole Windows screen and locate the resulting image in your Screenshots folder.
On a MacBook, remember two shortcuts:
Shift + Command + 3 for everything.
Shift + Command + 4 for a selected area.
On a Chromebook, Ctrl + Show Windows handles a basic screenshot, while Shift + Ctrl + Show Windows opens more capture options.
Final thoughts on how to take screenshot in laptop
Learning how to take screenshot in laptop comes down to remembering one or two shortcuts for your operating system.
For Windows users, start with Windows + Shift + S. It handles most everyday screenshot needs and lets you capture only the information you actually want. Use Windows + PrtScn when you need a full-screen image saved as a file.
MacBook users can rely on Shift + Command + 3 for the whole screen and Shift + Command + 4 for a selected portion. Chromebook users can use the Show Windows key with Ctrl or Shift + Ctrl for their built-in screenshot tools.
Once you’ve learned the shortcut that fits your laptop, taking a screenshot takes only a few seconds.
