

A new router can look intimidating when you see WAN ports, LAN ports, flashing LEDs, IP addresses, and security settings. The good news is that most modern routers are designed to guide you through the process, and a basic home network can usually be configured without specialist networking knowledge.
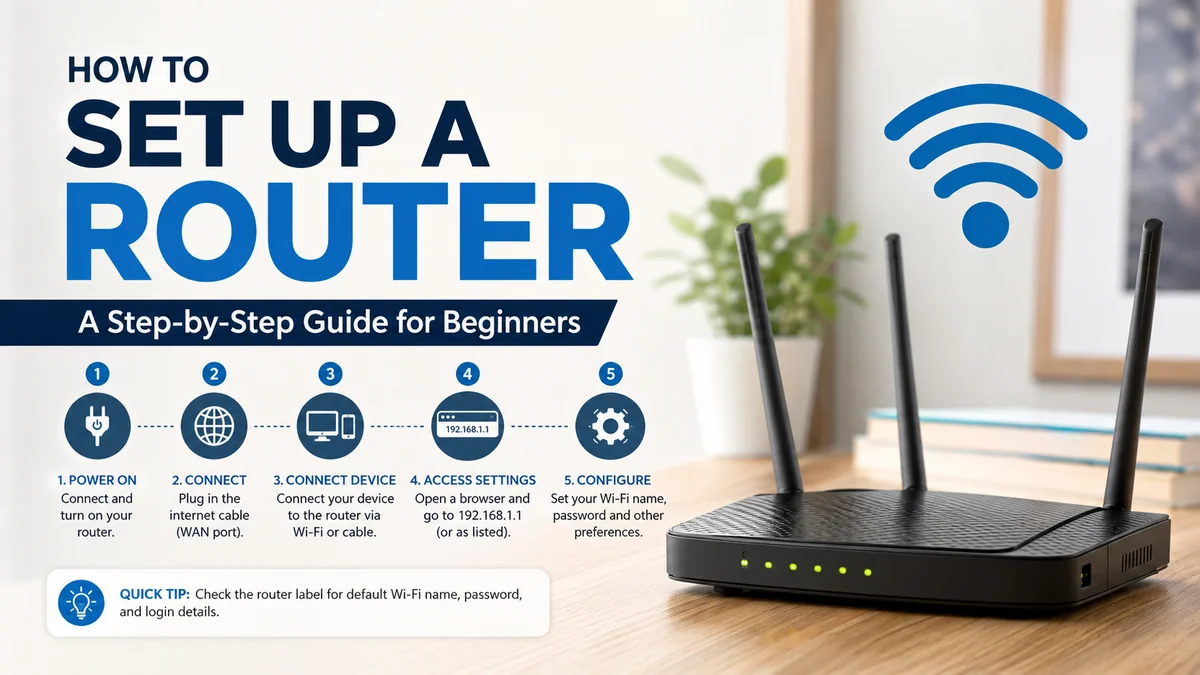
If you want to know how to set up a router, connect your modem or internet gateway to the router’s WAN/Internet port with an Ethernet cable, power on the equipment, connect a phone or computer to the router, open its setup app or web interface, configure the internet connection, create a Wi-Fi name and password, enable WPA3 or WPA2 security, update the firmware, and test your connection.
This guide walks through the entire process, including router placement, modem connections, SSID configuration, Wi-Fi security, 2.4 GHz and 5 GHz bands, firmware updates, and troubleshooting.
What You Need Before You Set Up a Router
A few minutes of preparation can prevent most setup problems.
For a typical home network, you will need:
- A wireless router and its power adapter
- An active broadband internet connection
- A modem, ONT, or ISP gateway if your connection requires one
- At least one Ethernet cable
- A smartphone, tablet, laptop, or desktop computer
- Your ISP account or connection details when required
- The router’s default Wi-Fi and administration information
Your ISP connection may use cable, DSL, fiber, or another broadband technology. Microsoft notes that the equipment and physical connection differ by service type; for example, cable connections commonly use coaxial infrastructure, while DSL uses a telephone line and fiber has its own optical equipment.
Understand the modem and router difference
A modem or optical network terminal connects your home to your internet service provider. A router creates and manages your local network and shares that internet connection among your phones, computers, TVs, consoles, smart-home devices, and other equipment.
Your setup might therefore look like:
Internet → Modem/ONT → Router → Your devices
However, many internet providers supply a combined modem-router gateway. If you already have one and want to add a separate router, the configuration can be different. Depending on the equipment, you may need bridge mode, access-point mode, or another manufacturer-recommended configuration to avoid problems such as double NAT.
Don’t assume that every ISP box needs a second router.
Find the router’s default information
Look at the label on the router and the quick-start documentation.
You may find:
- Default SSID or Wi-Fi network name
- Default Wi-Fi password
- Setup URL
- Router IP address
- QR code for connecting
- Serial number
- MAC address
Older routers sometimes use addresses such as 192.168.0.1 or 192.168.1.1 for their administration interface. Modern models may instead provide a manufacturer-specific URL or mobile app. Cisco recommends checking the router documentation because setup methods vary between manufacturers.
Quick Takeaway: Don’t automatically type 192.168.1.1 just because you’ve seen it in another tutorial. Use the address, app, or URL specified for your particular router.
how to set up a router: Step-by-Step Instructions
For most home routers, the entire process can be divided into eight basic steps.
1. Choose the best location for your router
Router placement affects Wi-Fi performance more than many people realize.
Ideally, place the router:
- Near the center of the area requiring coverage
- In an open location
- Above floor level
- Away from large metal objects
- Away from thick structural obstacles when possible
- Away from major sources of radio interference
- Somewhere with adequate ventilation
Microsoft recommends placing a wireless router centrally and away from walls, floors, and metal objects where practical.
Don’t hide your router inside a metal cabinet simply because the cables look untidy. Wi-Fi signals have to travel between the router and your devices, and unnecessary obstructions can reduce coverage.
Your modem or ONT location may limit your options. In that situation, a longer Ethernet cable can sometimes allow the router to be positioned more effectively.
2. Power down your existing modem or gateway
If you’re connecting a new router to an existing modem or gateway, switch off or unplug the existing equipment first.
This helps create a clean connection between the devices.
Some ISP equipment may need several minutes to restart completely. If your modem contains a backup battery, follow your provider’s or manufacturer’s restart instructions rather than assuming unplugging the power cable shuts it down.
3. Connect the modem to the router’s WAN port
Take an Ethernet cable and connect one end to the appropriate Ethernet/LAN port on the modem or gateway.
Connect the other end to your router’s WAN or Internet port.
This distinction matters.
A typical router has:
| Port | Purpose |
|---|---|
| WAN/Internet | Connects the router to the modem, gateway, ONT, or internet source |
| LAN | Connects computers, switches, TVs, consoles, and other wired devices |
| Power | Connects the router’s power adapter |
| USB | Optional storage, printer, or other manufacturer-specific functions |
WAN and LAN ports may look almost identical, although the WAN port is often labeled or colored differently.
Cisco’s setup guidance likewise instructs users to connect the broadband gateway to the router’s WAN port.
4. Power everything on in the correct order
Once the Ethernet cable is connected:
- Power on the modem, ONT, or ISP gateway.
- Allow it to finish starting.
- Connect power to the router.
- Turn on the router if it has a separate power switch.
- Give it time to boot.
- Check the status LEDs.
Don’t panic if the lights flash repeatedly during startup. That is normal on many models.
Look for indicators representing power, internet/WAN, Ethernet, and Wi-Fi. The exact colors and patterns vary significantly between manufacturers, so use your router’s manual if you see a red, amber, or unusual flashing indicator.
Quick Takeaway: One of the easiest router setup mistakes to make is moving ahead before the modem or router has finished booting.
How to Connect to the Router for the First Time
After the hardware is running, you need a device connected to the router before you can configure it.
There are usually three options.
Ethernet connection
Connecting a laptop or desktop directly to a LAN port with an Ethernet cable is reliable because your configuration session won’t be interrupted if the Wi-Fi settings change.
Default Wi-Fi network
Look for the default SSID and wireless password on the router’s label.
Open your phone or computer’s Wi-Fi settings, select that network, and enter the supplied password.
Some newer routers include a QR code that can simplify the process.
Manufacturer’s mobile app
Many current routers can be installed using a companion application. Cisco notes that manufacturers increasingly provide apps or web dashboards for setup and management.
For example, TP-Link supports browser-based setup and also provides its Tether app as an alternative for supported routers.
Follow the instructions for your exact model because manufacturers can use different procedures.
How to Access Router Settings
If you’re configuring the router through a browser, open its administration interface after connecting to the router.
The exact address is model-specific.
Common private IPv4 addresses include:
- 192.168.0.1
- 192.168.1.1
But don’t treat these as universal addresses.
Check the label or documentation first.
What if you don’t know the router’s IP address?
On Windows, you can identify the local router address by looking for the Default Gateway associated with your active network connection.
For example, open Command Prompt and enter:
ipconfig
Find the active Ethernet or wireless adapter and look for Default Gateway.
Enter that address into your web browser.
If your router requires a manufacturer-specific hostname instead, use the address given in its documentation. TP-Link, for example, documents both a dedicated management hostname and local IP access for supported models.
Router admin password vs. Wi-Fi password
These are two different credentials.
The Wi-Fi password allows devices to join your wireless network.
The router administrator password allows someone to modify the router itself.
Use different strong passwords for them where your router allows it.
If your router ships with generic or default administrator credentials, change them during initial setup.
Configure Your Internet Connection
After signing in, the setup wizard normally tries to detect your internet connection automatically.
Common WAN connection types include:
| Connection Type | How It Works | What You May Need |
|---|---|---|
| Dynamic IP/DHCP | ISP assigns settings automatically | Usually nothing |
| PPPoE | Authenticates using ISP credentials | Username and password |
| Static IP | Uses manually assigned network information | IP, gateway, subnet and DNS details |
TP-Link’s current setup documentation identifies Dynamic IP, PPPoE, and Static IP among the connection types users may encounter.
For many residential broadband connections, automatic detection is enough.
If the router asks for PPPoE credentials and you don’t have them, contact your ISP rather than guessing.
Similarly, don’t manually enter DNS servers, VLAN IDs, MAC cloning settings, or static addresses simply because another person’s router uses them. Those values can depend on your provider and connection.
What is DHCP?
Dynamic Host Configuration Protocol, or DHCP, automatically distributes local IP configuration to devices on your network.
For example, your router might assign different private addresses to your:
- Phone
- Laptop
- Smart TV
- Printer
- Game console
For a normal home network, leaving the router’s DHCP server enabled is usually appropriate unless you have a specific networking reason to change it.
Create Your Wi-Fi Network Name and Password
The next major part of learning how to set up a router is configuring the wireless network.
Your router will normally ask you to create an SSID, which is simply the network name users see when selecting Wi-Fi.
You could use something recognizable, but avoid putting unnecessary personal information in the name.
Create a strong Wi-Fi password
Choose a long, unique password that isn’t reused for email, banking, social media, or your router administrator account.
Avoid passwords such as:
- password123
- 12345678
- Your phone number
- Your home address
- A family member’s name
- The router model
A password manager can make unique credentials easier to maintain.
Choose WPA3 when available
Modern routers commonly provide several wireless security choices.
Prefer WPA3 when your router and devices support it. If older equipment cannot connect using WPA3, WPA2 or a WPA2/WPA3 compatibility mode may be necessary.
Microsoft recommends WPA3 where possible and identifies it as stronger than WPA2, WPA, and the obsolete WEP standard.
Avoid WEP.
Also avoid running an open home Wi-Fi network without authentication.
Should 2.4 GHz and 5 GHz have the same Wi-Fi name?
Modern dual-band routers typically support 2.4 GHz and 5 GHz, while newer hardware may also provide 6 GHz capability.
The bands have different characteristics:
| Wi-Fi Band | General Strength | General Limitation |
|---|---|---|
| 2.4 GHz | Longer reach and broad compatibility | More congestion and lower potential throughput |
| 5 GHz | Higher potential speeds and capacity | Shorter practical range through obstacles |
| 6 GHz | More spectrum for compatible modern devices | Requires compatible equipment and has coverage limitations |
Many routers can manage multiple bands under a single SSID using band-steering or related technology. That is usually convenient for everyday users.
Separate network names can be useful when troubleshooting or when you specifically want to control which band a device uses.
Change the Router Administrator Password
Wi-Fi security isn’t enough if the router’s management account is poorly protected.
During setup, replace any default administrator password with a strong, unique credential.
Cisco specifically recommends changing the router’s default administration credentials during configuration.
Your router administrator account can potentially control:
- Wi-Fi passwords
- DNS settings
- Connected devices
- Firewall settings
- Port forwarding
- Parental controls
- Guest networks
- Firmware
- Remote management
Protect it accordingly.
Where available, consider disabling administration access from the internet unless you genuinely need remote management and understand how it is secured.
Update the Router Firmware
Don’t skip the firmware check just because the internet starts working.
Firmware is the software running on the router itself. Manufacturers release updates to address security vulnerabilities, bugs, compatibility issues, and sometimes performance problems.
Dell’s 2026 router setup guidance recommends updating firmware as part of securing a newly configured router.
Open the router’s app or administration dashboard and look for options such as:
Administration → Firmware Update
or:
System → Update
The wording varies by manufacturer.
If automatic firmware updates are supported and appropriate for your device, enabling them can reduce the chance of forgetting future security updates.
Never interrupt power during a firmware installation unless the manufacturer specifically tells you to do so.
Secure Your New Home Network
Once the basic internet connection works, spend a few minutes reviewing the security configuration.
A practical baseline is:
- Use WPA3 where supported, or WPA2 when necessary.
- Create a unique Wi-Fi password.
- Change default router administration credentials.
- Install current firmware.
- Enable automatic security updates if supported.
- Keep the router’s firewall enabled.
- Disable unnecessary remote administration.
- Avoid obsolete WEP security.
- Create a guest network when useful.
- Review connected devices periodically.
Microsoft also recommends using a firewall as part of protecting devices connected to a network.
Should you use WPS?
Wi-Fi Protected Setup (WPS) can make connecting compatible devices easier. Microsoft still documents WPS as an available connection method on supported routers.
However, you don’t need WPS for ordinary Wi-Fi setup. Manually selecting your SSID and entering its password gives you a straightforward connection method.
If you never use WPS, disabling it is a reasonable security-hardening measure when your router provides that option.
Set up a guest Wi-Fi network
A guest network creates a separate wireless network for visitors.
Instead of giving every visitor the password for your primary network, you can provide access to the guest SSID.
Some routers can also isolate guest devices from computers, storage, printers, and other resources on your main LAN.
That makes guest networking useful for visitors and, depending on your router’s capabilities, some smart-home or IoT devices.
Configure 2.4 GHz, 5 GHz, and Wi-Fi Channels
You don’t necessarily need to manually optimize wireless channels during initial setup.
Modern routers often select channels automatically.
However, understanding the basics can help when diagnosing poor performance.
2.4 GHz Wi-Fi
The 2.4 GHz band usually provides good range and works with a huge number of devices, but it can become congested.
Microwave ovens, nearby wireless networks, and other equipment can contribute to interference. Microsoft specifically notes that some household equipment can interfere with 2.4 GHz wireless connections.
In environments using the common 20 MHz channel arrangement, channels 1, 6, and 11 are often used to minimize overlap.
But don’t blindly force a particular channel. Local wireless conditions matter.
5 GHz Wi-Fi
The 5 GHz band generally provides greater capacity and often encounters less congestion than 2.4 GHz.
It’s particularly useful for:
- Streaming
- Video calls
- Large downloads
- Gaming devices
- Computers near the router
The trade-off is that higher-frequency signals can lose strength more quickly through distance and physical barriers.
6 GHz Wi-Fi
Some newer Wi-Fi generations can operate in the 6 GHz spectrum.
This can provide additional spectrum and cleaner channels for compatible devices, but both the router and client device must support it. Availability and permitted channels also depend on regional regulations.
For most beginners, the router’s automatic band and channel management is a good starting point.
Test Your Router and Internet Connection
Once configuration is complete, don’t stop after seeing a Wi-Fi icon.
Actually test the network.
Connect several devices and confirm that they can:
- Join the wireless network
- Receive an IP address
- Open websites
- Resolve domain names
- Stream or download normally
- Reconnect after Wi-Fi is turned off and back on
Then test from different rooms.
Compare Ethernet and Wi-Fi performance
If your internet seems slow, connect a computer directly to the router using Ethernet and compare its performance with Wi-Fi.
If Ethernet performs normally but Wi-Fi is poor, the broadband connection itself may not be the problem.
Investigate:
- Router placement
- Distance
- Walls and floors
- Wireless interference
- Wi-Fi band
- Device capabilities
- Channel congestion
This distinction can save a lot of unnecessary troubleshooting.
How to Set Up a Router Without a Computer
You usually don’t need a desktop or laptop to install a modern wireless router.
Many manufacturers provide mobile setup apps.
The basic process is:
- Install the official router application.
- Connect the router to your modem or internet source.
- Power on the equipment.
- Connect your smartphone to the router when instructed.
- Open the application.
- Follow its setup wizard.
- Configure the internet connection.
- Create the SSID and Wi-Fi password.
- Configure wireless security.
- Install available firmware updates.
TP-Link, for example, supports mobile configuration on compatible equipment through its apps, while its current browser setup documentation provides a web-based alternative.
Use the official app specified in your router’s documentation rather than an unrelated third-party router-management application.
How to Set Up a Router Without a Modem
A separate modem isn’t always required.
Fiber services may use an ONT, while some apartment buildings, managed networks, and other services can provide an Ethernet handoff directly.
In those cases, the incoming Ethernet cable may connect directly to your router’s WAN/Internet port.
Mobile broadband routers are another category entirely. Some 4G/5G routers connect to the cellular network rather than a conventional cable or DSL modem. TP-Link, for example, documents a separate setup process for its 4G/5G Deco router products.
Follow your ISP’s connection requirements instead of assuming every internet service uses the traditional modem-plus-router arrangement.
Common Router Setup Problems and How to Fix Them
Even a correctly configured router can occasionally refuse to connect.
The symptoms usually provide clues about where the problem lies.
Wi-Fi works, but there is no internet
This means your device may be communicating with the router while the router itself cannot reach the internet.
Check:
- The modem or ONT status
- Ethernet cable between modem and WAN port
- WAN status in the router dashboard
- ISP connection type
- PPPoE credentials if applicable
- ISP outages
Restart the modem and router using the recommended sequence.
If you’re replacing an old router, your ISP may have additional provisioning or equipment requirements.
The router setup page won’t open
First confirm that your phone or computer is actually connected to the new router.
Then:
- Verify the management address
- Check the router’s label
- Try the manufacturer’s documented setup hostname
- Find your Default Gateway
- Try Ethernet instead of Wi-Fi
- Temporarily disable a VPN if it is interfering with access to local addresses
- Restart the router
Typing a random private IP address will not work if your router uses a different one.
The router doesn’t receive an IP address
Check the WAN connection and confirm the ISP connection type.
If your service requires PPPoE authentication, static addressing, VLAN configuration, or other provider-specific settings, automatic DHCP alone may not establish a connection.
Contact the ISP when you don’t know the required values.
Some devices can’t connect to WPA3
Older devices may not support WPA3.
If modern devices connect but an older printer, smart-home product, or laptop doesn’t, compatibility could be the problem.
Check whether your router offers an appropriate WPA2/WPA3 transition or compatibility mode. Avoid downgrading the entire network to obsolete WEP security.
Wi-Fi is weak in another room
Don’t immediately buy another router.
First try:
- Moving the router higher
- Moving it toward the center of the home
- Removing nearby obstructions
- Testing different bands
- Checking channel congestion
- Comparing Wi-Fi with Ethernet performance
For larger homes or difficult layouts, a properly designed mesh Wi-Fi system or wired access points may provide more reliable coverage than simply increasing transmitter power.
The new router works, but gaming reports double NAT
This commonly occurs when an ISP gateway is already performing routing and your new router performs routing again.
The network effectively becomes:
Internet → ISP router → New router → Device
Depending on your equipment and ISP requirements, bridge mode or access-point mode may be appropriate. Check the documentation for both devices before changing modes because doing so can alter routing, firewall, telephone, or IPTV functionality.
You forgot the administrator password
Check whether your router offers an account-recovery method.
If it doesn’t, a factory reset may be required.
A factory reset normally removes customized settings, including the Wi-Fi network name, passwords, and internet configuration, so treat it as a last resort rather than your first troubleshooting step.
Router Setup Settings Most People Should Leave Alone
Router dashboards can contain dozens of advanced options. Seeing them doesn’t mean they need to be changed.
Unless you have a specific requirement, avoid randomly modifying:
- NAT settings
- MTU
- VLAN IDs
- Static routes
- Port forwarding
- DMZ
- DNS
- DHCP ranges
- MAC cloning
- IPv6 configuration
- QoS rules
Some features can be useful. Quality of Service (QoS), for example, can help manage traffic priorities on certain networks. Port forwarding may be required for particular applications or services.
But advanced settings should solve a defined problem.
Changing them simply because a tutorial lists them can create new connectivity or security issues.
Router Placement Mistakes That Hurt Wi-Fi
Configuration isn’t the only factor determining wireless performance.
A perfectly configured Wi-Fi router can still perform badly if it sits in the wrong place.
Try to avoid placing it:
- On the floor
- Behind a television
- Inside a closed cabinet
- Next to large metal surfaces
- At an extreme corner of a large home
- Beside major sources of interference
- In poorly ventilated spaces
A central, elevated, open position is usually a better starting point. Both Microsoft and Cisco emphasize thoughtful router placement for improving wireless coverage.
If the modem is installed in a poor location, remember that the router doesn’t necessarily need to sit directly beside it. A suitable Ethernet run can give you more flexibility.
A Quick Router Setup Checklist
Before considering the installation finished, verify the following:
| Setting | Recommended Starting Point |
|---|---|
| Modem/ONT connection | Connected to WAN/Internet port |
| Router placement | Central, elevated, open where practical |
| Internet connection | Automatically detected or ISP settings entered |
| SSID | Custom recognizable network name |
| Wi-Fi password | Strong and unique |
| Admin password | Changed from any default credential |
| Security | WPA3 where compatible; otherwise appropriate WPA2 configuration |
| Firmware | Current |
| Firewall | Enabled |
| WPS | Disable if unused |
| Remote management | Disable if unnecessary |
| DHCP | Usually enabled for a standard home network |
| Guest network | Optional but useful |
| Channels | Automatic initially |
| Ethernet test | Recommended for troubleshooting |
| Wi-Fi coverage | Tested in multiple rooms |
Final Thoughts on how to set up a router
Learning how to set up a router is mostly about doing a handful of things in the correct order: connect the internet source to the WAN port, access the router’s official setup interface, configure the ISP connection, create a secure wireless network, change default administration credentials, update the firmware, and test the connection.
The settings that matter most are usually the simplest ones. Use WPA3 when your devices support it, choose strong unique passwords, keep firmware current, leave the firewall enabled, and position the router where its signal can reach the areas that actually need Wi-Fi.
Once those basics are working, test both wired and wireless performance before changing advanced settings. That gives you a stable, secure baseline—and makes any later troubleshooting much easier.
