
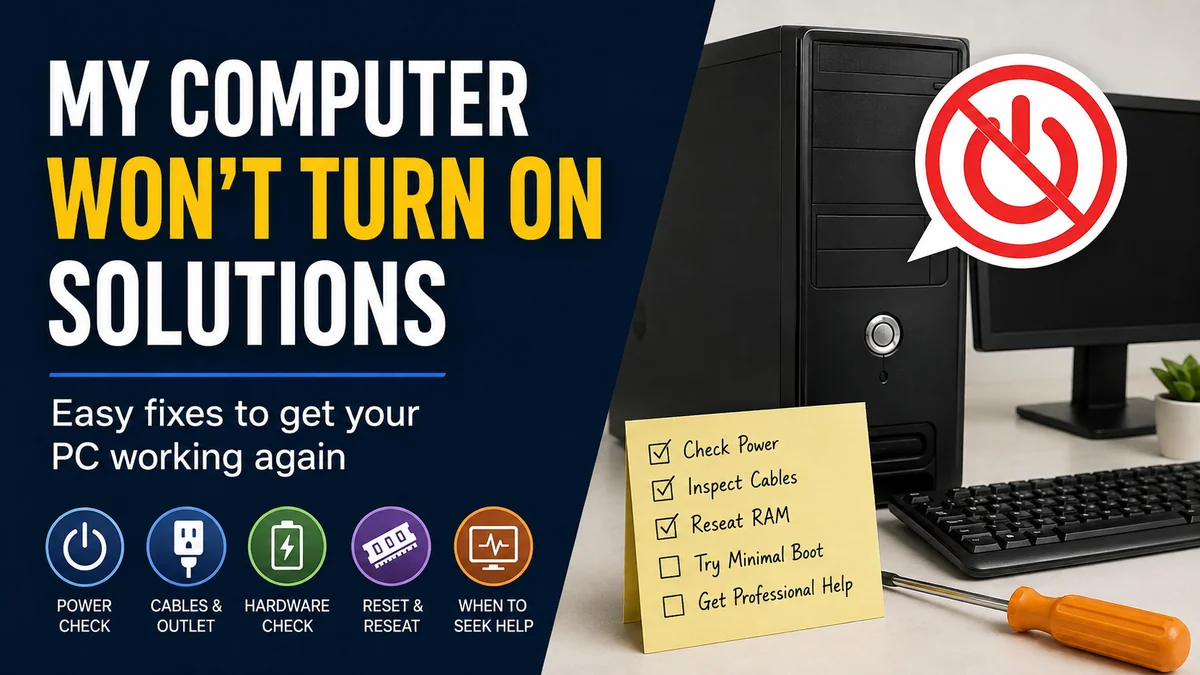

You press the power button and get nothing. No Windows logo, maybe no screen, and possibly not even a fan or indicator light. It can look like a serious hardware failure, but the cause may be as simple as a loose cable, bad outlet, drained battery, or display problem.
If you’re looking for my computer won’t turn on solutions, don’t start replacing components randomly. First determine whether you’re dealing with no power, no POST, no boot, or no video. Those symptoms look similar from the outside but require very different fixes. Dell’s troubleshooting guidance uses the same distinction when diagnosing computers that appear unable to start.
Quick answer: If your computer won’t turn on, verify the wall outlet and power cable first, disconnect external devices, perform a power reset, and check whether lights or fans appear. If the PC has power but no picture, troubleshoot the monitor, RAM, graphics card, and POST errors. If Windows starts loading and fails, focus on the boot drive and operating system.
First, Identify What “Won’t Turn On” Actually Means
The fastest way to troubleshoot a dead-looking computer is to pay attention to exactly what happens after you press the power button.
There are four main startup failure categories:
| What happens | Likely problem area |
|---|---|
| No lights, fans, or sounds | Outlet, cable, charger, battery, PSU, power button |
| Lights/fans work but no image | Monitor, RAM, GPU, POST failure |
| Manufacturer logo appears but Windows doesn’t load | Boot drive, Windows, startup files |
| Computer starts and immediately shuts down | PSU, overheating, RAM, motherboard, short circuit |
This distinction matters.
For example, a desktop with spinning fans and a black monitor technically is turning on. Troubleshooting its wall outlet repeatedly won’t help much because electricity is already reaching the system.
Dell similarly separates startup problems into No Power, No POST, No Boot, and No Video categories.
Look and listen before changing anything
Press the power button once and observe the computer carefully.
Check for:
- Power or charging LEDs
- Keyboard lights
- Fans spinning
- Hard-drive activity
- Motherboard diagnostic LEDs
- Beeping sounds
- A manufacturer logo
- A blinking cursor
- Messages such as “No Bootable Device”
Even a brief flash or fan movement is useful diagnostic information.
my computer won’t turn on solutions: Start With the Power Source
When there are absolutely no signs of life, start outside the computer rather than opening it.
1. Test the wall outlet
Unplug the computer and connect another device you know works.
A lamp or phone charger is enough.
If that device doesn’t work either, you’ve found the likely problem.
If you’re using a:
- Power strip
- Extension cable
- Surge protector
- UPS
temporarily bypass it and plug the computer directly into a known-working wall outlet.
Dell specifically recommends trying another outlet and bypassing a power strip when diagnosing a computer with no power.
2. Inspect the power cable
Make sure the cable is firmly seated at both ends.
For a desktop, check the connection between the AC cable and power supply unit (PSU).
Look for:
- Cuts
- Bent connectors
- Loose plugs
- Burn marks
- Damaged insulation
If you have a compatible known-good cable, try it.
3. Check the desktop PSU switch
Most desktop PSUs have a small rocker switch on the rear of the case.
It normally needs to be in the “I” (on) position rather than “O” (off).
This switch can easily get bumped while moving or cleaning a PC.
Some power supplies also have voltage-selection controls. Do not change voltage settings unless the manufacturer’s documentation specifically instructs you to do so.
Quick Takeaway
If your computer shows zero lights and zero fan activity, don’t troubleshoot Windows yet.
Start with:
- Outlet
- Power strip
- Power cable
- PSU switch
- Laptop charger
- Battery
- Power button
- Internal power hardware
Software cannot stop a computer from receiving electricity.
Laptop Won’t Turn On? Check the Charger and Battery
Laptop troubleshooting is slightly different because the power adapter, charging circuitry, and battery all sit between the wall outlet and the system.
Check the charging indicator
Connect the AC adapter and look for a charging LED.
Depending on the laptop, the indicator may be:
- Next to the charging port
- On the side of the chassis
- Near the keyboard
- On the power adapter itself
No charging light can indicate a bad adapter, cable, charging port, or internal power problem, although LED behavior varies by manufacturer and model.
Inspect the AC adapter
Look closely at the charger.
Check for:
- Frayed wires
- Bent connector pins
- A loose DC plug
- Excessive heat
- Burn marks
- Intermittent charging
If possible, test with a manufacturer-approved compatible adapter with the correct voltage and connector specifications.
Do not randomly connect chargers simply because the plug fits.
Try starting without a removable battery
If your laptop has a battery designed to be removed without disassembling the machine:
- Shut down the laptop.
- Disconnect the AC adapter.
- Remove the battery.
- Connect the AC adapter without the battery.
- Press the power button.
If the laptop starts normally, the battery may be failing.
Lenovo’s general troubleshooting guidance also recommends checking the battery and, where applicable, testing a laptop using AC power without the battery.
Modern laptops often have internal batteries. Don’t open the machine merely to disconnect one unless the manufacturer’s service procedure permits it and you’re comfortable doing so.
Perform a Power Reset
A power reset is one of the simplest fixes worth trying before opening a computer.
The goal is to remove external power and discharge residual electrical charge.
For a laptop
If your manufacturer’s instructions permit it:
- Disconnect the charger.
- Remove the removable battery, if applicable.
- Disconnect USB devices and other peripherals.
- Hold the power button for about 15–30 seconds.
- Reconnect the charger.
- Try starting the laptop.
The exact recommended procedure can vary between manufacturers and models, so model-specific support documentation should take priority.
For a desktop
- Shut down or unplug the computer.
- Disconnect its AC power cable.
- Hold the power button for roughly 10–15 seconds.
- Reconnect the power cable.
- Make sure the PSU switch is on.
- Try starting it again.
Power resets are particularly useful after unexpected shutdowns or strange power-state behavior.
Disconnect USB Devices and Other Peripherals
If the computer receives power but doesn’t start properly, remove everything that isn’t required for startup.
Disconnect:
- USB flash drives
- External hard drives
- Printers
- USB hubs
- Game controllers
- Memory-card readers
- External webcams
- Docking stations
- Unnecessary adapters
For a desktop, initially leave only the monitor, power cable, and essential input devices connected.
Then try booting again.
A malfunctioning peripheral can occasionally interfere with startup or cause firmware to attempt booting from the wrong device. Peripheral conflicts are also among the common startup causes identified in troubleshooting guidance.
If the computer starts normally afterward, reconnect your devices individually until you identify the one causing trouble.
Computer Has Power but the Screen Is Black
This is one of the most commonly misunderstood situations.
You press the button and hear fans. LEDs illuminate. Perhaps the keyboard lights up.
But the monitor remains completely black.
Your computer may have power but be experiencing a No Video or No POST problem rather than a true no-power failure.
Check the monitor first
Make sure the monitor itself is powered on.
Then check its selected input.
Common inputs include:
- HDMI
- DisplayPort
- USB-C
- DVI
- VGA on older equipment
If your computer uses HDMI but the monitor is manually set to DisplayPort, you’ll see a blank screen even when the PC works.
Reconnect the display cable
Disconnect and firmly reconnect the video cable at both ends.
If available, test another:
- Cable
- Monitor
- Television
- Display port
This quickly separates a display problem from a computer startup problem.
Desktop users: check where the monitor is connected
This is especially relevant for gaming PCs and workstations with a dedicated graphics processing unit (GPU).
If your system uses a dedicated graphics card, the monitor will usually need to be connected to the graphics card’s video outputs rather than the motherboard’s ports.
Laptop users: test an external display
If the laptop appears to run but its built-in screen stays black, connect an external monitor or TV using a supported output such as HDMI.
If the external display works, the laptop may have a problem with its:
- Display panel
- Display cable
- Backlight
- Related display hardware
That narrows the diagnosis considerably.
Listen for Beep Codes and Watch Diagnostic LEDs
A computer performs a Power-On Self-Test (POST) when starting.
If essential hardware fails during this process, the machine may never reach the operating system.
Instead, some systems communicate the failure through:
- Beep codes
- Blinking LEDs
- Motherboard debug lights
- Numeric POST codes
For example, repeated beeps can indicate memory or other hardware problems. However, there is no universal beep-code dictionary.
The exact pattern depends on the motherboard, BIOS/UEFI implementation, and computer manufacturer.
If you hear beeps or see a repeating LED pattern, record it exactly and check the support documentation for your specific computer or motherboard.
Don’t assume that a particular number of beeps always means the same thing across every PC.
Check the RAM if the PC Powers On but Won’t POST
Random-access memory (RAM) is another common area to investigate when a desktop receives power but can’t complete POST.
Typical symptoms include:
- Fans spinning with no display
- Diagnostic memory LED
- Repeated beep codes
- Failure after moving the PC
- Failure after installing or upgrading memory
If you’re comfortable working inside a desktop, reseating the RAM can help identify a loose module. Loose RAM is also highlighted in common PC troubleshooting guidance for systems that power up without producing a display.
How to reseat desktop RAM safely
Shut the computer down and disconnect it from AC power.
Then:
- Follow your PC or motherboard manufacturer’s service instructions.
- Open the side panel.
- Locate the DIMM memory modules.
- Release the retaining clips.
- Remove the module carefully by its edges.
- Reinstall it fully into the correct slot.
- Confirm the retaining clips lock into place.
- Reconnect power and test.
Avoid touching the gold contacts.
Test one RAM module at a time
If the computer has multiple DIMMs, testing one compatible module at a time can help identify a faulty stick or slot.
The correct memory slots and testing configuration depend on your motherboard, so consult its manual.
Don’t attempt internal laptop RAM troubleshooting unless the memory is user-serviceable and you’re comfortable following the manufacturer’s disassembly instructions.
Check the Graphics Card on a Desktop PC
A dedicated GPU can also produce the classic “fans running, black screen” symptom.
First inspect the external connections.
Check that:
- The monitor cable reaches the GPU
- PCIe power connectors are secure, where required
- The graphics card hasn’t become visibly displaced
If the computer was recently transported, an internal component may have shifted.
Advanced users can follow their motherboard and graphics-card documentation for reseating procedures.
If your processor and motherboard support integrated graphics, removing the dedicated GPU and testing the motherboard display output may help isolate a graphics-card problem.
This won’t work on every system because some CPUs have no integrated GPU.
Desktop Completely Dead? The PSU Becomes a Major Suspect
The power supply unit converts incoming AC electricity into the DC voltages required by the motherboard, CPU, storage devices, graphics card, and other components.
A failing PSU may produce:
- No power whatsoever
- Brief fan movement followed by shutdown
- Random restarts
- Intermittent startup
- Unusual noises
- Burning smell
Dell notes that abnormal noises, burning smells, intermittent power problems, and failed PSU diagnostic indicators can point toward power-supply hardware failure on applicable systems.
Don’t open the PSU enclosure
Opening a power-supply enclosure is different from opening your computer case.
A PSU contains components that can retain dangerous electrical energy. Do not dismantle it.
If you suspect a failed PSU, safer options include using manufacturer-provided built-in diagnostics where available or having the unit tested/replaced by someone qualified to work on the system.
What if the PSU fan spins?
That doesn’t automatically prove the PSU is healthy.
A power supply can start but still fail to provide stable output under load.
So avoid concluding that the motherboard is dead simply because you saw the PSU fan move.
Computer Turns On and Immediately Turns Off
A system that starts for one or two seconds and shuts down presents a different diagnostic path.
Possible causes include:
- Faulty PSU
- Loose RAM
- CPU cooling problem
- Motherboard fault
- Short circuit
- Incorrectly installed hardware
- Failed component
- Thermal protection
Think about what happened immediately before the problem appeared.
Did you recently:
- Build the PC?
- Upgrade RAM?
- Install a GPU?
- Replace the CPU cooler?
- Clean the computer?
- Move the tower?
- Experience a power surge?
If yes, inspect the component or connection you recently changed before assuming an unrelated part suddenly failed.
Check cooling hardware
If you’ve recently worked on the CPU cooler, verify that it is correctly installed according to the manufacturer’s instructions and that its fan or pump is connected appropriately.
Don’t repeatedly attempt to start a computer that is showing signs of serious overheating.
Try a Minimal Hardware Configuration
When a desktop still powers on but won’t POST, experienced users can simplify the system.
The basic idea is to remove non-essential components so fewer devices can cause the failure.
A diagnostic configuration might contain only the hardware required by that particular motherboard to attempt POST, such as:
- Motherboard
- CPU and cooler
- One RAM module
- PSU
- Required graphics hardware
Exactly what is “required” depends on the system.
Disconnecting additional storage drives, USB devices, expansion cards, and other non-essential hardware can help identify the faulty component. This minimal-hardware approach also appears in current troubleshooting guides for startup failures.
If the computer begins POSTing, reconnect components one at a time.
This approach is much more useful than randomly replacing expensive parts.
Reset BIOS/UEFI or CMOS Only When Appropriate
The BIOS or UEFI firmware initializes hardware before your operating system loads.
Incorrect firmware settings can occasionally prevent normal startup, especially after:
- Hardware upgrades
- Memory tuning
- Overclocking
- BIOS configuration changes
A CMOS reset restores certain firmware settings to defaults.
The procedure varies considerably between motherboards. It might involve:
- A clear-CMOS button
- Jumper pins
- A motherboard-specific procedure
Use your computer or motherboard manual rather than following generic pin-bridging instructions.
A CMOS reset can erase custom BIOS settings, including memory profiles and other configuration changes.
Be especially careful after a BIOS update
If the machine stopped starting during or immediately after a firmware update, don’t repeatedly experiment with random recovery procedures.
Some motherboards provide dedicated BIOS recovery or flashback features. Follow the exact manufacturer’s instructions for your model.
What If the Computer Reaches the Logo but Windows Won’t Start?
Once the manufacturer logo or BIOS/UEFI interface appears, your problem has moved beyond basic “no power” troubleshooting.
The hardware has successfully reached at least part of the startup sequence.
You may instead have a No Boot problem.
Dell describes this state as a computer that passes POST but cannot successfully load its operating system.
Possible causes include:
- Damaged Windows startup files
- Failed SSD or hard drive
- Incorrect boot order
- Interrupted Windows update
- Driver problem
- File-system corruption
- Missing boot device
Check whether the storage drive is detected
Enter your system’s BIOS/UEFI setup using the manufacturer-specified key.
Look for the installed SSD or hard disk drive (HDD).
If the drive isn’t detected, there may be a connection or hardware problem.
If it is detected but Windows won’t load, the operating system or boot configuration becomes a stronger suspect.
Use Windows Recovery Tools for Boot Failures
If Windows begins loading but repeatedly fails, the Windows Recovery Environment (Windows RE) may provide repair options.
Depending on the system and failure, available tools can include:
- Startup Repair
- Startup Settings
- Safe Mode
- System Restore
- Uninstall Updates
- Command Prompt
- Reset options
Use recovery tools only after you’ve established that the computer actually powers on and reaches the boot process.
A machine with no electricity cannot be repaired with Safe Mode or Startup Repair.
Protect your files
If the SSD or HDD appears to be failing and important data isn’t backed up, avoid unnecessary write operations or repeated recovery attempts.
Your priority may need to shift from “make Windows boot” to protect the data.
Important files should ideally already exist in at least one separate backup location.
my computer won’t turn on solutions After a Power Outage or Surge
A PC that stops working immediately after a blackout or electrical surge deserves extra caution.
First:
- Disconnect it from AC power.
- Disconnect unnecessary peripherals.
- Wait briefly.
- Inspect for visible damage or unusual smells.
- Test the wall outlet separately.
- Reconnect the computer and attempt a normal power-on.
For desktops, a surge can damage the PSU while leaving other components unaffected, but motherboard and peripheral damage is also possible.
If you smell burning or see damaged components, stop troubleshooting and disconnect the machine.
Don’t repeatedly power-cycle visibly damaged hardware.
What Common Troubleshooting Mistakes Should You Avoid?
The biggest mistake is replacing parts before identifying which startup stage is failing.
Mistake 1: Assuming a black screen means no power
If fans are spinning, troubleshoot video and POST before replacing the PSU.
Mistake 2: Blaming Windows when there are no lights
Windows doesn’t control whether electricity reaches an unplugged or failed system.
No lights and no fans require power-related troubleshooting first.
Mistake 3: Buying a new motherboard immediately
Motherboards can fail, but so can:
- Cables
- Chargers
- Batteries
- PSUs
- RAM
- GPUs
- Power buttons
- Displays
Eliminate simpler possibilities first.
Mistake 4: Trying every internet “hack”
Generic procedures for jumping PSU pins, shorting motherboard headers, dismantling power supplies, or blindly flashing firmware can create additional problems.
Use manufacturer documentation for your exact model.
Mistake 5: Changing several things simultaneously
Change one variable, then test.
Otherwise, if the computer starts, you won’t know which change solved the problem.
A Faster Diagnostic Order
Instead of trying fixes randomly, work from the safest and easiest checks toward hardware-level troubleshooting.
- Observe the symptoms. Look for LEDs, fans, beeps, and screen activity.
- Test the wall outlet. Confirm it with another device.
- Check power connections. Reseat external power cables and verify the PSU switch.
- Check the laptop adapter and battery. Use only compatible hardware.
- Perform a power reset.
- Disconnect external peripherals.
- Test the display. Check input, cable, monitor, and GPU connection.
- Read diagnostic codes. Look up beep or LED patterns for your exact system.
- Inspect user-serviceable internal components. RAM is a common starting point on desktops.
- Test a minimal configuration. Remove non-essential hardware if you’re experienced.
- Investigate PSU or motherboard failure.
- Troubleshoot Windows only if the machine reaches the boot stage.
This order prevents wasted effort and keeps invasive troubleshooting until later.
How to Tell Which Component Is Probably Failing
Symptoms can’t prove a diagnosis, but they can point you in the right direction.
| Symptom | Areas worth investigating |
| Absolutely nothing happens | Outlet, cable, adapter, PSU, battery, power button |
| Charging light absent | Adapter, cable, charging port, battery/power circuitry |
| Fans spin, screen black | Display, RAM, GPU, POST |
| Repeating beeps | Hardware/POST error; check manufacturer code |
| Diagnostic LED flashes | Check model-specific error code |
| Starts then instantly shuts off | PSU, RAM, cooling, motherboard, short |
| BIOS appears, Windows doesn’t | SSD/HDD, boot configuration, Windows |
| External monitor works | Laptop’s internal display system |
| Starts after removing peripheral | External device or related boot/configuration issue |
| Starts with one RAM module | RAM module, slot, or memory configuration |
Treat this table as a diagnostic starting point rather than proof that a particular component has failed.
When Should You Stop Troubleshooting?
There is a point where home troubleshooting stops being sensible.
Disconnect the computer and consider qualified repair assistance if you encounter:
- Burning smell
- Smoke
- Liquid damage
- Visible electrical damage
- Repeated sparking
- Damaged charging connector
- Suspected motherboard failure
- Suspected internal laptop power-circuit failure
- A PSU that may require internal repair
- Important data on a potentially failing drive
You should also stop if a procedure requires tools, electrical measurements, or disassembly beyond your experience.
Professional diagnosis can sometimes cost less than replacing several perfectly good components while guessing.
Should You Repair or Replace the Computer?
A failed cable or RAM module is very different from a failed motherboard in an old laptop.
Consider:
- Computer age
- Repair cost
- Replacement cost
- Warranty status
- Availability of replacement parts
- Overall performance
- Battery condition
- Storage health
- Value of the data
- Whether other components are also failing
A relatively new PC with a replaceable PSU may be worth repairing.
An aging laptop requiring an expensive motherboard replacement may not be.
If the computer is under warranty, check the manufacturer’s support terms before opening the chassis because unauthorized repairs or accidental damage during disassembly can complicate service coverage.
Prevent the Same Startup Problem From Happening Again
Not every hardware failure can be prevented, but a few habits reduce risk.
Keep vents clear so cooling systems can work properly. Avoid forcing connectors, and use compatible chargers and replacement parts.
For desktops, a suitable surge protector or uninterruptible power supply (UPS) can provide additional protection against some electrical disturbances and unexpected outages.
Most importantly, maintain regular backups.
A computer can be repaired or replaced. Important photographs, documents, and work may be far harder to recover from a failed storage device.
Final Takeaway
The most effective my computer won’t turn on solutions begin with diagnosis rather than component replacement.
If there are no lights or fans, investigate the outlet, power cable, charger, battery, PSU, and power button. If the computer receives power but displays nothing, shift your attention to the monitor, GPU, RAM, and POST diagnostics. If BIOS/UEFI appears but Windows doesn’t load, investigate the boot drive and operating system instead.
Start with external checks, change one thing at a time, and move toward internal hardware only when the symptoms justify it. That systematic approach is safer, faster, and far more likely to reveal what is actually preventing the computer from starting.
