
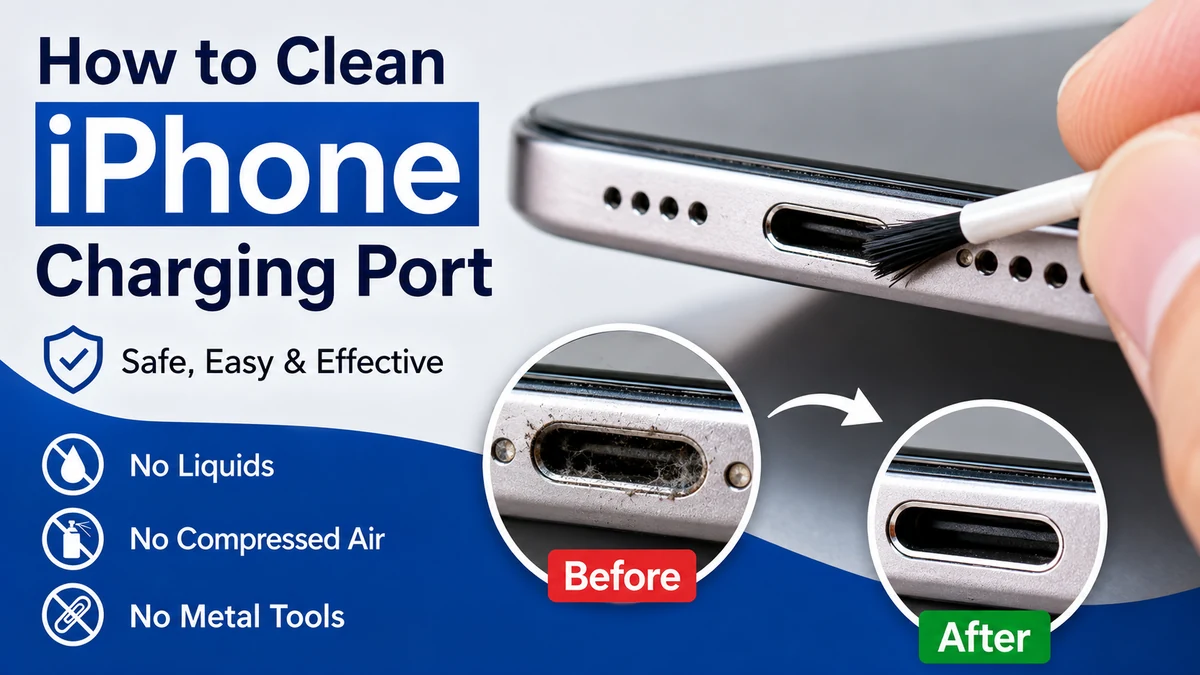

Your iPhone suddenly refuses to charge, the cable feels loose, or charging stops whenever you move the phone. Before assuming the battery or charging port has failed, look at something much simpler: pocket lint.
Dust, fibers, sand, and other debris can accumulate inside an iPhone’s Lightning or USB-C connector. Eventually, that buildup may prevent the charging cable from making a reliable connection. Apple itself recommends checking for and removing debris when troubleshooting an iPhone that won’t charge.
The safest answer to how to clean iphone charging port is to disconnect the cable, turn off the iPhone, inspect the connector under a bright light, and avoid moisture, compressed air, metal tools, or aggressive scraping. If debris cannot be removed without inserting or forcing an object into the connector, professional cleaning is safer than risking the delicate contacts.
This guide explains how to identify a dirty charging port, what you should and shouldn’t use, what to do about water, and how to tell when cleaning probably isn’t the solution.
Why an iPhone Charging Port Gets Dirty
An iPhone spends a surprising amount of time in environments filled with tiny particles.
Think about a phone repeatedly going into:
- Jeans pockets
- Handbags and backpacks
- Car compartments
- Work bags
- Bedding
- Dusty desks and countertops
Pocket lint is particularly troublesome. Each time you plug in your charging cable, loose fibers can be pushed farther into the connector. After repeated charging cycles, those fibers may become tightly compacted.
The problem isn’t always obvious from outside.
You might look at the bottom of the iPhone and see an apparently empty connector while a compressed layer of lint remains deeper inside. Repair guides commonly identify dirt, dust, and lint as causes of poor cable contact.
Lightning vs. USB-C iPhone Ports
The type of connector depends on your iPhone model.
Older iPhones commonly use Apple’s Lightning connector, while newer generations use USB-C. Although their internal designs differ, both connectors can accumulate debris and both contain contacts that you don’t want to scratch or damage.
That distinction matters when cleaning. Advice that involves aggressively scraping around inside a connector may create more problems than it solves.
Quick Takeaway: If your cable used to fit securely but now feels unusually loose, accumulated debris is one possible explanation. Don’t immediately assume the charging port needs replacement.
Signs Your iPhone Charging Port May Need Attention
A dirty connector doesn’t always cause complete charging failure.
The symptoms often develop gradually.
The Charging Cable Doesn’t Fit Properly
A Lightning or USB-C connector should seat normally without needing excessive force.
If a cable that previously fit correctly suddenly seems unable to go fully into the connector, inspect the port before pushing harder.
Compacted debris may be occupying space inside.
Your iPhone Charges Intermittently
You connect the charger and see the charging indicator.
A few seconds later, charging stops.
You move the cable slightly and charging begins again.
This behavior can happen when the cable isn’t making reliable contact, although a damaged cable or charging port can produce similar symptoms.
Charging Only Works at an Angle
Having to bend, hold, or position the charging cable at a particular angle is another warning sign.
Don’t continue doing this indefinitely. Repeated sideways pressure can put unnecessary stress on both the cable connector and the phone’s port.
You Can See Dust or Lint
Use a bright flashlight and look carefully into the connector without inserting anything.
Visible fibers, dust, or other material make contamination more likely.
The iPhone Says an Accessory Isn’t Supported
Apple says an accessory-related charging alert can occur when the iOS device has a dirty or damaged charging port, though a defective or incompatible charging accessory can also be responsible.
So treat the alert as a troubleshooting clue rather than proof that dirt is definitely the cause.
What to Use When Learning how to clean iphone charging port
This is where online advice becomes inconsistent.
Many third-party tutorials recommend toothpicks, cotton swabs, compressed air, brushes, or even rubbing alcohol. Some of these recommendations conflict with Apple’s current guidance.
For an iPhone, Apple’s instructions should take priority.
Apple’s general cleaning guidance says to unplug cables, switch off the iPhone, avoid moisture in openings, and not use compressed air.
Apple also specifically warns against inserting foreign objects such as cotton swabs or paper towels into a connector when dealing with moisture.
A conservative cleaning kit is therefore very simple:
| Item | Recommended use |
|---|---|
| Bright flashlight | Inspect the connector |
| Soft lint-free cloth | Clean around the exterior |
| Charging cable | Test after inspection/cleaning |
| Second known-good cable | Rule out cable failure |
| Compressed air | Avoid; Apple advises against it |
| Liquid cleaner | Keep out of the connector |
| Metal pin or needle | Never insert into the connector |
The goal isn’t to make the inside of the port cosmetically perfect. It’s to restore a reliable connection without damaging anything.
How to Clean an iPhone Charging Port Step by Step
If you’re researching how to clean iphone charging port because charging has become unreliable, start with the least invasive approach.
1. Disconnect Your iPhone
Remove the Lightning or USB-C cable and any other connected accessories.
Never clean around the connector while a charging cable remains attached.
2. Turn Off the iPhone
Apple recommends switching off the iPhone before cleaning it.
You can also go to:
Settings > General > Shut Down
Turning the device off is a sensible precaution before inspecting or cleaning around its openings.
3. Inspect the Port Under Bright Light
Position the iPhone so you can clearly see inside the connector.
A flashlight or another strong light source makes this much easier.
Look for:
- Pocket lint
- Dust
- Sand
- Fibers
- Dirt
- Discoloration
- Signs of moisture
- Bent or visibly damaged components
Don’t insert anything yet.
This inspection can tell you whether you’re dealing with loose surface debris, compacted material, possible corrosion, or no visible contamination at all.
4. Hold the Connector Facing Down
Position the iPhone with its charging connector facing downward.
This orientation allows already-loose material to fall outward instead of moving farther inside.
Don’t aggressively hit or shake the phone.
If you’re dealing with liquid rather than dust, Apple specifically recommends gently tapping the iPhone against your hand with its connector facing down before leaving it somewhere dry with airflow.
5. Clean Around the Opening
Use a clean, soft, lint-free cloth to wipe the exterior surrounding the charging connector.
Keep moisture away from the opening.
Apple recommends a soft lint-free cloth for general iPhone cleaning and warns users to avoid getting moisture into openings.
If debris is deeply compacted inside the connector and won’t come out without probing or scraping internal components, stop here.
That’s the point where professional cleaning becomes the lower-risk option.
6. Inspect the Connector Again
Use the flashlight for another look.
Don’t judge success by whether the connector looks brand new. You’re primarily checking whether visible obstruction has disappeared and whether the cable can seat normally again.
7. Test With a Known-Good Cable and Charger
Turn the iPhone back on.
Connect a cable and charger that you know work correctly.
Check whether:
- The connector seats properly
- Charging starts normally
- Charging remains stable
- The connection survives gentle normal movement
Apple recommends trying a different USB cable or charger during charging troubleshooting.
This simple test matters because a worn charging cable can mimic a dirty charging port.
Should You Use a Toothpick to Clean an iPhone Charging Port?
You’ll see this recommendation everywhere.
Numerous third-party repair and technology guides suggest gently removing compacted lint with a wooden toothpick.
That doesn’t make it Apple’s recommended method.
The problem isn’t simply whether wood conducts electricity. Any object inserted into the connector can potentially contact, bend, scrape, or otherwise damage internal components if too much force is used.
A toothpick can also break.
For that reason, the safest consumer approach is to avoid probing deeply inside the connector. If material is packed tightly enough that it requires scraping around internal contacts, having the connector professionally cleaned is preferable to turning a minor lint problem into physical port damage.
Can You Use Compressed Air?
It’s another common piece of internet advice—and another area where recommendations conflict.
Some repair guides suggest short bursts of compressed air for removing dust.
Apple’s current cleaning instructions, however, explicitly say not to use compressed air on an iPhone.
Following the device manufacturer’s instructions is the safer choice.
That means you shouldn’t blast canned air directly into the Lightning or USB-C connector, even if you’ve seen the method recommended elsewhere.
What Not to Put Inside an iPhone Charging Port
Knowing what not to do is arguably more important than knowing how to clean iphone charging port.
A charging connector contains small, delicate components. The wrong cleaning technique can turn an inexpensive cleaning problem into a hardware repair.
Avoid Metal Objects
Never dig inside the port with:
- Needles
- Safety pins
- SIM-eject tools
- Paper clips
- Tweezers
- Earrings
- Knives
- Other metal picks
Sharp metal objects can scratch or damage components inside the connector.
Don’t Pour Alcohol Into the Port
Isopropyl alcohol is widely used for electronics work, which leads some people to assume it’s automatically appropriate for every part of an iPhone.
It isn’t something you should pour or drip into the charging connector.
Apple’s general cleaning guidance says to avoid getting moisture into openings. Although Apple permits certain alcohol wipes for specified exterior surfaces, that isn’t permission to introduce alcohol into the charging port.
Don’t Use Water or Household Cleaner
The same principle applies to:
- Water
- Glass cleaner
- Soap
- Detergent
- Disinfectant spray
- Solvents
- Hydrogen peroxide cleaners
Keep liquids out of the connector.
Don’t Blow Into It With Your Mouth
Your breath contains moisture.
It also doesn’t provide a controlled way of removing compacted debris.
If you can’t see or remove an obstruction safely, don’t compensate by blowing harder.
Don’t Force the Charging Cable
A cable that suddenly won’t fit completely may be telling you something.
Pushing harder can compress debris farther into the port or put additional pressure on the connector.
Stop and inspect first.
How to Clean iPhone Charging Port After It Gets Wet
Water requires a completely different approach from lint.
Don’t attempt to clean or scrape a wet charging port.
On supported iPhones, iOS can display a liquid-detection warning when moisture is detected in a Lightning or USB-C connector or on the connected cable/accessory. Apple disables normal charging or accessory connections in this situation to help protect the hardware.
What to Do After a Liquid-Detection Alert
Apple recommends:
- Disconnect the charging cable.
- Gently tap the iPhone against your hand with the connector facing downward.
- Leave the phone in a dry place with airflow.
- Wait at least 30 minutes before trying the cable again.
- If the warning returns, allow more drying time.
Apple says complete drying can take as long as 24 hours in some circumstances.
Don’t repeatedly reconnect the cable every few minutes.
Can You Put a Wet iPhone in Rice?
No.
Apple specifically advises against putting an iPhone into a bag of rice because small rice particles can get into the device and cause damage.
Rice isn’t a substitute for airflow and time.
Don’t Use a Hair Dryer
Heat isn’t the answer either.
Apple advises against using an external heat source to dry an iPhone.
Avoid:
- Hair dryers
- Space heaters
- Radiators
- Heat guns
- Ovens
- Direct high-temperature airflow
Let evaporation happen naturally in a dry, ventilated area.
What About Wireless Charging?
If your model supports wireless charging, it can provide an alternative while you wait for the connector to dry.
Apple says wireless charging can still be used after ensuring the back of the iPhone is dry.
This avoids inserting a cable into a wet connector.
Why Cleaning Sometimes Fixes an iPhone That Won’t Charge
To understand why cleaning helps, think about how the connector works.
The charging cable needs to seat correctly and establish reliable electrical contact. A compacted layer of lint can physically prevent the plug from reaching its normal position.
The result may be:
Cable → debris obstruction → incomplete connection → intermittent/no charging
Removing the obstruction allows the plug to seat correctly again.
This explains why a dirty port can cause symptoms that initially look like a bad battery or failed charger.
But don’t assume every charging problem comes from dirt.
Apple identifies several possible causes, including a dirty or damaged charging port and defective or damaged charging accessories.
What to Do If Cleaning Doesn’t Fix the Problem
Your connector looks clear, but the iPhone still won’t charge.
Now it’s time to troubleshoot the rest of the charging system.
Try Another Cable
Charging cables wear out.
Look for:
- Fraying
- Bent connectors
- Damaged contacts
- Discoloration
- Loose connector ends
Test with another compatible, known-good cable.
If the second cable works normally, the phone’s charging port probably wasn’t the problem.
Try Another Power Adapter
A failed USB power adapter can also create what looks like an iPhone charging problem.
Test another compatible adapter and wall outlet.
Restart Your iPhone
Software occasionally contributes to charging or accessory recognition problems.
Apple includes restarting the iPhone among its recommended troubleshooting steps when charging accessories aren’t recognized properly.
Check iOS
Make sure the iPhone is running an appropriate current version of iOS.
Apple also recommends checking for software updates when troubleshooting unsupported or uncertified charging accessory alerts.
Look for Physical Damage
Cleaning cannot repair:
- Bent connector components
- Broken internal contacts
- Corrosion
- Impact damage
- A physically loose port
- Internal board damage
If the port looks damaged, stop experimenting with cleaning tools.
Dirt, Water, or Hardware Failure? How to Tell
Charging problems can look remarkably similar, so use the surrounding symptoms to narrow down the cause.
| Symptom | Possible cause | Sensible next step |
| Cable won’t seat normally | Compacted debris | Inspect connector |
| Visible lint | Dirt/debris | Gentle external cleaning |
| One cable fails, another works | Damaged cable | Replace/test cable |
| Liquid warning appears | Moisture | Disconnect and allow to dry |
| Multiple cables fail | Port, adapter, battery, or hardware issue | Continue troubleshooting |
| Port looks green/discolored | Possible corrosion | Seek professional service |
| Connector appears physically damaged | Hardware damage | Seek professional service |
| Wireless works but wired charging doesn’t | Cable/port-related issue possible | Test cable and connector |
Don’t diagnose the phone from one symptom alone.
For example, intermittent charging might come from compacted lint, but it could just as easily result from a worn Lightning or USB-C cable.
When Should You Stop Cleaning and Get Professional Help?
DIY cleaning makes sense only while the problem remains simple.
Stop if:
- Debris is tightly compacted and requires force to remove
- You see corrosion or unusual discoloration
- Internal parts appear bent
- The connector is physically loose
- The phone became wet and continues showing liquid alerts after drying
- Several known-good cables fail
- The iPhone still doesn’t charge after basic troubleshooting
- The device becomes unusually hot while charging
- Cleaning requires scraping delicate internal components
Apple says an iPhone that repeatedly displays liquid alerts with Apple Lightning or USB-C cables or accessories may require service.
The same cautious approach makes sense when visible physical damage is present.
How to Keep Your iPhone Charging Port Cleaner
You don’t need to clean the connector constantly.
In fact, repeatedly inserting cleaning objects creates unnecessary opportunities for damage.
Prevention is easier.
Keep Pockets Clean
Pocket lint is a common source of debris.
Occasionally turning empty pockets inside out before washing clothing can reduce the loose fibers that eventually end up around your phone.
Don’t Leave Your Phone on Dirty Surfaces
Workshops, beaches, dusty countertops, and outdoor tables expose the connector to fine particles.
Sand deserves particular caution because abrasive grains can damage surfaces and components.
Avoid Carrying Loose Debris in the Same Pocket
Try not to keep your iPhone in a pocket containing things that shed fibers or produce crumbs and dirt.
Inspect Instead of Routinely Scraping
There’s no need for an aggressive weekly charging-port cleaning schedule.
If charging works properly and the cable fits normally, leave the internal connector alone.
A quick visual inspection under good lighting is far safer than repeatedly poking around inside it.
Common Mistakes That Can Make the Problem Worse
Most charging-port damage during DIY cleaning comes from trying to solve the problem too aggressively.
One common mistake is assuming that if gentle cleaning doesn’t work, more force will.
Another is copying generic smartphone advice without checking Apple’s recommendations. Compressed air is a good example: several third-party guides suggest it, yet Apple’s current iPhone cleaning instructions explicitly advise against it.
Liquid is another source of confusion. Alcohol wipes may be suitable for certain exterior iPhone surfaces under Apple’s instructions, but that doesn’t mean liquid alcohol should be introduced into the charging connector.
And if you see a liquid-detection alert, don’t treat it as a dirty-port problem. Stop wired charging and let the connector dry.
Quick Takeaway: When cleaning a charging port, patience is safer than force. If you can’t remove the obstruction without probing delicate internal components, professional cleaning is the better next step.
Final Thoughts on how to clean iphone charging port
Learning how to clean iphone charging port is mostly about knowing when not to clean aggressively.
Start by disconnecting the cable, turning off the iPhone, and examining the Lightning or USB-C connector under bright light. Clean around the opening with a soft lint-free cloth, keep liquids away from the port, and follow Apple’s guidance by avoiding compressed air.
If the iPhone still doesn’t charge, test another cable, power adapter, and outlet before blaming the port. A persistent problem may indicate a damaged connector, charging accessory, battery, or another hardware issue.
And if debris is so deeply compacted that removing it requires force or scraping around internal contacts, stop. A professional cleaning is far less expensive than repairing a charging port damaged during an overly enthusiastic DIY attempt.
