
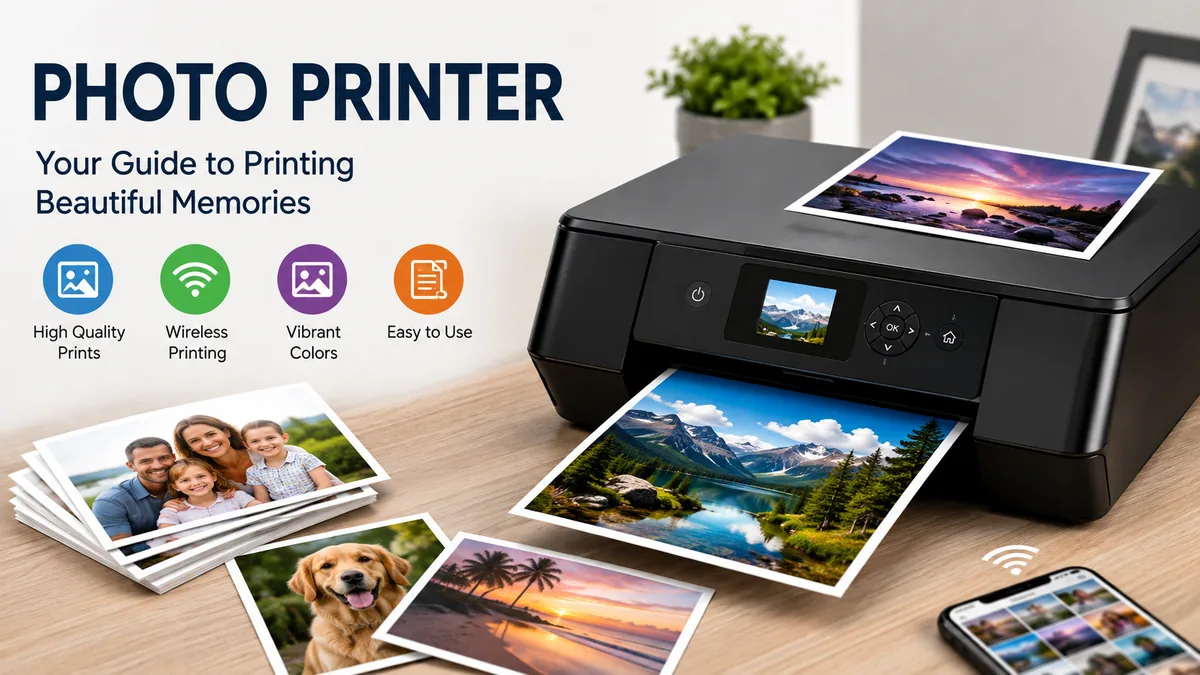

Digital photos are easy to take and even easier to forget inside a phone or cloud library. A photo printer turns those files into physical prints you can frame, archive, share, scrapbook, or use in creative projects.
The confusing part is that machines described as photo printers can work in completely different ways. A desktop inkjet designed for gallery prints has little in common with a pocket-size ZINK printer, while a dye-sublimation model follows another process entirely.
A photo printer is a printer designed to reproduce photographs with smoother color gradients, greater color accuracy, finer detail, and more suitable media handling than a typical document-focused printer. Most models use inkjet, dye-sublimation, or ZINK technology, with differences in print size, color quality, durability, portability, and operating cost.
This guide explains those differences so you can understand what actually affects a printed photograph.
What Is a photo printer?
A photo printer is optimized for producing photographic images rather than primarily printing text, invoices, spreadsheets, or office documents.
That distinction matters because a photograph contains continuous changes in color, brightness, skin tone, shadow detail, highlights, and texture. Reproducing those subtleties requires more than simply placing black and colored marks on paper.
Modern photographic printers may use:
- Four, six, eight, ten, or more ink colors
- Dye-based or pigment-based inks
- Specialized glossy, luster, matte, or fine-art papers
- Borderless printing
- Advanced color-management systems
- High-resolution printheads
- Dedicated photo-black, gray, red, or other additional inks
- ICC profiles for more predictable color reproduction
- Wireless printing through Wi-Fi, Bluetooth, or mobile apps
Professional machines can also handle thicker fine-art media and larger sheets.
For example, Canon’s professional imagePROGRAF range includes models designed around multi-ink pigment systems, while its PIXMA PRO line includes photo-focused printers using expanded ink sets. Epson likewise offers everything from consumer photo machines to SureColor printers intended for professional photography and fine-art reproduction.
A regular color printer can certainly print photographs. The difference is that a dedicated photographic model puts considerably more emphasis on tonal transitions, color gamut, media compatibility, and image quality.
How Does a photo printer Work?
The answer depends on the printing technology inside the machine.
Three technologies dominate consumer photographic printing:
- Inkjet
- Dye-sublimation
- ZINK or zero-ink printing
They can all turn the same JPEG or smartphone photograph into a physical image, but the way they create that image is very different.
Inkjet photo printing
An inkjet printer builds an image by depositing extremely small droplets of liquid ink onto coated paper.
Instead of laying down one uniform block of color, the printhead precisely combines tiny quantities of several inks. Viewed from a normal distance, those microscopic dots create smooth photographic tones.
Basic consumer inkjets commonly start with cyan, magenta, yellow, and black, known collectively as CMYK. Photo-focused machines often expand this set.
For example, Canon’s PIXMA G620/G650 family uses six dye-based inks, adding colors intended to improve photographic reproduction. Epson’s EcoTank Photo ET-8500 and ET-8550 also use six-color systems, with Epson specifying photographic dye inks alongside additional inks designed to improve photo and document performance.
Higher-end printers may add:
- Light cyan
- Light magenta
- Gray
- Light gray
- Photo black
- Matte black
- Red
- Blue
- Chroma-enhancing coatings
More inks do not automatically make a printer better, but a carefully designed expanded ink set can improve color gamut, grayscale neutrality, gradients, and subtle tonal reproduction.
Dye-sublimation photo printing
Dye-sublimation works differently.
Instead of spraying liquid ink through nozzles, the printer heats dye contained on a ribbon or film. That heat transfers the color onto specially designed photo media.
Canon describes dye-sublimation as a thermal-transfer process in which heat causes dye from an ink sheet to vaporize and transfer to the print material.
Many compact dye-sub printers move the same photograph through the machine several times.
A typical sequence applies:
- Yellow
- Magenta
- Cyan
- A protective finishing layer
This multi-pass process produces smooth gradients because the density of transferred dye can be controlled through heat.
Dye-sub is widely used in compact photo printers because the system can deliver consistent small-format prints without carrying multiple liquid ink cartridges. Recent portable models, including machines in Canon’s SELPHY category and Polaroid’s Hi-Print line, use variations of this approach.
ZINK photo printing
ZINK stands for Zero Ink.
A ZINK printer does not contain conventional ink cartridges or dye ribbons. Instead, the necessary color-forming material is embedded inside special paper.
The printer applies carefully controlled heat to activate different color-forming layers in the sheet.
That makes ZINK hardware extremely compact, which is why the technology commonly appears in pocket printers designed for smartphones.
The tradeoff is image quality. Portable dye-sublimation models generally provide smoother and more photographic-looking output than very small ZINK devices, while ZINK remains appealing where portability and simplicity matter more than maximum image fidelity.
Inkjet vs Dye-Sublimation vs ZINK
No single printing system is ideal for every photograph.
| Feature | Inkjet | Dye-Sublimation | ZINK |
|---|---|---|---|
| Image quality | Excellent to professional | Very good | Casual |
| Typical print sizes | Small to very large | Usually small/medium | Usually very small |
| Media variety | Excellent | Limited | Limited |
| Portable models | Some | Many | Many |
| Ink cartridges/tanks | Yes | No conventional liquid ink | No |
| Special paper required | Often recommended | Yes | Yes |
| Fine-art printing | Excellent on suitable models | Limited | Not intended for it |
| Color control | Extensive | More automated | Limited |
| Best suited to | Home photographers, enthusiasts, professionals | Events, family prints, portable printing | Journals, stickers, casual smartphone prints |
Inkjet technology gives photographers the greatest freedom.
You can choose glossy paper for punchy photographs, matte media for softer presentation, textured fine-art paper for exhibition work, and—in compatible wide-format models—print considerably larger images.
Dye-sublimation simplifies the process. The ribbon and paper are designed to work together, so there are fewer combinations to manage.
ZINK prioritizes convenience.
That makes the real question less about which technology is universally superior and more about what kind of photograph you want to produce.
Dye Ink vs Pigment Ink in a photo printer
Within inkjet printing, one of the biggest distinctions is between dye-based and pigment-based ink.
Dye-based ink
Dye ink uses colorant dissolved in liquid.
Its strengths typically include:
- Rich color
- Smooth gradients
- Strong performance on glossy paper
- Excellent saturation
- Relatively small droplet formation
This is why many consumer and enthusiast photo printers use dye-based color inks.
Canon’s PIXMA PRO-200S, for example, uses an eight-color dye-based system and supports photographic output up to A3+/13 × 19 inches. Independent testing has highlighted the model’s strong detail, vivid colors, and photographic output.
Pigment-based ink
Pigment ink contains microscopic solid color particles suspended in a carrier liquid.
Pigment systems are frequently used for professional photographic and fine-art printing because they work particularly well with matte and fine-art media and can offer strong print longevity when combined with compatible paper and proper storage.
Canon’s imagePROGRAF PRO-310, for example, uses its LUCIA PRO II pigment ink system. RTINGS reports that the printer produces highly detailed, color-accurate photographic output, while Canon positions the imagePROGRAF family for professional photographic and fine-art applications.
Which one produces better photos?
Neither answer is universally correct.
Dye ink can look spectacular on glossy media, especially when vivid color is the goal.
Pigment becomes especially attractive for:
- Fine-art printing
- Matte paper
- Exhibition work
- Black-and-white photography
- Photographers concerned with print longevity
The entire printing system matters more than the word “dye” or “pigment” on its own. Ink formulation, printhead design, paper, color management, image preparation, and printer profiles all affect the finished photograph.
What Actually Determines Photo Print Quality?
Manufacturers advertise specifications such as DPI heavily, but photographic quality cannot be reduced to one number.
Several factors work together.
Color gamut
Color gamut describes the range of colors a device can reproduce.
A broader useful gamut can help reproduce difficult colors more accurately, particularly saturated reds, greens, blues, and subtle transitions.
Expanded ink sets are one way manufacturers attempt to increase useful photographic color reproduction.
Tonal gradation
Photographs contain gradual transitions rather than hard blocks of color.
Look closely at:
- A clear blue sky
- Out-of-focus backgrounds
- Skin
- Sunset gradients
- Shadows
- Black-and-white photographs
A strong printing system renders those changes smoothly without visible banding or abrupt color shifts.
Black density
Deep blacks give photographs perceived contrast and dimensionality.
This becomes especially noticeable in monochrome photography, dark landscapes, portraits, night scenes, and fine-art images.
Photo-focused printers may include dedicated photo-black, matte-black, or gray inks to improve these areas.
Color accuracy
A saturated print is not necessarily an accurate print.
For photographic work, accuracy means reproducing colors in a controlled and predictable way.
Skin tones are particularly revealing. Slight errors in magenta, yellow, or overall white balance can make a portrait look unnatural even when the image initially appears colorful.
Resolution
Printer resolution is commonly expressed in dots per inch, or DPI.
Higher numbers describe how densely a printer can place dots, but comparing DPI specifications across manufacturers is not a reliable way to predict which machine makes the better photograph.
Printhead technology, dot size, ink placement, dithering, paper coating, color management, and viewing distance also influence perceived detail.
For context, Epson lists resolutions of up to 5,760 × 1,440 dpi for its EcoTank Photo ET-8500 and ET-8550 systems, while different manufacturers use different print architectures and measurement approaches.
Treat DPI as one specification—not a final image-quality score.
Photo Paper Matters More Than Many People Expect
Putting premium ink onto unsuitable paper can produce disappointing results.
Photographic paper is engineered to control how ink is absorbed and how light interacts with the finished surface.
Common finishes include:
Glossy
Glossy paper creates strong contrast, saturated colors, and a reflective surface.
It works particularly well for:
- Family photographs
- Travel images
- Colorful landscapes
- Albums
- Snapshot-size prints
The downside is reflections and visible fingerprints.
Luster and semi-gloss
Luster paper sits between glossy and matte.
It retains good contrast while reducing reflections, which makes it popular for portraits, weddings, exhibitions, and general photographic work.
Matte
Matte paper has little or no reflective shine.
It can suit:
- Fine-art photography
- Muted colors
- Black-and-white work
- Illustrations
- Prints displayed under strong lighting
Very deep blacks may behave differently on matte surfaces compared with glossy media, which is one reason professional photo printers may contain separate black inks for different paper types.
Fine-art media
Professional inkjets can print onto cotton rag, textured papers, baryta-style media, and other specialist substrates.
These papers can fundamentally change the character of a photograph.
Paper manufacturers such as Canon, Epson, Hahnemühle, and Canson offer media aimed at photographic and fine-art printing. Digital Camera World, for example, highlights dedicated papers from these manufacturers and notes that specific paper choices are designed around different printer and ink systems.
Why the Paper Setting on Your Printer Matters
Choosing “Glossy Photo Paper” instead of “Plain Paper” is not merely changing a label in the print dialog.
The media setting can affect:
- Ink quantity
- Printhead passes
- Drying behavior
- Color conversion
- Print speed
- Black ink selection
- Paper-feed settings
Epson explicitly explains that the media-type setting tells the printer what paper is being used so the machine can adjust ink coverage accordingly.
This leads to one of the simplest practical rules in home printing:
Match the printer’s media setting as closely as possible to the paper you actually loaded.
Using glossy photographic paper while leaving the driver set to plain paper can prevent the printer from applying the settings designed for that surface.
Understanding ICC Profiles and Color Management
One of the most frustrating experiences in photo printing is this:
The image looks right on the monitor, but the physical print looks too dark, too warm, too cool, or noticeably different in saturation.
This is partly because monitors and printers create color differently.
A display produces light.
Paper reflects light.
Those two mediums can never look completely identical.
Color management helps make the translation more predictable.
What is an ICC profile?
An ICC profile describes the color behavior of a device or printing condition.
For photographic printing, a profile can represent a particular combination of:
- Printer
- Ink
- Paper
- Printing conditions
Color-managed software uses that information when converting image colors into values the printer can reproduce.
ICC-based workflows are based on standards associated with the International Color Consortium and are commonly used to improve consistency between digital imaging devices and printed output.
Do casual users need ICC profiles?
Not necessarily.
Printer manufacturers often build good automatic color settings into their drivers and mobile applications.
For everyday snapshots, those controls may be enough.
ICC profiles become more useful when you need predictable output for:
- Professional photography
- Fine-art printing
- Portfolio work
- Print sales
- Consistent reprints
- Third-party photographic papers
The biggest mistake is allowing both editing software and the printer driver to independently perform conflicting color corrections. Advanced users generally choose a controlled color-management workflow rather than applying multiple corrections blindly.
Why Printed Photos Sometimes Look Too Dark
This common problem often has less to do with a faulty printer than expected.
Computer displays are illuminated. Paper is not.
If your screen is extremely bright while editing, you may reduce the photograph’s exposure until it looks correct on that display. Once printed on reflective paper, the same image can appear significantly darker.
For more predictable results:
- Edit on a reasonably calibrated display.
- Avoid running the monitor at unnecessarily high brightness.
- Use the correct paper profile or printer setting.
- Evaluate prints under suitable lighting.
- Make a small test print before committing expensive large-format paper.
Professional printing becomes much easier once the monitor, file, printer, paper, and viewing conditions are treated as one connected workflow.
What Photo Sizes Can You Print?
The available sizes depend heavily on the printer category.
Pocket prints
Pocket printers commonly create approximately 2 × 3-inch or similarly compact prints.
These are useful for:
- Journals
- Wallet photos
- Parties
- Scrapbooks
- Travel
- Stickers
Canon’s IVY 2, for example, is a smartphone-oriented mini printer built around app-based instant printing, while Xiaomi offers compact systems designed around small sticky-backed images.
4 × 6-inch prints
This is one of the classic snapshot formats.
Compact dye-sub machines frequently focus on 4 × 6-inch output because it is practical for albums and family photographs.
A4 and letter size
Desktop photographic inkjets often support standard office paper sizes while also handling dedicated photographic media.
This makes them useful when one machine needs to produce both everyday documents and photographs.
A3+ and 13 × 19 inches
Enthusiast printers commonly extend to A3+ or approximately 13 × 19 inches.
The Canon PIXMA PRO-200S and Epson EcoTank ET-8550 are examples of current models supporting larger photographic output. Epson lists borderless output up to 13 × 19 inches for the ET-8550.
Large-format printing
Professional photographic printers can go substantially wider.
Epson’s professional range includes machines aimed at photography and graphic arts in widths reaching well beyond desktop formats, while Canon offers large-format imagePROGRAF systems for photographic and graphic applications.
Once prints become large, image resolution, viewing distance, paper cost, color management, and file preparation become increasingly significant.
How Much Image Resolution Do You Need?
A camera does not need an extraordinary megapixel count to create a good small print.
A useful way to evaluate your file is through pixels per inch, or PPI.
Suppose an image is 3600 × 2400 pixels.
At 300 pixels per inch, it can produce approximately:
- 12 inches wide
- 8 inches high
That does not mean a print becomes unusable immediately below 300 PPI.
Larger photographs are normally viewed from farther away, so lower effective pixel density can still look excellent.
What matters is avoiding the assumption that the printer’s advertised DPI and your image’s PPI mean the same thing. They describe different parts of the process.
Portable photo printer vs Desktop Models
Portability has changed how people use physical photographs.
Small printers can now connect directly to phones and create a print at a party, wedding, classroom, trip, or family gathering.
Portable models commonly use:
- Bluetooth
- Wi-Fi
- Rechargeable batteries
- Proprietary mobile apps
- Dedicated paper packs
Current portable categories include Canon SELPHY and IVY devices, Fujifilm Instax printers, Polaroid Hi-Print models, Xiaomi portable printers, and similar smartphone-centered systems.
A portable printer makes sense when immediacy matters more than print size.
Desktop inkjets make more sense when you need:
- Larger output
- More paper choices
- Better fine-art capabilities
- Detailed color management
- Lower costs at higher photographic volumes
- Exhibition or portfolio printing
These products solve different problems, so comparing them purely by print resolution misses the point.
Ink Tanks vs Cartridges
Traditional inkjet printers use replaceable cartridges.
Many newer photographic models use refillable tanks instead.
Canon markets this approach as MegaTank in relevant models, while Epson uses the EcoTank name.
The key practical difference is the amount of ink supplied and how it is replenished.
Tank systems are particularly attractive when you print photographs frequently because full-page photographic output consumes considerably more ink than ordinary text.
For example, current photo-oriented EcoTank systems use refillable bottles, and Epson’s ET-8500/ET-8550 line combines that approach with six-color photographic printing.
Cartridge printers remain relevant, especially in professional systems where users prioritize exact ink formulations, specialized color sets, and particular print characteristics over minimum running cost.
When comparing printing expenses, consider the whole system, including:
- Ink
- Paper
- Maintenance
- Cleaning cycles
- Wasted test prints
- Print size
- Frequency of use
The cheapest printer to purchase is not automatically the cheapest printer to operate.
How to Get Better Results From a photo printer
Excellent hardware can still produce mediocre output when the workflow is wrong.
A reliable process looks like this:
1. Start with the best available image file
Use the original full-resolution photograph where possible rather than an image downloaded from social media or repeatedly compressed through messaging apps.
2. Crop for the final aspect ratio
A 4 × 6 print has a different aspect ratio from a square photograph.
If the file and paper have different proportions, either part of the photograph must be cropped or blank borders must remain.
Check the preview instead of allowing automatic cropping to remove an important face or object.
3. Make basic image corrections
Review:
- Exposure
- White balance
- Contrast
- Highlights
- Shadows
- Color
- Sharpening
Avoid aggressive sharpening intended to compensate for a blurry original. It usually creates halos rather than genuine detail.
4. Load the correct side of the paper
Many photographic papers have only one printable surface.
Check the packaging rather than guessing.
5. Select the correct media type
Match the driver’s setting to the loaded paper as closely as possible.
This affects how the printer deposits ink.
6. Select an appropriate print-quality setting
A draft or economy mode is useful for documents, not final photographic work.
Use the manufacturer’s recommended photo-quality mode when producing finished prints.
7. Check color-management settings
For everyday printing, the manufacturer’s automatic settings can work well.
For controlled photographic workflows, use the correct ICC profile and avoid accidental double color management.
8. Make a test print
Large premium paper is expensive.
A smaller test can reveal:
- Incorrect brightness
- Unexpected cropping
- Color casts
- Wrong paper settings
- Excessive saturation
- Poor sharpening
Fixing the problem before the full-size print saves ink and media.
Common Photo Printing Problems and Their Causes
Understanding the symptom often tells you where to look.
Horizontal lines or banding
Possible causes include:
- Clogged nozzles
- Misaligned printhead
- Incorrect print settings
- Very fast print mode
- Ink-delivery problems
Run the manufacturer’s nozzle-check procedure before repeatedly performing deep cleaning cycles.
Wrong color cast
If everything appears unusually red, green, yellow, or blue, investigate:
- Missing or clogged ink channels
- Wrong media settings
- Incorrect ICC profiles
- Driver color adjustments
- Third-party ink behavior
- Image-file color settings
Color casts can have both hardware and workflow causes, so replacing cartridges without diagnosis may not solve the problem.
Muddy or oversaturated photographs
Check whether the paper profile and printer settings match the actual media.
A printer placing an unsuitable amount of ink onto a particular coating can produce poor tonal separation.
Print looks different from the screen
This is normal to some extent because displays emit light while prints reflect it.
For tighter matching, improve monitor calibration, screen brightness, color management, and viewing conditions.
Cropped edges
Borderless printing usually enlarges the image slightly beyond the paper edges to ensure no white strip remains.
That means a small amount of the image may be lost.
Keep important faces, text, or details away from the extreme edges when preparing borderless prints.
How to Care for an Inkjet photo printer
Inkjet printers benefit from regular use.
Leaving a printer unused for long periods can allow ink to dry around parts of the ink-delivery system or nozzles.
A few practical habits help:
- Print periodically rather than leaving the machine dormant for months.
- Keep the printer powered and stored according to manufacturer guidance.
- Use nozzle checks before unnecessary deep-cleaning routines.
- Keep photo paper sealed when not in use.
- Avoid touching the printable surface.
- Store ink and media under the conditions recommended by the manufacturer.
- Keep dust away from paper paths and printable surfaces.
Do not run repeated cleaning cycles casually. Cleaning consumes ink, and aggressive troubleshooting can become expensive.
If a nozzle check is clean, look elsewhere before assuming the printhead is blocked.
Are Laser Printers Good for Photographs?
Color laser printers can reproduce photographs, but they serve a different purpose.
Laser printers excel at:
- Text documents
- Charts
- Presentations
- High-volume office work
- Fast general-purpose output
Photographic inkjets generally provide smoother tonal transitions and a wider choice of specialist photographic media.
This distinction is reflected in modern printer testing: photo-focused recommendations remain dominated by inkjet and dedicated dye-sublimation systems rather than office laser printers.
A color laser can be perfectly adequate for a photograph inside a business report.
It is not normally the first choice for a framed portrait or fine-art print.
Does a Dedicated Photo Printer Still Make Sense?
For many people, sending occasional photographs to a professional lab remains simpler than owning printing equipment.
Home printing makes more sense when you value control.
It allows you to adjust the image, print it, inspect it under real light, modify it, and print again without outsourcing each iteration.
That can be particularly useful for:
- Photographers
- Artists
- Designers
- Scrapbookers
- Families creating albums
- Photography students
- Event photographers
- Small creative studios
Professional photographers also gain the ability to choose the exact paper surface and control the final interpretation of an image rather than stopping their workflow when the digital edit is finished.
On the other hand, occasional users should consider the realities of ink maintenance, media storage, printer space, and consumable costs.
Sometimes ordering ten photographs is more practical than maintaining equipment throughout the year.
Understanding Current Photo Printer Categories
The modern market covers several very different levels of photographic printing.
At the small end are pocket printers intended primarily for smartphones.
Compact dye-sublimation models occupy the next level, creating more conventional photographs while remaining relatively portable.
Desktop inkjets cover everything from family snapshots to serious enthusiast work.
Large professional machines focus on fine art, exhibitions, production environments, and commercial photography.
Current examples illustrate that range well. Canon’s G620/G650 uses six dye inks for economical home photo output, while the PIXMA PRO-200S expands to an eight-color dye system for A3+ photography. At the professional end, the imagePROGRAF PRO-310 uses a ten-color pigment system. Epson’s ET-8500 and ET-8550 use six-color refillable systems, with the ET-8550 extending to 13 × 19-inch borderless printing.
Those differences reveal a useful principle:
A photo printer should be understood by its intended output, not simply by its brand or advertised resolution.
What to Look for When Understanding or Comparing Photo Printers
Instead of focusing on a single specification, examine the printing system as a whole.
Pay particular attention to:
- Printing technology
- Dye versus pigment ink
- Number and purpose of inks
- Maximum paper size
- Borderless capabilities
- Supported paper thickness and finishes
- Cartridge versus refillable tank design
- Cost of ink and paper
- Color-management support
- ICC profile availability
- Connectivity
- Mobile-app support
- Print speed
- Maintenance requirements
- Physical printer size
If portability matters, battery life and print-pack availability become more relevant.
If fine-art output matters, media handling, pigment inks, black density, grayscale performance, ICC profiles, and paper support deserve more attention.
If you print hundreds of family photos, consumable cost may matter more than having ten ink colors.
There is no meaningful “best” specification without considering the intended photograph.
The Practical Takeaway
A photo printer is best thought of as a complete imaging system rather than simply another color printer.
Inkjet technology offers the broadest range of sizes, papers, inks, and professional controls. Dye-sublimation provides convenient and consistent photographic output, especially in compact formats. ZINK sacrifices some image fidelity for extremely portable, cartridge-free printing.
For better results, concentrate on the factors that genuinely affect the finished photograph: image quality, suitable paper, correct media settings, ink technology, color management, print size, and realistic running costs.
And once those basics are right, the most useful step is surprisingly simple: make a test print and look at it under real light. A physical photograph often reveals things a bright computer display never will.
