

Need to record a presentation, online tutorial, software demonstration, or something happening on your laptop screen? You don’t need expensive software or advanced technical skills to get started.
Learning how to screen record on laptop is straightforward because modern Windows and Mac computers include built-in screen recording tools.
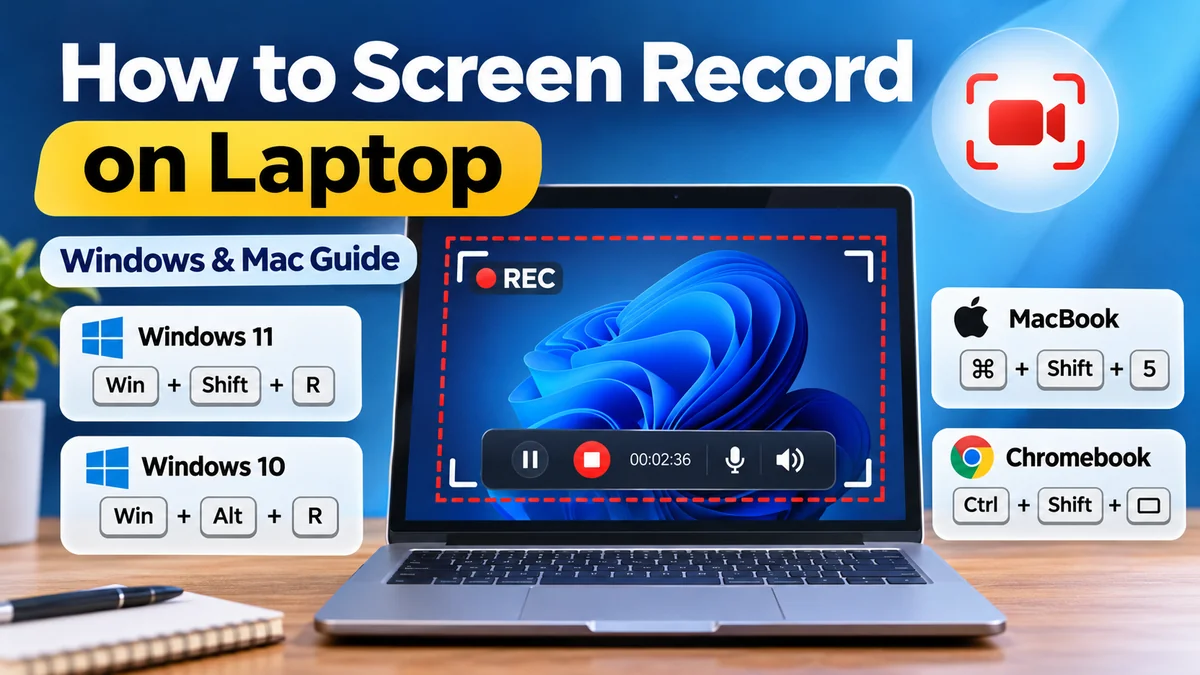
To screen record on a laptop, Windows users can open Snipping Tool with Windows + Shift + R or use Xbox Game Bar with Windows + Alt + R. Mac users can press Command + Shift + 5 to access screen recording controls. Select the recording area, choose audio settings, and start recording.
This guide explains the easiest screen recording methods for Windows 11, Windows 10, MacBook, and Chromebooks. You’ll also learn how to record audio, find saved videos, troubleshoot common problems, and improve recording quality.
How to Screen Record on Laptop Using Windows 11
Windows 11 includes multiple ways to record your screen without installing third-party applications. The most convenient options are Snipping Tool and Xbox Game Bar.
Method 1: Record Your Screen Using Snipping Tool
Snipping Tool is a built-in Windows application that supports screenshots and video recording.
It is particularly useful for recording tutorials, browser demonstrations, presentations, and selected portions of your desktop.
Steps to record your screen:
- Press Windows + Shift + R to open the screen recording interface on supported Windows 11 versions.
- Alternatively, search for Snipping Tool in the Start menu.
- Select the video recording option if it isn’t already selected.
- Click New and drag your cursor to select the area you want to capture.
- Configure microphone and system audio options if available.
- Click Start to begin recording.
- Perform the actions you want to capture.
- Click Stop when finished.
- Preview and save your recording as an MP4 video.
Snipping Tool is especially helpful when you only need to record a specific window or screen region rather than your entire display.
Practical tip: Close unnecessary notifications before recording. Incoming messages, pop-ups, and other interruptions can appear in your video if they enter the selected recording area.
Method 2: Record Your Screen Using Xbox Game Bar
Xbox Game Bar is another built-in Windows recording utility.
Although designed primarily for gaming, it can record many desktop applications, including browsers and productivity software.
Follow these steps:
- Open the application you want to record.
- Press Windows + G to launch Xbox Game Bar.
- Locate the Capture widget.
- Click the recording button or press Windows + Alt + R.
- Use Windows + Alt + M to toggle microphone recording if needed.
- Continue working in the application.
- Press Windows + Alt + R again to stop.
Recordings are normally saved in:
Videos > Captures
Xbox Game Bar usually saves video files in MP4 format, making them easy to play, edit, or share.
However, Game Bar has limitations. It generally cannot record the Windows desktop or File Explorer directly, and it is not designed for freely selecting arbitrary screen regions.
Snipping Tool vs. Xbox Game Bar
| Feature | Snipping Tool | Xbox Game Bar |
|---|---|---|
| Built into Windows 11 | Yes | Yes |
| Record selected screen area | Yes | No |
| Record supported applications | Yes | Yes |
| Microphone recording | Supported on updated versions | Yes |
| System audio | Supported on updated versions | Yes |
| Record gameplay | Basic recording | Designed for gameplay |
| Output format | MP4 | MP4 |
| Best use | Tutorials and demonstrations | Games and application capture |
For general screen recording on Windows 11, Snipping Tool is often the more flexible choice. Xbox Game Bar works well when you need a quick recording of a supported application.
How to Screen Record on Laptop Using Windows 10
Windows 10 does not provide the same built-in Snipping Tool video recording experience as updated Windows 11 systems.
However, it includes Xbox Game Bar, which can record supported applications without requiring additional software.
Record Your Screen on Windows 10 Without Software
- Open the program or browser you want to capture.
- Press Windows + G.
- If prompted, enable Xbox Game Bar through Windows settings.
- Open the Capture widget.
- Click Start Recording.
- Press Windows + Alt + R to stop recording.
- Open the Captures folder to locate your video.
You can also open Windows Settings and search for Xbox Game Bar to review the available controls.
If the recording button is disabled, the application or current screen may not support Game Bar recording.
Can You Record the Entire Desktop on Windows 10?
Xbox Game Bar is not a full desktop recording solution. It is mainly intended to capture individual applications and games.
If you need to record your entire desktop, multiple windows, or a specific screen region, consider a dedicated recorder such as OBS Studio.
OBS Studio supports full-display capture, window capture, microphone input, desktop audio, and more advanced recording layouts.
How to Screen Record on Laptop Using MacBook
Apple laptops include native screen recording functionality through macOS.
You can capture the entire display or select a specific area without downloading additional applications.
Method 1: Use the Mac Screen Recording Shortcut
The fastest way to start recording on a MacBook is through the Screenshot toolbar.
Steps:
- Press Command + Shift + 5.
- Wait for the Screenshot toolbar to appear.
- Choose Record Entire Screen or Record Selected Portion.
- Click Options to configure the microphone and save location.
- Click Record.
- Perform the actions you want to capture.
- Click the Stop button in the menu bar or press Command + Control + Escape.
By default, macOS typically saves screen recordings to the Desktop unless you choose another location.
The recording is commonly saved as a .mov file.
Method 2: Record Your Screen Using QuickTime Player
QuickTime Player is another built-in option.
On modern macOS versions, QuickTime’s screen recording command opens the same native screenshot and recording controls.
Steps:
- Open QuickTime Player.
- Select File > New Screen Recording.
- Choose the full-screen or selected-area recording option.
- Configure your microphone settings.
- Start recording.
- Stop the recording when finished.
- Save or locate the resulting video.
QuickTime is useful when you want a familiar Mac application for managing and playing recorded videos.
How to Record Screen With Audio on Mac
Mac screen recording supports microphone input through the native recording toolbar.
To enable it:
- Press Command + Shift + 5.
- Click Options.
- Under Microphone, select your built-in microphone or an external microphone.
- Start recording.
Important: Selecting a microphone does not automatically capture internal system audio.
If you need to record sound produced by applications, such as music, video playback, or software notifications, you may need additional software or a compatible audio-routing setup.
OBS Studio and virtual audio devices can provide more control over system audio capture, depending on your macOS version and configuration.
How to Screen Record on a Chromebook
Chromebooks running ChromeOS also include a built-in screen recording tool. You can capture the full display, a specific window, or a selected area.
Record Your Chromebook Screen Step by Step
- Press Ctrl + Shift + Show Windows. The Show Windows key usually displays a rectangle with two lines.
- Select Screen record from the toolbar.
- Choose full screen, partial screen, or window recording.
- Open Settings to configure microphone audio, device audio, or both.
- Select the screen or window to begin recording.
- Click Stop recording in the bottom-right corner when finished.
Chromebook recordings are normally saved in the Downloads folder, although you can select a different destination.
ChromeOS also supports optional camera overlays and indicators for mouse clicks and keyboard shortcuts, which can make instructional videos easier to follow. Chromebook Help+1
How to Screen Record on Laptop With Audio
A screen recording without sound may be sufficient for a visual demonstration, but tutorials, online lessons, and presentations often need audio.
There are two main audio sources to understand:
- Microphone audio: Your voice or sounds captured through a connected microphone.
- System audio: Sounds produced by the laptop, including application audio, notifications, and video playback.
Some recording applications support both simultaneously, while others require additional configuration.
Record Screen and Voice on Windows
On Windows 11, updated versions of Snipping Tool allow you to configure microphone and system audio recording.
Open the recording interface, select your capture area, and check the microphone and audio controls before clicking Start.
For Xbox Game Bar:
- Press Windows + G.
- Open the Audio or Capture controls.
- Enable your microphone.
- Review the Capturing settings to include the audio sources you need.
- Start recording with Windows + Alt + R.
If your microphone isn’t detected, open Settings > System > Sound > Input and check the selected recording device.
Record Screen and Voice on Mac
On a MacBook, press Command + Shift + 5, select Options, and choose your microphone.
For internal system audio, availability depends on your macOS version and recording application. On versions without native system-audio capture, additional audio-routing software may be required.
Before recording a long presentation, make a short test clip to confirm your voice and application audio are captured correctly.
Best Free Screen Recording Software for Laptops
Built-in recorders handle everyday tasks, but dedicated applications offer more control over video quality, audio mixing, webcam overlays, and editing.
| Software | Windows | Mac | Main advantage |
|---|---|---|---|
| OBS Studio | Yes | Yes | Advanced recording and streaming |
| Snipping Tool | Windows 11 | No | Simple region recording |
| Xbox Game Bar | Yes | No | Quick app and gameplay capture |
| QuickTime Player | No | Yes | Built-in Mac recording |
| ShareX | Yes | No | Customizable screen capture |
| Loom | Yes | Yes | Screen and webcam communication |
OBS Studio for Advanced Screen Recording
OBS Studio is a free, open-source application widely used for video recording and live streaming.
It supports multiple capture sources, including:
- Full-screen display capture
- Individual application windows
- Webcam video
- Microphone input
- Desktop audio
- Multiple scenes and layouts
To record with OBS Studio, install the application from its official website, add a Display Capture or Window Capture source, configure your audio devices, and click Start Recording.
Click Stop Recording when finished.
OBS is particularly useful for educational videos, software demonstrations, and longer recording sessions. Its interface has more settings than most built-in recorders, so beginners may need some time to become familiar with it.
ShareX for Windows Screen Capture
ShareX is a free Windows utility with screenshot, screen recording, and automation features.
Depending on its configuration, it can capture video or animated GIFs. Some recording functions use FFmpeg.
ShareX is useful when you frequently need to capture selected screen regions or automate repetitive capture tasks.
Loom for Screen and Webcam Recording
Loom focuses on making screen recordings easy to share.
It is commonly used for explaining workflows, giving feedback, and creating short instructional videos.
Unlike a basic local recorder, Loom emphasizes video communication and sharing. Some features and recording limits depend on the available plan.
How to Screen Record on Laptop Without Installing Software
If you want the quickest possible method, use the recording tool already included with your operating system.
Quick screen recording shortcuts
| Windows 11 | Windows + Shift + R |
| Windows 10/11 Game Bar | Windows + Alt + R |
| MacBook | Command + Shift + 5 |
| Chromebook | Ctrl + Shift + Show Windows |
These shortcuts offer a convenient starting point without requiring a separate recording application. Microsoft Support+3
For recording multiple displays, mixing audio sources, or capturing your webcam alongside the screen, dedicated software may be more suitable.
How to Screen Record on HP, Dell, Lenovo, and ASUS Laptops
The screen recording process generally depends on your operating system rather than your laptop manufacturer.
An HP laptop running Windows 11 usually offers the same built-in recording tools as a Dell, Lenovo, Acer, or ASUS laptop running Windows 11.
How to Screen Record on HP Laptop
For an HP laptop running Windows 11, press Windows + Shift + R to open Snipping Tool’s video capture interface.
Select your screen area and click Start.
For Windows 10, try Windows + G to open Xbox Game Bar.
How to Screen Record on Dell Laptop
Dell laptops running Windows can use Snipping Tool or Xbox Game Bar.
Open the application you want to record, press Windows + Alt + R, and stop recording using the same shortcut.
If the shortcut doesn’t work, check whether Xbox Game Bar is enabled and whether the active application supports recording.
How to Screen Record on Lenovo Laptop
Lenovo ThinkPad, IdeaPad, and Yoga laptops generally follow the same Windows recording steps.
On Windows 11, Snipping Tool is convenient for selected-area recording. Xbox Game Bar is useful for supported applications.
Some Lenovo models also include manufacturer utilities, but these are not necessary for basic screen recording.
How to Screen Record on ASUS or Acer Laptop
On ASUS and Acer Windows laptops, use Windows + Shift + R for Snipping Tool recording or Windows + G for Game Bar.
For advanced recording, including webcam overlays or multiple audio sources, OBS Studio is an alternative.
Key takeaway: You usually don’t need brand-specific screen recording software. Check your Windows version first, then select the appropriate built-in tool.
Where Do Screen Recordings Save on a Laptop?
The save location depends on your operating system and recording application.
| Operating system or tool | Typical save location |
|---|---|
| Windows Xbox Game Bar | Videos > Captures |
| Windows Snipping Tool | Videos > Screen Recordings or selected save location |
| macOS Screenshot | Desktop by default |
| QuickTime Player | Location selected when saving |
| Chromebook | Downloads by default |
| OBS Studio | Configured recording path |
How to Find a Missing Screen Recording
If you can’t find your recorded video, try these steps:
- Open File Explorer on Windows or Finder on Mac.
- Check the Videos, Desktop, and Downloads folders.
- Search for recent
.mp4,.mov, or.webmfiles. - Sort files by date modified.
- Open your recorder’s settings to check the configured output folder.
On Windows, Xbox Game Bar recordings are generally saved as MP4 files in the Captures folder. Microsoft Support
If you stopped recording but the video is missing, check whether the application displayed an error or failed to save the file.
How to Improve Screen Recording Quality
A successful recording should be readable, smooth, and easy to understand. Higher resolution alone doesn’t guarantee better results.
Choose the Right Resolution
For most tutorials, 1920 × 1080 pixels (Full HD) provides a good balance between clarity and file size.
A 1280 × 720 recording may be adequate for short demonstrations or situations where storage space is limited.
Recording at 4K can provide more detail, but it creates larger files and may require more processing power.
Select an Appropriate Frame Rate
Frame rate determines how many individual frames are recorded each second.
| Frame rate | Recommended use |
|---|---|
| 15 FPS | Simple, low-motion demonstrations |
| 24 FPS | Basic presentations |
| 30 FPS | Tutorials, software walkthroughs |
| 60 FPS | Gaming and fast-moving content |
For most educational recordings, 30 FPS is sufficient.
Gaming footage often benefits from 60 FPS when the laptop can maintain smooth performance.
Use Suitable Video Formats
MP4 with H.264 encoding is a practical choice for general compatibility.
MOV is common for macOS recordings, while WebM is frequently used for browser-based recordings and ChromeOS captures.
Some recording tools offer additional formats, including MKV. For example, OBS Studio can record to MKV and remux the result into MP4 afterward.
The best format depends on where you intend to play, edit, or upload the recording.
Reduce Background Noise
Audio quality matters just as much as video quality for instructional content.
Use a quiet room, position your microphone properly, and avoid placing it directly beside a noisy laptop fan.
Headphones can help prevent speaker audio from leaking into the microphone.
Prepare Your Screen Before Recording
Before clicking Record:
- Close unnecessary applications.
- Disable distracting notifications.
- Hide passwords and private information.
- Increase text size when demonstrating small interface elements.
- Check that your recording area includes everything needed.
- Make a short test recording.
These small preparations can save considerable editing time.
Why Is Screen Recording Not Working on My Laptop?
Screen recording problems can result from unsupported applications, incorrect permissions, missing audio devices, or insufficient storage.
The following troubleshooting steps address common situations.
Screen Recording Shortcut Not Working
If Windows + Alt + R doesn’t start recording, open Xbox Game Bar manually using Windows + G.
Check whether the active application supports Game Bar capture.
For Windows 11, try Snipping Tool instead.
If Windows + Shift + R doesn’t open recording controls, launch Snipping Tool from the Start menu and select Record.
Screen Recording Has No Sound
First, identify which audio source is missing.
If your voice isn’t recorded, check the microphone selection and operating system permissions.
If application sound is missing, confirm that the recorder supports system audio and that the relevant capture setting is enabled.
For Xbox Game Bar, Microsoft provides options for including system and application sounds in recordings. Microsoft Support
Screen Recording Shows a Black Screen
A black screen may occur because of graphics capture incompatibilities, application restrictions, or protected content.
Try switching from display capture to window capture, or vice versa, if your software supports both.
Restarting the recorder and updating graphics drivers may also resolve some capture problems.
Certain streaming services and protected applications deliberately prevent recording. Screen recording software cannot necessarily bypass these restrictions.
Screen Recording Is Laggy
Lagging or choppy video often indicates that the laptop is struggling to record and run other applications simultaneously.
Try lowering the recording resolution from 4K to 1080p or reducing the frame rate from 60 FPS to 30 FPS.
Close unnecessary applications, connect your laptop to power, and check whether your recorder supports hardware encoding.
Screen Recording Stops Automatically
If recording ends unexpectedly, check available storage space, battery settings, and application stability.
Large video files can fill a nearly full drive quickly, particularly at high resolutions or bitrates.
For long sessions, keep your laptop connected to power and ensure sufficient free storage.
Can You Screen Record Zoom, Google Meet, or Online Classes?
Technically, screen recording tools can capture many video conferencing and educational applications, subject to software restrictions and operating system permissions.
However, there are important differences between recording your own screen and using a meeting platform’s built-in recording function.
For example, Zoom and Google Meet may offer recording capabilities depending on the account, meeting settings, and permissions.
A local screen recorder may capture the visible meeting window, but audio capture can vary.
Before recording a meeting, class, or private conversation, obtain appropriate permission and follow applicable laws and organizational policies.
For personal study, recording your own presentation or a demonstration you created is generally more straightforward than capturing someone else’s private session.
Can You Screen Record With Webcam and Screen Together?
Yes. Some recording applications support simultaneous webcam and screen capture.
This is useful for educational videos, software tutorials, presentations, and narrated demonstrations.
OBS Studio, for example, allows you to add a Video Capture Device source alongside a Display Capture source.
You can resize the webcam video and position it in a corner of the screen.
Some Chromebook recording configurations also support a front-camera overlay.
For basic tutorials, a webcam isn’t essential. A clear screen recording with understandable narration is often enough.
How Long Can You Screen Record on a Laptop?
There is no single recording time limit that applies to every laptop.
The maximum duration depends on your recording software, available storage, battery life, system performance, and any application-specific restrictions.
A short five-minute tutorial usually requires relatively little preparation. A two-hour lecture or gameplay session needs more attention to storage and power.
As an illustration, a recording at a constant video bitrate of 8 Mbps uses approximately 3.6 GB per hour before accounting for audio and container overhead.
Actual file size varies with the recording format, compression, resolution, frame rate, and content.
For longer recordings, use reliable storage, connect the laptop to power, and test the recording settings beforehand.
How to Edit and Share a Laptop Screen Recording
Once you’ve recorded your screen, you may want to remove mistakes, shorten the video, or highlight important steps.
Trim the Beginning and End
Many recordings contain a few seconds of unnecessary footage while you start or stop the recorder.
Use a basic video editor to trim these sections.
Windows users can use supported editing applications such as Microsoft Clipchamp, while Mac users can use QuickTime Player for basic trimming.
Add Captions or Annotations
Captions make instructional videos easier to follow, especially when viewers watch without sound.
Annotations such as arrows, highlights, and zoom effects can draw attention to important buttons or settings.
Avoid adding too many visual effects, which can make a simple tutorial harder to understand.
Share Your Recording
MP4 is a widely supported format for sharing video recordings through messaging services, cloud storage, and learning platforms.
Before sharing, review the entire recording to make sure it doesn’t contain passwords, private messages, account information, or other sensitive content.
If the video is too large, consider exporting it at a lower bitrate or resolution rather than reducing quality unnecessarily.
How to Screen Record on Laptop: Final Tips
Learning how to screen record on laptop is easier once you identify the operating system and the type of recording you need.
Windows 11 users can start with Snipping Tool for selected-area recordings, while Windows 10 users can use Xbox Game Bar for supported applications. MacBook users can press Command + Shift + 5, and Chromebook users can access the built-in Screen Capture toolbar.
For advanced requirements such as multiple recording sources, webcam overlays, or detailed audio controls, OBS Studio offers greater flexibility.
Start with a short test recording, confirm that your audio works, and check the saved video before recording an important presentation or tutorial.
