
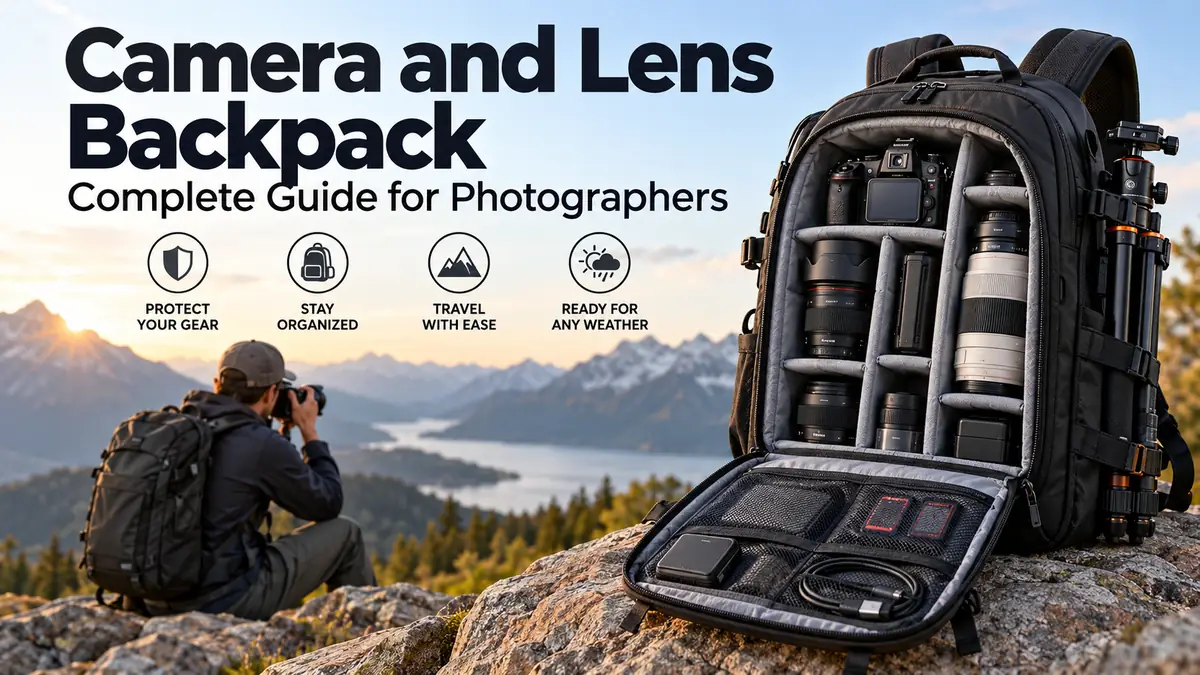

Camera bodies are tough enough for everyday shooting, but lenses, mounts, filters, screens, and electronics still need protection from impacts, moisture, dust, and constant movement. A normal backpack rarely provides the separation or padding photography equipment needs.
A camera and lens backpack is a padded, compartmentalized backpack designed to carry a DSLR or mirrorless camera, interchangeable lenses, batteries, memory cards, and other photography equipment securely. Good designs combine adjustable dividers, impact protection, weather resistance, comfortable straps, and fast access while keeping delicate pieces of equipment from hitting each other.
Choosing one becomes much easier when you stop thinking about the bag itself and start with the equipment you actually need to carry.
What Is a Camera and Lens Backpack?
A camera and lens backpack is a purpose-built photography bag with separate padded spaces for camera bodies, lenses, flashes, and accessories.
Unlike a conventional backpack, its main compartment normally uses removable or adjustable padded dividers. These dividers create individual spaces around equipment so a camera body cannot slide into a lens or other hard accessory while you walk.
Typical storage may include:
- DSLR or mirrorless camera bodies
- Prime and zoom lenses
- Telephoto lenses
- Flash units
- Batteries and chargers
- Memory cards
- Lens filters
- Cleaning equipment
- Laptop or tablet
- Drone equipment
- Tripod or monopod
- Personal items
Capacity varies dramatically. For example, some current 25L designs are intended for a camera body, several lenses, accessories, and a 15-inch laptop, while larger 32L models can accommodate two camera bodies, multiple lenses, a flash, and a laptop.
The right capacity isn’t necessarily the largest one available. A bag should fit your working kit closely enough to keep equipment stable without encouraging you to carry gear you rarely use.
Why a Camera and Lens Backpack Protects Gear Better
The biggest difference between a photography backpack and an ordinary daypack is not the number of pockets. It is how the interior manages impact and movement.
Padded dividers prevent equipment from colliding
Camera lenses contain precisely aligned optical and mechanical components. Camera bodies also have vulnerable displays, controls, mounts, and electronic connections.
Adjustable dividers create individual cells around these components.
A properly configured divider should sit firmly against the equipment without placing excessive pressure on it. If you can shake the backpack gently and hear or feel equipment moving significantly, the internal layout probably needs adjustment.
Modern photography packs commonly use removable padded dividers so photographers can reorganize the same compartment for different combinations of cameras, lenses, flashes, or drone equipment.
Padding absorbs everyday impacts
Foam around the sides, back, base, and dividers helps reduce the force transferred to equipment when the backpack is bumped or placed on the ground.
Pay particular attention to bottom protection. This area takes repeated impacts whenever you put the pack down.
A rigid or semi-rigid structure can provide additional protection, although it usually increases weight and bulk. Hardshell designs can therefore make sense when impact protection matters more than having a lightweight pack.
A secure layout protects lens mounts
One common packing mistake is allowing heavy lenses to move freely beside a camera.
The dividers should support each lens independently. Long or heavy lenses need enough surrounding structure that their weight is not continually transferred through a camera’s lens mount while the backpack moves.
Quick Takeaway: The safest backpack is not simply the one with the thickest padding. Good protection comes from padding, correct divider placement, a stable structure, and eliminating unnecessary movement inside the compartment.
How to Choose the Right Camera and Lens Backpack Size
Capacity is often listed in liters, but liters alone do not tell you whether your equipment will fit.
Lens dimensions matter.
A 70–200mm telephoto zoom, for example, occupies a very different shape from several compact prime lenses. A drone and controller can also consume a surprising amount of usable space.
Start by laying out your real photography kit
Before comparing backpacks, place everything you expect to carry regularly on a table.
Separate it into three groups:
- Essential equipment: camera body, primary lenses, batteries, cards.
- Shoot-dependent equipment: flash, microphone, drone, filters, additional lenses.
- Personal and travel items: laptop, jacket, food, water bottle, documents.
Then decide what actually needs to be inside the backpack.
Avoid buying around every piece of photography equipment you own. Carrying unnecessary lenses quickly increases weight and makes frequently used gear harder to reach.
Allow some room for future equipment
A completely full backpack offers little flexibility.
Leaving a modest amount of configurable space is useful if you expect to add another lens, second body, flash, microphone, or compact drone later.
Don’t go too far in the opposite direction. Oversized bags tempt photographers to fill empty compartments, and the resulting load can become uncomfortable on long walks.
Check dimensions, not just capacity
A 25L photography backpack and another 25L model can have very different usable interiors.
Check:
- External dimensions
- Camera-compartment dimensions
- Compartment depth
- Divider orientation
- Maximum lens length
- Laptop sleeve dimensions
- Backpack weight when empty
For example, a current 28L photography pack lists dimensions of approximately 48 × 33.5 × 12.5 cm and weighs about 1.8 kg before equipment is added.
Empty weight becomes particularly significant once several kilograms of cameras and lenses are loaded.
Camera and Lens Backpack Organization That Actually Works
A neat-looking arrangement isn’t necessarily an efficient one. Organization should make your most frequently used equipment accessible while keeping the load balanced.
Keep heavy equipment close to your back
The heaviest items should generally sit relatively close to the back panel rather than hanging far away from your body.
This reduces the backward pulling sensation that makes a loaded backpack tiring to carry.
Large camera bodies and heavier lenses therefore deserve the most stable central positions.
Give every lens its own compartment
Avoid stacking unprotected lenses on each other.
Configure the padded dividers so every lens has a secure position. Lens caps should remain attached while equipment is stored.
Small gaps can be useful for accessories, but don’t squeeze hard objects against lens barrels merely to use every centimeter of space.
Separate small accessories
SD cards, spare batteries, cables, lens cloths, filters, adapters, and card readers disappear easily inside a large compartment.
Use dedicated zippered or mesh pockets for them.
Keeping charged and depleted batteries separate is also useful during long shoots. A simple system prevents you from repeatedly testing batteries to remember which ones still have power.
Keep liquids away from electronics
A water-bottle pocket should ideally be external and separated from the camera compartment.
Even a weather-resistant bag cannot protect equipment from a bottle leaking inside the same compartment.
Camera and Lens Backpack Access: Front, Side, or Rear?
How a backpack opens can have as much influence on daily usability as its capacity.
Side access
Side-access backpacks let you reach a camera without fully removing and opening the pack.
This is especially useful for street photography, events, travel, and situations where shooting opportunities appear quickly. Side camera access is now common across modern photography backpack designs.
The trade-off is that the side opening usually gives immediate access to only part of the camera compartment.
Rear access
Rear-opening designs place the main zipper against your back while you’re wearing the backpack.
This arrangement can reduce casual access to the main equipment compartment in crowded environments. It also means the outer face of the bag can be placed on the ground while the back panel remains relatively clean.
The disadvantage is speed: you usually need to remove the backpack to reach most equipment.
Front or clamshell access
A clamshell opening exposes most or all of the equipment compartment.
It is excellent when changing lenses, reorganizing equipment, or preparing for a shoot because everything is visible at once.
However, opening the complete compartment in a busy or dusty environment may expose more gear than necessary.
There is no universally superior system. Many practical designs combine full access with a smaller side-access door.
Weather Resistance and Waterproofing
The terms water-resistant and waterproof should not automatically be treated as interchangeable.
Water-resistant fabric is intended to resist ordinary moisture such as light rain and splashes. It does not necessarily mean the entire backpack can withstand prolonged heavy rain or immersion.
Water can also enter through:
- Zippers
- Seams
- Access panels
- Stitching
- Open pockets
Some camera backpacks therefore combine weather-resistant materials with a separate rain cover. Others use coated fabric and water-resistant zippers. For example, NOMATIC describes its McKinnon 35L V2 as using water-resistant ripstop material and urethane-coated zippers while explicitly advising against submersion.
That distinction matters.
If you regularly photograph landscapes, wildlife, sports, or outdoor events, look beyond a generic “weatherproof” label and check exactly what protection the manufacturer specifies.
A rain cover is still useful
A removable rain cover adds another barrier during sustained rain.
It can also protect the exterior from mud and spray. Once conditions improve, remove and dry the cover instead of leaving moisture trapped around the backpack.
After working in wet conditions, inspect the camera compartment before storing the bag for an extended period.
Quick Takeaway: Weather resistance buys time; it doesn’t make careless storage safe. Keep the bag closed during rain, use its rain cover when available, and dry both backpack and equipment after exposure to moisture.
Comfort Matters More as Your Camera Kit Gets Heavier
A camera backpack can feel comfortable when empty and completely different with two bodies, several lenses, a laptop, batteries, and a tripod attached.
That is why the harness deserves serious attention.
Shoulder straps
Wide, padded shoulder straps spread pressure across a larger area.
The straps should adjust far enough to position the backpack securely against your back rather than letting it hang low and pull backward.
Sternum strap
A sternum or chest strap helps stabilize the shoulder straps, particularly while hiking or moving over uneven terrain.
It should stabilize the pack without restricting breathing.
Waist belt
For heavier loads, a properly designed waist or hip belt can transfer part of the load away from the shoulders.
Small lightweight backpacks may not need one. On larger photography packs, however, it can make a meaningful difference during long periods of walking.
Back-panel ventilation
Breathable mesh and channels in the back panel can improve airflow.
They won’t eliminate sweating in warm weather, but they are generally more comfortable than a completely flat padded panel pressed against the back.
Current photography packs often combine padded shoulder straps, ventilated back panels, sternum straps, and sometimes waist support specifically for carrying heavier equipment.
Camera and Lens Backpack for Travel
Travel creates a different set of requirements from local photography.
You may need to carry a laptop, passport, charging equipment, headphones, clothes, water, and camera gear in the same bag.
Check airline limits before every flight
Never assume that a backpack described as “carry-on compatible” will automatically comply with every airline.
Cabin baggage limits vary between carriers, ticket types, routes, and regions. Always compare the backpack’s external dimensions when packed against your airline’s current allowance.
Expandable backpacks need extra attention.
For example, the McKinnon Camera Pack 35L V2 measures 22 × 13.5 × 9.5 inches and is described by its manufacturer as fitting the limits of most major airlines in its standard configuration, but the company recommends checking airline-specific limits when the pack is expanded to 42L.
That illustrates why manufacturer claims should be treated as a starting point rather than a substitute for checking your carrier.
Keep valuable equipment with you
Where airline rules permit, photographers generally prefer keeping fragile cameras, lenses, storage media, and other valuable equipment in cabin baggage rather than exposing them to ordinary checked-baggage handling.
If weight restrictions force you to reduce the kit, prioritize equipment that would be expensive or difficult to replace during the trip.
Look for a luggage pass-through
A trolley or luggage pass-through allows the backpack to slide over a rolling suitcase handle.
It sounds minor until you spend several hours moving through airports with a heavy photography kit.
Laptop, Tripod, and Drone Storage
Photography rarely involves only a camera and lenses anymore.
Laptop compartment
A dedicated padded laptop sleeve is useful for editing, backups, tethered shooting, and travel.
Don’t choose it purely by advertised screen size.
Two 16-inch laptops can have different physical dimensions. Compare your laptop’s actual width, height, and thickness against the sleeve measurements when those specifications are available.
Current camera backpacks commonly support laptops from around 15 to 17 inches, depending on overall pack size.
Tripod holder
Tripod attachments normally use a side pocket, straps, or a bottom mounting system.
A side-mounted tripod is convenient but creates an uneven load. If you carry a substantial tripod, use compression straps firmly and compensate for the weight distribution when organizing the opposite side.
Drone compartment
Adjustable dividers make many camera backpacks suitable for compact drones.
The drone, controller, spare batteries, camera, and lenses should each have dedicated spaces rather than being stacked together.
If you regularly alternate between photography and drone work, removable dividers are far more practical than a rigid fixed layout.
Common Camera Backpack Mistakes
Even an excellent bag performs poorly when it is packed incorrectly.
Overloading the backpack
More capacity does not mean you should use all of it.
Carrying every lens “just in case” adds weight, slows lens selection, and makes walking more tiring.
Build the kit around the shoot.
Leaving empty space around equipment
Large gaps allow cameras and lenses to move whenever you walk, climb stairs, or put the bag down.
Reposition the dividers until equipment is secure without being crushed.
Ignoring the backpack’s empty weight
A heavily constructed bag can already weigh several pounds before you add a single camera.
Add the weight of your complete kit before deciding whether the resulting load is realistic for a full day.
Attaching too much equipment externally
Tripods, bottles, jackets, and accessories attached outside the pack change its balance and dimensions.
External gear can also catch on doors, branches, seats, and other objects.
Assuming weather-resistant means waterproof
A coated fabric does not automatically mean every seam and zipper is waterproof.
Check the manufacturer’s actual specification and use a rain cover when conditions exceed the bag’s intended protection.
Buying before measuring your equipment
This is particularly risky with long telephoto lenses, large professional bodies, camera cages, gimbals, drones, and thick laptops.
Measure first.
How to Pack a Camera and Lens Backpack Step by Step
A consistent packing routine saves time and helps prevent forgotten accessories.
- Choose equipment for the specific shoot. Start with what you expect to use rather than everything you own.
- Install the padded dividers. Build compartments around your largest camera and lenses first.
- Place heavier equipment close to the back panel. This helps keep the load stable.
- Secure each lens separately. Use caps and avoid unnecessary movement between hard components.
- Organize batteries, cards, and filters. Put small items in dedicated pockets.
- Insert the laptop into its padded sleeve. Keep chargers and hard accessories away from the laptop surface.
- Attach the tripod securely. Tighten both the supporting pocket and retention straps when applicable.
- Put liquids in external storage. Avoid carrying an unsealed bottle beside electronics.
- Close every zipper and access panel. Side-access doors are especially easy to overlook after changing equipment.
- Wear the backpack and adjust the harness. Set shoulder, sternum, and waist straps after the bag reaches its actual working weight.
Finally, walk around for several minutes.
If the pack pulls backward, shifts excessively, or creates a pressure point, reorganize it before heading out. Small adjustments are much easier at home than halfway through a shoot.
What Features Should You Prioritize?
Different photographers need different combinations of features.
| Use | Features to Prioritize |
|---|---|
| Everyday photography | Compact size, adjustable dividers, quick access |
| Street photography | Side access, discreet appearance, lightweight construction |
| Wedding and event work | Fast access, multiple bodies, organized lens storage |
| Landscape photography | Weather resistance, tripod support, comfortable harness |
| Wildlife photography | Space for long lenses, strong structure, load support |
| Travel photography | Carry-on-friendly dimensions, laptop sleeve, luggage pass-through |
| Hiking | Low weight, ventilation, sternum strap, supportive waist belt |
| Drone photography | Flexible dividers, battery storage, larger compartment |
| Video work | Space for camera cages, microphones, batteries and accessories |
The most useful features are the ones that solve problems you encounter repeatedly.
A USB port or numerous tiny pockets may look impressive in a feature list, but they are less valuable than correct dimensions, reliable padding, comfortable load distribution, and an interior layout that matches your equipment.
How to Maintain a Camera and Lens Backpack
Camera backpacks collect dust, sand, moisture, and debris because they travel everywhere the photographer does.
Regular maintenance is simple.
Empty the backpack completely every few weeks if it sees frequent use. Remove loose dirt from the main compartment and inspect the dividers for compressed foam, torn hook-and-loop material, or exposed hard edges.
Wipe exterior surfaces according to the manufacturer’s cleaning instructions. Some hardshell and coated packs specifically recommend wiping with a soft damp cloth rather than machine washing.
Also inspect:
- Shoulder-strap stitching
- Carry handles
- Zippers
- Buckles
- Tripod straps
- Rain cover
- Divider attachment points
- Laptop padding
- Bottom panel
Let a wet backpack dry completely before storing equipment inside it for long periods.
And don’t forget the backpack itself when reviewing insurance records or equipment inventories. The camera bodies and lenses receive most of the attention, but accessories and carrying equipment can represent a substantial part of a photography kit.
Final Thoughts on Choosing a Camera and Lens Backpack
A camera and lens backpack should do three things exceptionally well: protect equipment, organize it efficiently, and remain comfortable enough that you actually want to carry it.
Start with your real camera kit. Measure the body, longest lens, laptop, drone, and other bulky equipment instead of relying solely on advertised capacity. Then evaluate padding, adjustable dividers, access style, weather resistance, harness design, tripod storage, and external dimensions.
For travel, verify airline requirements directly before flying. For outdoor photography, pay close attention to rain protection and carrying comfort. For events or street photography, fast camera access may matter more than maximum capacity.
Most importantly, don’t buy a larger backpack simply because it can hold more gear. The right backpack carries the equipment you actually need, keeps every piece secure, and lets you concentrate on photography instead of worrying about what’s happening inside the bag.
