
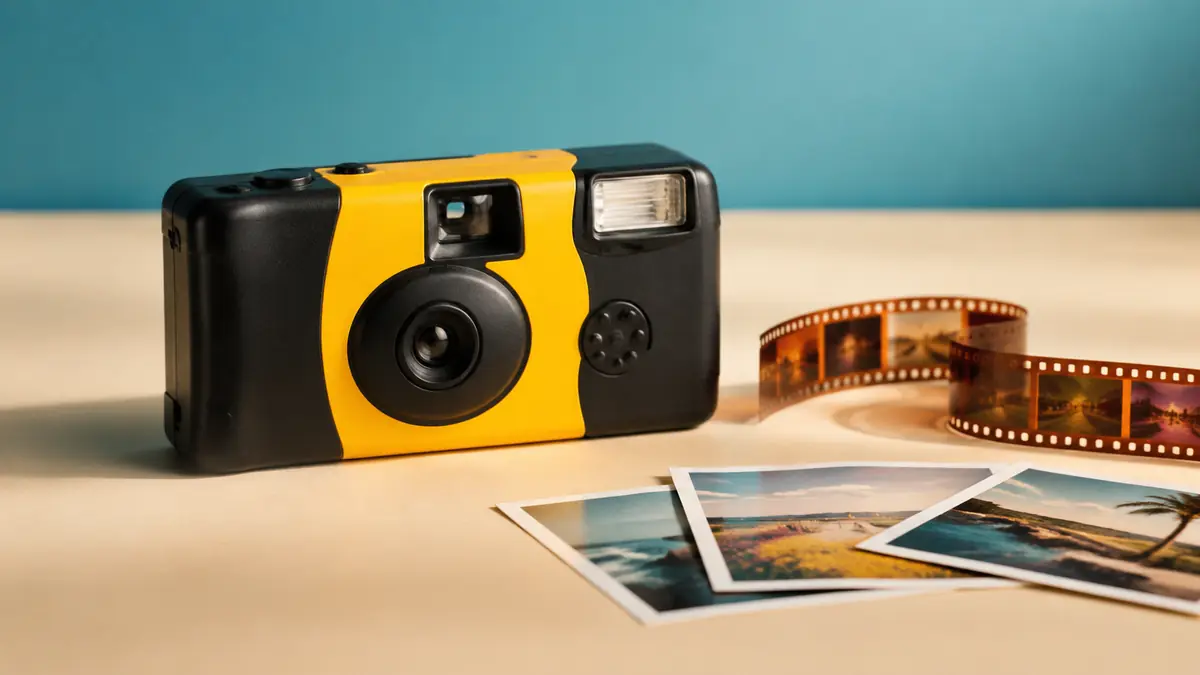

A disposable camera makes photography feel simple again: frame the moment, press the shutter, and wait for the developed photographs. There is no screen, autofocus system, or editing app to correct mistakes. That limitation is precisely why these inexpensive film cameras create such spontaneous, distinctive pictures.
A disposable camera is a preloaded, single-use film camera with a fixed-focus lens, fixed shutter speed, and usually a built-in flash. Most models hold 27 exposures on 35mm color-negative film. After every photograph, the film advances into a light-tight cartridge, which a photo lab removes, develops, scans, and optionally prints.
What Is a disposable camera?
A disposable camera—also called a single-use camera—is a compact point-and-shoot camera sold with film already loaded inside. Its plastic body contains the basic components needed to expose a roll of photographic film:
- A plastic fixed-focus lens
- A mechanical shutter
- A film-advance wheel
- A frame counter
- A simple optical viewfinder
- Preloaded 35mm film
- A built-in electronic flash on most models
- A small battery that powers the flash
Unlike a reusable film camera, it is not designed for the owner to open, reload, or repair. When all the exposures have been used, the complete camera goes to a film-processing lab.
“Disposable” does not necessarily mean every part goes into the trash. Many professional processing facilities recover the film cartridge, battery, circuit board, and plastic shell for recycling or refurbishment. The available recycling process depends on the camera manufacturer and the laboratory handling it.
Common models and specifications
Two widely recognized examples are the Kodak FunSaver and Fujifilm QuickSnap. Specifications vary, but both represent the familiar single-use-camera design.
| Feature | Kodak FunSaver | Fujifilm QuickSnap Flash 400 |
|---|---|---|
| Film format | 35mm color negative | 35mm color negative |
| Typical exposures | 27 | 27 |
| Film speed | ISO 800 | ISO 400 |
| Focus | Fixed | Fixed |
| Flash | Built in | Built in |
| User reloadable | No | No |
| Processing | Standard color-film processing | CN-16/C-41 compatible processing |
The QuickSnap Flash 400, for example, uses a 32mm f/10 plastic lens, a shutter speed of 1/140 second, and a stated focus range beginning at approximately one meter. Its effective flash distance is roughly one to three meters.
These numbers explain much of the familiar disposable-camera look. The small plastic lens can produce softer corners, visible grain, strong flash illumination, and occasional color shifts. Those characteristics are usually treated as part of the aesthetic rather than technical defects.
How Does a disposable camera Work?
The camera records light on photosensitive film rather than an electronic image sensor. Pressing the shutter briefly opens an aperture behind the lens. Light reflected from the subject reaches the film and creates an invisible latent image in its light-sensitive emulsion.
The full process works like this:
- The manufacturer loads the film.
In many single-use designs, the film begins outside its cartridge, wound around a spool inside the camera. - You advance to the next frame.
Turning the thumb wheel prepares the shutter and moves an unexposed section of film into position. - You compose through the viewfinder.
The viewfinder provides an approximate composition rather than an exact preview through the taking lens. - The shutter exposes the film.
A preset aperture and shutter speed control how much light reaches the emulsion. - The exposed frame moves into the cartridge.
Advancing the camera after a shot winds that frame safely into the light-tight 35mm canister. - A laboratory develops the roll.
Chemical processing converts the latent images into permanent negatives. - The negatives are scanned or printed.
The lab can supply digital files, photographic prints, negatives, or a combination of these.
Because exposure settings are fixed, the camera cannot intelligently adapt to every scene. The film’s latitude—the amount of overexposure or underexposure it can tolerate—helps preserve usable detail, but good light remains essential.
Why can’t you see the photograph immediately?
Film must undergo chemical processing before its images become visible. There is no LCD screen or digital storage inside the camera. This delayed result separates a disposable film camera from disposable-style digital cameras and smartphone filters that merely imitate analog color and grain.
How to Use a disposable camera Step by Step
Most models work in nearly the same way, although you should check the instructions printed on the camera’s wrapper or body.
1. Remove the protective packaging
Check that the camera has not passed its expiration date and that its outer casing is intact. Film can remain usable after its printed date, but older stock may produce increased grain, color shifts, lower contrast, or fogging—especially if it was stored in heat.
2. Advance the film
Turn the ridged film-advance wheel until it stops. The shutter will not normally fire until the next frame has been fully advanced.
Look at the exposure counter on top of the camera. It shows approximately how many photographs remain. Most standard versions begin at 27, although other exposure counts exist.
3. Decide whether you need flash
Use the flash indoors, in shade, around sunset, and whenever your subject is not receiving strong direct light. Depending on the model, you may need to hold a flash button or slide a switch until an indicator lamp signals that the capacitor is charged.
Charging can take several seconds. Pressing the shutter before the ready light appears may result in an underexposed frame.
4. Keep the correct distance
Fixed-focus lenses depend on a broad depth of field, but they cannot make extremely close subjects sharp. Unless the product instructions specify otherwise, stay at least one meter—or roughly three feet—from the subject.
For flash photographs, keep the main subject within the flash’s practical range. On a Fujifilm QuickSnap, that range is approximately one to three meters. A person standing much farther away may be surrounded by darkness even though the flash fired.
5. Frame with a little extra space
The optical viewfinder is separate from the lens, so it does not show precisely what the film records. This difference is known as parallax and becomes more noticeable at close distances.
Leave modest space around faces, heads, and important objects. Avoid placing critical details directly against the frame’s edges.
6. Hold the camera steady
Use both hands, keep your fingers away from the lens and flash, and squeeze the shutter smoothly. Although the fixed shutter speed may be reasonably fast, movement can still blur a photograph—particularly when the subject is walking, dancing, or turning quickly.
7. Advance after every shot
Turn the advance wheel again until it stops. Repeat the process until the counter reaches zero and the shutter no longer prepares for another exposure.
Do not force the wheel once the roll is finished. The exposed film should now be protected inside its cartridge.
How to Get Better disposable camera Photos
The strongest results come from working with the camera’s limitations instead of expecting it to behave like a smartphone.
Look for abundant light
Daylight is the safest environment. Open shade can also work, but deeply shaded faces may become muddy or grainy.
For outdoor portraits, position the subject so light reaches the face without forcing the person to squint. Avoid placing someone directly in front of a bright sky unless you plan to use fill flash. The camera may record the sky while leaving the face too dark.
Use flash more often than you think
Disposable-camera lenses typically have small fixed apertures. That gives them a useful depth of field, but it also limits the amount of light reaching the film.
Flash is helpful for:
- Indoor gatherings
- Parties and receptions
- Night portraits
- Shaded subjects
- Backlit faces
- Dim restaurants
- Late-afternoon photographs
The flash cannot illuminate a distant stage, building, landscape, or sports field. It is designed for nearby people and objects.
Avoid reflective surfaces
A direct flash can bounce from mirrors, windows, polished walls, license plates, and glossy artwork. Photograph reflective objects at a slight angle rather than facing them straight on.
Red-eye can also occur because the flash sits close to the lens. Asking the subject to look slightly away from the camera may reduce the effect.
Do not photograph too close
A person’s face may fill the viewfinder beautifully at arm’s length but still appear soft because it falls inside the lens’s minimum focusing distance. Step back and crop the scan later if necessary.
The same principle applies to food, flowers, documents, and small details. A basic single-use camera is not a macro camera.
Keep fingers away from the lens
The compact body makes it easy to cover the lens accidentally. Check the front of the camera each time you change your grip. A finger over the flash may also block the light or create a warm, glowing patch across the frame.
Protect the camera from heat and moisture
Film is sensitive to prolonged heat. Do not leave the camera in a parked car, beside a heater, or in direct sun for hours. Store it in a cool, dry place and arrange development reasonably soon after finishing the roll.
Standard models are not waterproof. Underwater disposable cameras use sealed housings and have specific depth ratings. A regular model placed in a plastic bag is not an equivalent substitute.
Quick takeaway: Use daylight whenever possible, activate the flash for nearby people in weak light, remain beyond the minimum focus distance, and hold the camera steady. Those four habits prevent most disappointing frames.
Understanding Film Speed, Focus, and Exposure
A little technical knowledge makes the camera’s behavior much easier to predict.
ISO 400 vs. ISO 800 film
ISO indicates the film’s sensitivity to light.
- ISO 400 is a versatile general-purpose speed suited to daylight and flash photography.
- ISO 800 is more sensitive and performs better in weaker light, although visible grain may be stronger.
Higher ISO does not make a camera capable of seeing in darkness. It simply gives the fixed exposure system more flexibility.
Fixed focus
Fixed-focus cameras do not use autofocus. Instead, their lens and aperture are designed to render a broad distance range acceptably sharp. Subjects within that range can look clear, while objects too close to the lens remain blurred.
This system is quick and reliable because it requires no focusing motor, sensor, or manual adjustment.
Fixed aperture and shutter speed
Most disposable models provide no control over aperture or shutter speed. Brightness is governed by the existing light, film speed, and flash.
That simplicity introduces several limitations:
| Situation | Likely result | Better approach |
|---|---|---|
| Bright outdoor scene | Generally well exposed | Photograph with the sun beside or behind you |
| Dim indoor room without flash | Dark or grainy frame | Charge and use the flash |
| Subject beyond flash range | Bright foreground, dark subject | Move closer |
| Very close portrait | Soft focus or framing error | Step back beyond one meter |
| Fast-moving subject | Possible motion blur | Shoot in brighter light |
| Person against bright window | Silhouetted face | Reposition or use fill flash |
| Mirror directly ahead | Strong flash reflection | Change the shooting angle |
Developing a disposable camera
A finished camera must be processed by a lab that accepts single-use 35mm cameras. Depending on your location, this may be a dedicated film laboratory, camera shop, pharmacy, supermarket photo department, or mail-in processing service.
Ask what the quoted service includes. “Developing” can refer only to chemical processing, while the deliverables you want may require separate options.
Common choices include:
- Development only
- Development plus digital scans
- Development plus photographic prints
- Development, scans, and prints
- Return or disposal of the negatives
- Standard- or high-resolution scanning
What happens at the laboratory?
A technician opens the body safely and removes the light-tight film cartridge. Standard color-negative film is normally processed using C-41 chemistry; Fujifilm refers to its compatible process as CN-16.
During processing, chemical baths develop and stabilize the images in the emulsion. The resulting negative strip is dried, cut, and scanned. Software or a lab technician then converts the negative colors into positive digital images and adjusts basic density and color balance.
How long does developing take?
Turnaround varies considerably. An on-site professional film lab may complete processing within several days, while a retailer that ships cameras to a central facility can require one or more weeks. Mail-in services also need shipping time in both directions.
Ask these questions before submitting the camera:
- Do you process the film on-site or send it elsewhere?
- Will I receive my original negatives?
- What scan resolution is included?
- Are prints included or charged separately?
- How will digital files be delivered?
- What is the expected turnaround time?
- What happens if the roll is blank or damaged?
Returning the negatives matters because they are the original photographic record. New, higher-resolution scans can be made from them later.
Should you open the camera yourself?
No, unless you understand film handling and electronic safety. Opening the shell in normal light at the wrong stage can fog undeveloped film. The flash circuit may also retain a high-voltage electrical charge even after the battery appears exhausted.
Take the complete camera to the lab. There is no need to remove the film yourself for ordinary commercial processing.
Can a disposable camera Go Through Airport Security?
A disposable camera is generally permitted in carry-on luggage, but airport screening equipment can affect undeveloped film. The greatest concern is high-powered checked-baggage equipment and newer computed-tomography scanners, which may fog film and reduce contrast.
The safest routine is:
- Keep the camera in your carry-on bag.
- Do not place undeveloped film in checked luggage.
- Put cameras and film together in a clear plastic bag.
- Request a hand inspection before the items enter a scanner.
- Allow extra time because inspection procedures vary by airport.
- Develop the film before additional flights when practical.
Older guidance sometimes states that lower-speed film can tolerate conventional carry-on X-rays. However, travelers cannot reliably identify every scanner type, and radiation exposure can accumulate across several screenings. A hand inspection is the more cautious choice for both exposed and unexposed film.
Lead-lined film bags are not a guaranteed solution. If security equipment cannot see through the bag, staff may increase scanner intensity or remove it for additional inspection.
Disposable Cameras vs. Reusable Film Cameras and Smartphones
Each format creates a different photographic experience.
| Feature | Disposable camera | Reusable film camera | Smartphone |
|---|---|---|---|
| Image medium | Photographic film | Photographic film | Digital sensor |
| Typical shot limit | About 27 | Usually 24 or 36 per roll | Storage-dependent |
| Preview screen | No | Usually no on traditional models | Yes |
| Exposure controls | Minimal or none | Basic to advanced | Automatic plus manual options |
| Focus | Usually fixed | Fixed, zone, manual, or autofocus | Autofocus |
| Processing required | Yes | Yes | No |
| Reloadable | Not normally | Yes | Not applicable |
| Image character | Grainy, soft, unpredictable | Depends on film and lens | Clean and computationally processed |
| Waste per roll | Higher unless components are recovered | Lower | No film body waste |
A reusable point-and-shoot film camera makes more sense for frequent analog photography because it accepts replacement rolls. It may also provide autofocus, automatic exposure, a stronger lens, red-eye reduction, and more reliable frame spacing.
A smartphone is technically superior in low light and offers immediate results. What it does not reproduce perfectly is the physical process: limited exposures, no preview, chemical film response, and the anticipation of waiting for the negatives.
Common Problems and Why They Happen
The photographs are too dark
The flash may not have been activated or fully charged. The subject could also have been beyond its effective range. Indoors, use flash and keep the main subject relatively close.
Some frames are completely blank
Possible causes include insufficient light, a blocked lens, a mechanical problem, expired or heat-damaged film, or firing before the flash was ready. A lab can inspect the negatives to distinguish an exposure failure from a scanning issue.
Faces are bright but the background is black
This is normal in dark environments. Direct flash illuminates nearby subjects, but its light falls off rapidly with distance. Move the group closer to an existing light source if you want more background detail.
The composition is cut off
The viewfinder does not show the lens’s exact perspective. Leave additional space around important subjects, particularly at close range.
The pictures look grainy
Film grain becomes more apparent with higher-speed film, underexposure, aggressive scan correction, and large digital enlargements. Grain is part of the medium, but correct exposure keeps it from becoming unnecessarily harsh.
The counter says zero
The roll is finished. Do not force the advance wheel or repeatedly press the shutter. Label the camera if you are carrying several units so it is not mistaken for an unused one.
Storage, Expiration, and Environmental Impact
Before use, store the camera in a cool, dry location inside its protective packaging. After exposure, keep it away from heat and arrange processing promptly. The image does not disappear immediately, but poor storage can degrade the latent image and film emulsion over time.
An expiration date is a manufacturer’s quality guideline, not a switch that instantly makes film unusable. Expired film may still produce photographs, but the risk of color shifts, fog, reduced sensitivity, and unpredictable contrast increases with age and improper storage.
Single-use plastic and electronics give these cameras a larger material footprint than reloading an existing film body. To reduce waste:
- Choose laboratories that recover or recycle camera shells.
- Return the entire unit instead of throwing it away.
- Do not place a flash camera in ordinary household recycling.
- Use a reusable 35mm point-and-shoot if you expect to shoot film regularly.
- Keep the negatives so the roll does not need to be duplicated unnecessarily.
Is a disposable camera Worth Using?
A disposable camera is useful when simplicity and participation matter more than technical perfection. It works well at weddings, parties, school trips, holidays, festivals, and group events because almost anyone can take a photograph without learning camera settings.
Its strengths are clear:
- Lightweight and easy to carry
- No charging, memory card, or software required
- Simple operation
- Distinctive color, grain, and direct-flash appearance
- Fewer distractions because there is no screen
- Physical negatives that can be archived and rescanned
The compromises are equally real:
- Limited exposures
- Separate developing and scanning costs
- No immediate image review
- Weak performance in poor light without flash
- Fixed focus and exposure
- Potential processing delays
- More waste than a reusable camera
- Risk of losing images through handling, heat, scanner exposure, or lab error
The format is not the cheapest option per photograph, nor is it the most dependable. Its appeal comes from restriction. People tend to pause before using one of their 27 frames, yet the pictures often feel less staged because nobody stops to inspect and retake them.
Final Takeaway
A disposable camera offers a straightforward introduction to 35mm film photography: advance the film, use the flash when light is weak, stay within the focus and flash ranges, and protect the camera until processing. Once finished, submit the complete unit to a reputable C-41 photo lab and request digital scans, returned negatives, and prints if desired.
For the best results, photograph in good light, leave extra room around the composition, avoid extreme close-ups, and never pack undeveloped film in checked airport luggage. Those simple decisions give every limited frame a much better chance of becoming a photograph worth keeping.
