

Need to capture an error message, save an online receipt, or share something displayed on your laptop? Taking a screenshot is one of the quickest ways to preserve information without downloading an entire page or copying text manually.
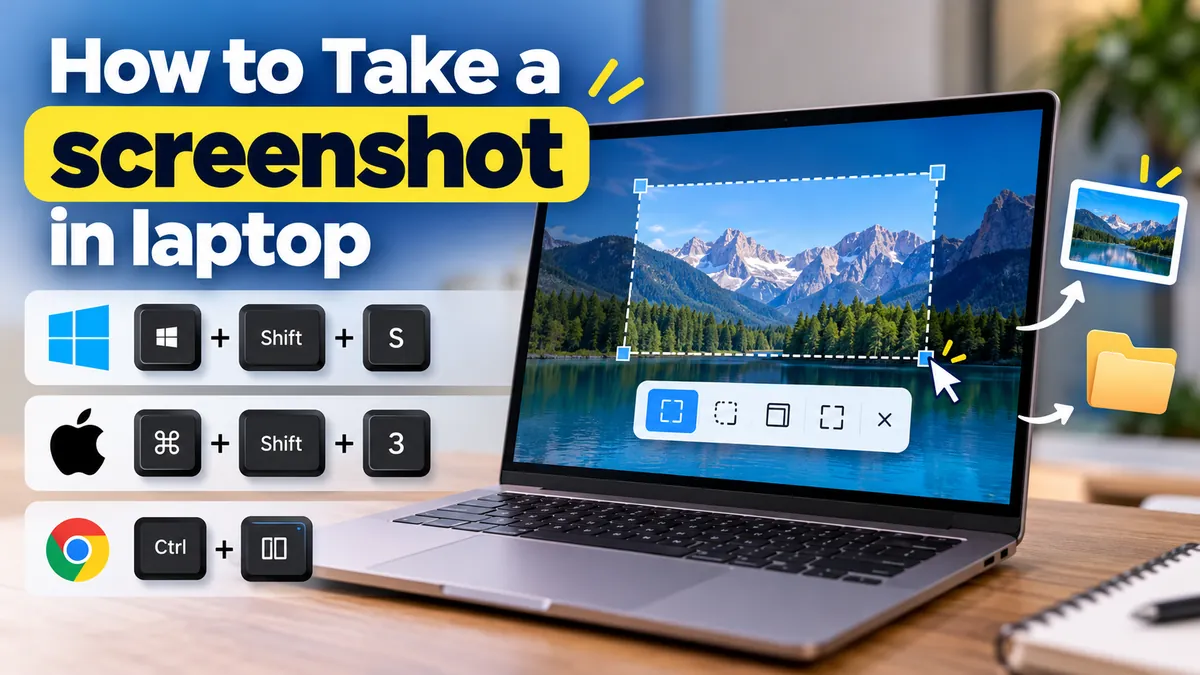
To take a screenshot in laptop, use Windows + Shift + S on Windows 10 or 11, Command + Shift + 3 on a MacBook, or Ctrl + Show Windows on a Chromebook. These shortcuts capture your screen instantly, while other combinations let you select a specific area or window.
The exact method depends on your laptop’s operating system, keyboard layout, and the type of screenshot you need. This guide explains the shortcuts, built-in screenshot tools, saving options, and solutions to common problems.
How to Take a screenshot in laptop Using Keyboard Shortcuts
Most laptops include built-in screenshot functionality, so you usually don’t need to install additional software.
Here is a quick comparison of the most useful shortcuts.
| Laptop / System | Screenshot Shortcut | What It Does |
|---|---|---|
| Windows 11 / 10 | Windows + Shift + S | Opens screen selection |
| Windows 11 / 10 | Windows + PrtScn | Saves the entire screen |
| Windows laptop | Alt + PrtScn | Copies the active window |
| MacBook | Command + Shift + 3 | Captures the entire screen |
| MacBook | Command + Shift + 4 | Captures a selected area |
| MacBook | Command + Shift + 5 | Opens screenshot controls |
| Chromebook | Ctrl + Show Windows | Captures the entire screen |
| Chromebook | Ctrl + Shift + Show Windows | Opens partial screenshot controls |
On some Windows laptops, you may also need to hold the Fn key to activate the Print Screen function.
How to Take a Screenshot on a Windows Laptop
Windows provides several screenshot methods, including keyboard shortcuts, Snipping Tool, and automatic file saving.
Method 1: Use Windows + Shift + S
This is one of the most convenient ways to capture a selected area on Windows 10 and Windows 11.
- Open the webpage, application, or document you want to capture.
- Press Windows + Shift + S together.
- Your screen will dim, and screenshot controls will appear.
- Select the desired capture mode.
- Drag your mouse to select the area you want.
- Open the screenshot notification to edit or save the image.
The screenshot is copied to your clipboard. Depending on your Windows version and Snipping Tool settings, it may also be saved automatically.
You can paste the captured image into Microsoft Paint, Word, an email, or a messaging application using Ctrl + V.
Method 2: Use the Print Screen Key
The Print Screen key is usually labeled PrtSc, PrtScn, or Print Screen.
Pressing it traditionally copies the entire screen to the clipboard. However, some Windows 11 configurations use this key to open Snipping Tool instead.
To capture the screen:
- Locate the Print Screen key, typically near the top-right area of the keyboard.
- Press PrtScn, or Fn + PrtScn if required.
- Open Paint or another image editor.
- Press Ctrl + V if the screenshot was copied.
- Save the image in your preferred format.
This method is particularly useful when you want to paste a screenshot directly into a document.
Method 3: Automatically Save a Screenshot
If you want to save a screenshot without opening an image editor, use:
Windows + PrtScn
On some laptops, the shortcut is Fn + Windows + PrtScn.
Windows typically saves the image in:
Pictures > Screenshots
The screen may briefly dim to indicate that the capture was successful.
This method is useful when capturing several screenshots in succession.
Method 4: Capture Only the Active Window
Sometimes you need a screenshot of one application rather than the entire desktop.
To do this:
- Click the application window you want to capture.
- Press Alt + PrtScn.
- Open Paint, Word, or another compatible application.
- Press Ctrl + V.
- Save the image if needed.
On keyboards where Print Screen shares a function key, you may need Alt + Fn + PrtScn.
Capturing only the active window reduces unnecessary background information and can help keep unrelated applications out of the image.
How to Use Snipping Tool on Windows 11 and 10
Snipping Tool is Microsoft’s built-in utility for taking and editing screenshots.
It offers more flexibility than basic Print Screen shortcuts.
Opening Snipping Tool
Click Start, type Snipping Tool, and open the application.
You can then select one of several screenshot modes:
| Mode | Purpose |
|---|---|
| Rectangle | Capture a rectangular selection |
| Freeform | Draw an irregular capture area |
| Window | Capture an application window |
| Fullscreen | Capture the entire display |
Taking a Screenshot With Snipping Tool
- Open Snipping Tool.
- Select the desired screenshot mode.
- Click New.
- Select the area or window to capture.
- Review the screenshot.
- Use the editing tools if necessary.
- Save the screenshot using the available Save option.
Snipping Tool supports basic annotation features such as pen and highlighter tools.
Modern Windows 11 versions also include features such as text recognition and screen recording, although availability can depend on the installed application version.
Taking a Delayed Screenshot
A delayed screenshot can help capture dropdown menus, hover effects, or interface elements that disappear when you click elsewhere.
Open Snipping Tool and choose an available delay before starting the capture.
Then arrange the interface you want to capture while the countdown runs.
This is especially useful for creating tutorials and documenting software issues.
How to Take a Screenshot on a MacBook
Apple laptops running macOS include screenshot shortcuts that work without installing third-party applications.
Capture the Entire Screen
Press:
Command (⌘) + Shift + 3
The MacBook captures the entire screen and normally saves the image to the desktop.
If multiple displays are connected, macOS can capture each display separately.
Capture a Selected Portion
Press:
Command (⌘) + Shift + 4
Your pointer changes to a crosshair.
Click and drag over the area you want to capture, then release to take the screenshot.
Press Escape before releasing if you want to cancel.
Capture a Specific Window
To capture a single application window:
- Press Command + Shift + 4.
- Press the Space bar.
- Move the camera pointer over the window.
- Click to capture it.
This method produces a clean screenshot of the selected window.
Use the Mac Screenshot Toolbar
Press Command + Shift + 5 to open the macOS screenshot toolbar.
The toolbar provides options to capture the entire screen, capture a window, capture a selected portion, or record your screen.
You can also choose where screenshots are saved and configure a timer.
Copy a Mac Screenshot Instead of Saving It
If you want to paste the screenshot into another application, hold Control along with the screenshot shortcut.
For example:
Control + Command + Shift + 3
This copies the full-screen capture to the clipboard instead of saving it as a file.
You can then paste it into a compatible application using Command + V.
How to Take a Screenshot on a Chromebook
Chromebooks use ChromeOS, which provides its own screenshot controls.
Capture the Full Screen
Press:
Ctrl + Show Windows
The Show Windows key usually displays a rectangle with two vertical lines beside it.
ChromeOS captures the entire screen.
Capture a Specific Area
Press:
Ctrl + Shift + Show Windows
The Screen Capture toolbar opens.
Choose partial screenshot mode, then drag over the area you want to capture.
Use Quick Settings
You can also open the Quick Settings panel and select Screen capture.
This is helpful when you cannot remember the keyboard shortcuts.
Screenshots are generally saved in the Downloads folder, although newer ChromeOS configurations may allow you to choose another location.
How to Take a screenshot in laptop Without the Print Screen Button
Some compact laptops have smaller keyboards that omit a dedicated Print Screen key.
Fortunately, there are alternatives.
On Windows, press Windows + Shift + S to open the screenshot interface without needing PrtScn.
You can also open Snipping Tool directly from the Start menu.
On MacBook and Chromebook devices, use their dedicated screenshot shortcuts instead.
Another option on Windows is the On-Screen Keyboard.
To access it:
- Open the Start menu.
- Search for On-Screen Keyboard.
- Launch the application.
- Locate the virtual PrtScn button, if available.
- Use it to capture the screen.
The Windows On-Screen Keyboard can be useful when a physical keyboard key is missing or malfunctioning.
How to Take Screenshots on HP, Dell, Lenovo, ASUS, and Acer Laptops
Laptop brands sometimes use different keyboard layouts, but the operating system determines most screenshot shortcuts.
HP Laptops
Most HP laptops running Windows support Windows + Shift + S, Windows + PrtScn, and Alt + PrtScn.
Some models require the Fn key because Print Screen shares a key with another function.
Dell Laptops
Dell laptops generally support standard Windows screenshot shortcuts.
Look for PrtScn in the upper keyboard row. If the key shares another function, try using Fn.
Lenovo Laptops
Lenovo ThinkPad, IdeaPad, and Yoga models typically support Windows screenshot commands.
The location of Print Screen varies by keyboard design.
Windows + Shift + S is often the simplest option.
ASUS Laptops
ASUS VivoBook, Zenbook, and ROG laptops generally use the same Windows shortcuts.
Some compact models require Fn to activate Print Screen.
Acer Laptops
Acer Aspire, Swift, and Nitro laptops support Windows screenshot methods.
If the dedicated Print Screen key is unavailable, use Snipping Tool.
Quick takeaway: The brand of your laptop matters less than whether it runs Windows, macOS, or ChromeOS.
Where Are Screenshots Saved on a Laptop?
The screenshot location depends on your operating system and the capture method.
| Operating System | Default Screenshot Location |
|---|---|
| Windows 11 / 10 | Pictures > Screenshots for automatically saved captures |
| MacBook | Desktop, unless changed |
| Chromebook | Downloads, unless changed |
| Windows clipboard capture | Clipboard until pasted or saved |
If you use Windows + Shift + S, the screenshot is copied to your clipboard. On supported versions of Snipping Tool, it is also automatically saved when that setting is enabled.
Microsoft Windows
+1
How to Find Missing Screenshots
If you cannot find your screenshot, open File Explorer or Finder and search for files created around the time you captured it.
On Windows, check Pictures, Screenshots, Downloads, and any folders synchronized with OneDrive.
On a MacBook, check the Desktop or open the Screenshot toolbar using Command + Shift + 5 and inspect its Options menu.
On a Chromebook, open the Files application and look inside Downloads or the custom screenshot folder.
Apple Support (IE)
+1
How to Take a Scrolling Screenshot on a Laptop
A standard screenshot captures only the visible portion of the screen. If a webpage extends beyond the screen, you may need a scrolling screenshot.
Capture a Full Webpage in Microsoft Edge
Microsoft Edge includes a screenshot feature that can capture full webpages.
- Open the webpage in Microsoft Edge.
- Open the browser menu and find Screenshot.
- Select the full-page capture option, if available.
- Review the captured page.
- Save the image.
The available commands can vary by browser version.
Capture a Full Webpage in Firefox
Firefox provides a built-in screenshot feature.
Right-click an empty area of a webpage and choose Take Screenshot, or access the screenshot command from the browser’s available tools.
Select Save full page to capture the webpage beyond the visible area.
Capture a Full Webpage in Google Chrome
Desktop Chrome provides screenshot capabilities through Developer Tools, although the process is less convenient than a normal keyboard shortcut.
- Open the webpage.
- Press Ctrl + Shift + I on Windows, or Command + Option + I on Mac, to open Developer Tools.
- Open the Developer Tools command menu.
- Search for Capture full size screenshot.
- Select the command to save the image.
Chrome extensions can provide additional scrolling capture options.
Keep in mind that some websites with sticky navigation bars, animations, or dynamically loaded sections may not capture perfectly.
How to Edit and Crop a Screenshot
After capturing a screenshot, you may want to remove unnecessary areas, highlight information, or hide sensitive details.
Edit Screenshots on Windows
Use Snipping Tool or Microsoft Paint to crop, annotate, resize, and save screenshots.
Snipping Tool also supports text extraction on compatible versions, allowing you to copy text from a captured image.
Microsoft Support
Edit Screenshots on MacBook
macOS provides Markup tools through the screenshot preview and Preview application.
You can crop an image, add arrows, insert text, and highlight important areas.
Edit Screenshots on Chromebook
Open the screenshot using the Files application and use the available image editing controls.
For more advanced edits, compatible image editing applications may be necessary.
When hiding passwords, personal information, or account details, use solid redaction rather than a transparent highlighter. Check the final image before sharing.
Best Screenshot Image Formats: PNG, JPG, and WebP
Different image formats serve different purposes.
| Format | Best For | Main Advantage |
|---|---|---|
| PNG | Text, software interfaces, diagrams | Sharp text and lossless quality |
| JPG / JPEG | Photographs and general images | Smaller files at adjustable quality |
| WebP | Website images and compressed screenshots | Efficient compression |
PNG is usually the best choice for screenshots containing small text, charts, or interface details.
JPEG is useful when file size matters more than preserving every pixel.
WebP can be helpful when publishing screenshots on websites because it supports both lossy and lossless compression.
If a screenshot appears blurry, check whether it was resized or heavily compressed before saving it again.
Why Is Screenshot Not Working on My Laptop?
Screenshot shortcuts occasionally stop working because of keyboard settings, software conflicts, or application restrictions.
Print Screen Key Not Responding
First, try pressing Fn + PrtScn.
Some laptops require the Fn key to activate secondary keyboard functions.
If your laptop lacks a Print Screen key, Microsoft also documents Fn + Windows + Space as an alternative on supported hardware.
Microsoft Support
You can also use Windows + Shift + S.
Windows + Shift + S Not Working
If the shortcut fails:
- Open Snipping Tool manually.
- Restart the application.
- Check Windows updates.
- Review the application’s settings.
- Restart your laptop.
- Check whether another screenshot utility is interfering with the shortcut.
If the problem continues, use Windows Settings to repair or reset Snipping Tool where those options are available.
Screenshot Is Black or Blank
Some applications restrict screenshots to protect copyrighted or sensitive content.
Streaming services, protected video playback, and certain secure applications may produce a black image.
A black screenshot can also result from graphics driver issues or conflicts with screen capture software.
Try capturing an ordinary desktop window to determine whether the issue affects the entire laptop or only one application.
Screenshot Was Taken but Not Saved
If you used PrtScn or Alt + PrtScn, the image may exist only in your clipboard.
Open Paint and press Ctrl + V to check.
On Windows 11, review Snipping Tool’s automatic saving settings if screenshots are not appearing in the expected folder.
Screenshot Shortcut Opens Another Feature
Keyboard remapping tools, gaming utilities, and manufacturer-specific applications can change the behavior of certain keys.
Check the relevant software settings and test the standard operating system shortcut again.
How to Take Better Screenshots for Work, School, and Tutorials
A good screenshot should communicate the intended information clearly without forcing the viewer to search through unnecessary details.
Before capturing, close unrelated windows and remove notifications that could cover important content.
For tutorials, capture one action or interface state at a time. Use consistent image dimensions when screenshots will appear together in a document.
For school assignments, make sure text remains readable after inserting screenshots into Word, Google Docs, or presentation slides.
If you’re documenting a technical error, include the error message and enough surrounding interface information to identify the application.
Avoid including private browser tabs, email addresses, passwords, or other sensitive details.
Screenshot vs. Screen Recording: Which Should You Use?
A screenshot is a static image of one moment. A screen recording captures activity over time.
Use screenshots for error messages, receipts, charts, instructions, and visual comparisons.
Use screen recordings when you need to demonstrate several actions, an animation, or a problem that appears only during interaction.
Windows 11 includes screen recording capabilities through Snipping Tool. macOS offers recording through Command + Shift + 5, while ChromeOS includes recording in Screen Capture.
Microsoft Windows
+2
Conclusion
Learning how to take a screenshot in laptop is straightforward once you know the correct shortcut for your operating system.
Windows users can press Windows + Shift + S, MacBook users can press Command + Shift + 3 or 4, and Chromebook users can press Ctrl + Show Windows.
For greater control, use Snipping Tool on Windows, the Screenshot toolbar on macOS, or Screen Capture on ChromeOS.
Start with the shortcut that matches your laptop, select the content you need, and verify where the image was saved. These simple steps make it easy to capture, edit, and share screenshots whenever needed.
