
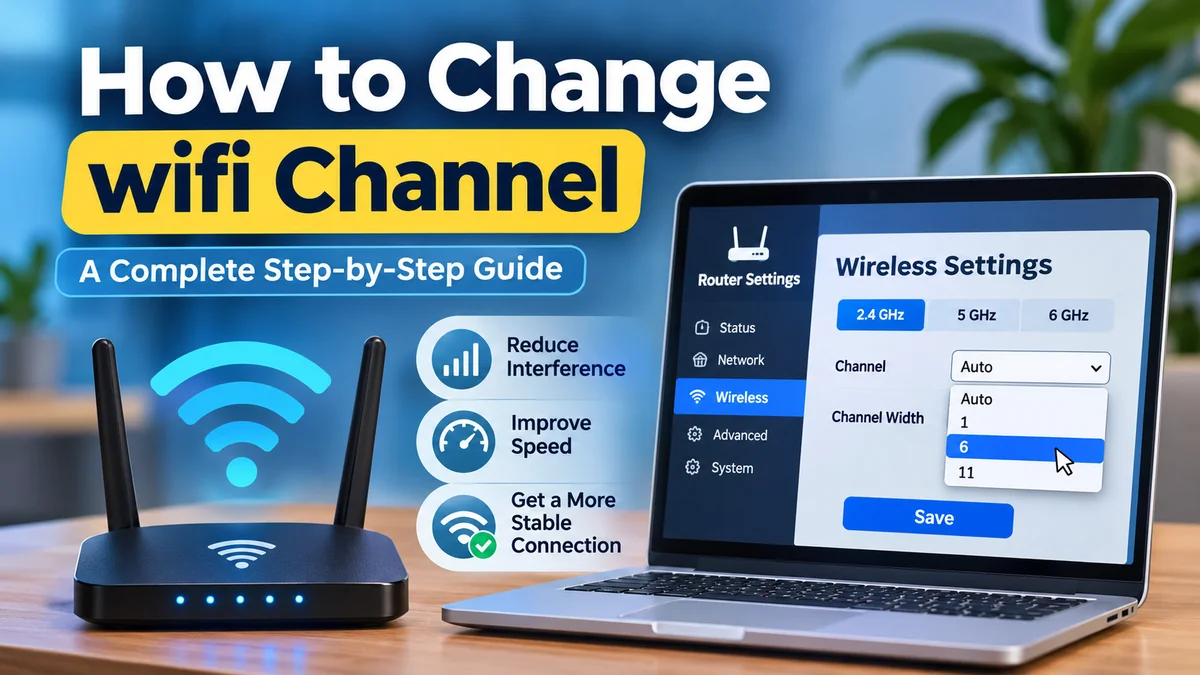

Slow Wi-Fi, random disconnections, and frustrating lag can happen even when your internet plan is fast. One possible cause is wireless interference from neighboring networks using the same or overlapping channels.
Learning how to change wifi channel can help you reduce interference, improve connection stability, and get more consistent wireless performance without replacing your router.
To change your Wi-Fi channel, open your router’s administration page in a web browser, sign in, and navigate to Wireless or Wi-Fi Settings. Select the 2.4 GHz, 5 GHz, or 6 GHz band, change the channel from Auto to a suitable available channel, and save your settings. Your devices may briefly disconnect while the router applies the change.
The exact steps depend on your router brand, wireless frequency band, and whether your network uses automatic channel selection.
What Is a Wi-Fi Channel and Why Does It Matter?
A Wi-Fi channel is a smaller portion of the radio frequency spectrum that a wireless router uses to communicate with connected devices.
Think of your Wi-Fi frequency band as a highway and individual channels as lanes. When too many nearby networks compete for the same radio spectrum, devices may have to wait longer to transmit data.
Wi-Fi operates primarily across three frequency bands:
- 2.4 GHz: Offers relatively long range and good wall penetration but has fewer practical non-overlapping channel choices.
- 5 GHz: Provides more channel options, typically experiences less interference from older household devices, and supports wider channels.
- 6 GHz: Available on compatible Wi-Fi 6E and Wi-Fi 7 equipment, offering additional spectrum and reduced congestion from older Wi-Fi devices.
Wireless networking standards are developed by the IEEE under the 802.11 family, while the Wi-Fi Alliance certifies interoperability under programs such as Wi-Fi 6, Wi-Fi 6E, and Wi-Fi 7.
How Wi-Fi Channel Interference Affects Performance
Wireless interference generally falls into two categories.
Co-channel interference occurs when multiple nearby Wi-Fi networks operate on the same channel. These networks often share airtime through the Wi-Fi medium-access process, reducing the time available for each device to transmit.
Adjacent-channel interference occurs when networks use overlapping frequencies. This is especially problematic on the 2.4 GHz band, where many channel combinations overlap.
You might notice:
- Slow downloads despite a strong Wi-Fi signal.
- Higher latency during online gaming or video calls.
- Frequent buffering while streaming.
- Unstable connections in apartments or crowded buildings.
- Better performance late at night than during busy hours.
Changing channels can help with congestion, but it will not fix every wireless problem. Weak signal strength, poor router placement, outdated firmware, and internet service provider issues can produce similar symptoms.
How to Change WiFi Channel on Any Router
Most home routers provide channel settings through a web-based administration interface or a companion mobile application.
The following process works for many devices from TP-Link, ASUS, NETGEAR, Linksys, D-Link, and other manufacturers.
Step 1: Find Your Router’s IP Address
Your router has a local network address, often called the default gateway.
Common router addresses include:
| Router IP address | Typical use |
|---|---|
192.168.1.1 | Common default gateway |
192.168.0.1 | Common on many home routers |
192.168.50.1 | Used by some ASUS configurations |
10.0.0.1 | Used by some ISP gateways |
These are examples, not universal addresses. The actual address depends on your network configuration.
On Windows:
- Press
Windows + R. - Type
cmdand press Enter. - Enter
ipconfig. - Locate Default Gateway under your active network adapter.
- Copy the displayed IPv4 address.
On macOS:
- Open System Settings.
- Select Network.
- Choose your active Wi-Fi connection.
- Open Details and select TCP/IP.
- Find the Router address.
On Android or iPhone, the gateway may appear in the details of your connected Wi-Fi network.
Step 2: Log In to Your Router
Open Chrome, Edge, Safari, or Firefox and enter the gateway address into the address bar.
For example:
http://192.168.1.1
Your router should display a login screen.
Enter the router’s administrator credentials. These are often different from your Wi-Fi network name and password.
If you have never changed the credentials, check the router label, its documentation, or your internet provider’s setup instructions.
Avoid trying random passwords repeatedly. Some routers temporarily lock administrative access after multiple failed attempts.
Step 3: Open Wireless Settings
After signing in, look for a section named:
- Wireless
- Wi-Fi Settings
- Advanced Wireless
- Wireless Configuration
- Radio Settings
Some routers separate basic and advanced wireless controls.
If your router broadcasts multiple frequency bands, you may see separate configuration sections for 2.4 GHz, 5 GHz, and possibly 6 GHz.
Step 4: Select the Wi-Fi Frequency Band
Choose the band you want to configure.
The 2.4 GHz band is usually the first place to investigate when nearby networks or household electronics cause interference.
For 5 GHz networks, changing channels may be useful when multiple neighboring access points operate on the same frequencies.
If your router uses Smart Connect or band steering, certain controls may be combined or hidden. Some mesh systems manage channels automatically and do not permit manual selection.
Step 5: Change the Wireless Channel
Find the setting labeled Channel, Control Channel, or Wireless Channel.
It may currently display Auto.
For 2.4 GHz networks, channels 1, 6, and 11 are common starting choices in regions where all three are permitted.
For 5 GHz, available options depend on local regulations, router capabilities, and channel width.
Choose a suitable channel based on nearby network activity rather than simply selecting the highest channel number.
Step 6: Save and Apply Changes
Click Save, Apply, or Update.
Your router may restart its wireless radio or briefly disconnect connected devices.
Wait for the network to become available again, then reconnect if necessary.
Step 7: Test Your Wi-Fi Connection
After changing the channel, evaluate the connection from the same device and location used before the change.
Check download and upload speeds, latency, video-call stability, and whether disconnections continue.
For a fair comparison, test at similar times of day and avoid running large downloads on other devices.
If performance becomes worse, try another permitted channel or restore automatic selection.
How to Change WiFi Channel on TP-Link, ASUS, NETGEAR, and Other Routers
Although the basic process is similar across manufacturers, router interfaces use different menus and terminology.
The following instructions cover several popular router brands.
TP-Link Router
Many TP-Link Archer routers support channel changes through their web interface or the TP-Link Tether app.
- Connect to your TP-Link network.
- Open
tplinkwifi.netin your browser. - Sign in using the router administrator password.
- Navigate to Advanced → Wireless → Wireless Settings on supported models.
- Select the frequency band.
- Find Channel and select your preferred option.
- Save your changes.
On compatible models, the Tether app also provides advanced wireless controls under Wi-Fi Settings. Menu names vary by model and firmware version. TP-Link
ASUS Router
ASUS routers commonly provide a setting called Control Channel.
- Visit
asusrouter.comwhile connected to the router. - Sign in to the ASUS administration interface.
- Open Wireless → General.
- Choose the relevant frequency band.
- Locate Control Channel.
- Select a permitted channel.
- Click Apply.
Some ASUS models provide additional settings for DFS channels and separate 5 GHz radios. ASUS USA
NETGEAR Router
For many NETGEAR routers:
- Open
routerlogin.netfrom a connected device. - Enter your administrator credentials.
- Navigate to Wireless.
- Locate the desired frequency band.
- Choose a channel from the Channel menu.
- Click Apply.
NETGEAR generally recommends keeping default channel settings unless interference is causing connection problems. NETGEAR Support
Linksys and D-Link Routers
Many Linksys and D-Link models offer similar controls under Wireless Settings, Wi-Fi Settings, or Advanced Wireless.
Connect to the router’s management interface, locate the channel selection menu, and save your preferred setting.
Some models require disabling automatic channel selection before a manual channel can be chosen.
Because firmware interfaces vary considerably, consult the documentation for your exact model if the channel option is not visible.
Which Wi-Fi Channel Is Best for 2.4 GHz, 5 GHz, and 6 GHz?
There is no single channel that performs best in every home.
The right choice depends on nearby networks, channel width, signal strength, device compatibility, and regional restrictions.
| Frequency band | Channel guidance | Typical recommendation |
|---|---|---|
| 2.4 GHz | Channels 1, 6, or 11 where permitted | 20 MHz width |
| 5 GHz | Choose among locally permitted channels | Auto selection and width |
| 6 GHz | Use compatible channels, preferably PSC when manually configuring | Auto selection and width |
Best Channel for 2.4 GHz Wi-Fi
For most 2.4 GHz networks using 20 MHz channel width, channels 1, 6, and 11 are the standard non-overlapping choices.
Other channel numbers may overlap with neighboring networks, potentially increasing interference.
Microsoft recommends choosing among channels 1, 6, and 11 based on neighboring access points and their signal strengths. Microsoft Support
For example, suppose a Wi-Fi analyzer detects several strong neighboring networks on channel 6, two weaker networks on channel 11, and minimal activity on channel 1.
Channel 1 may be the better starting point, but testing is still necessary because the number of detected networks does not reveal their actual airtime usage.
Best Channel for 5 GHz Wi-Fi
The 5 GHz band provides more channel options than 2.4 GHz.
Common channel groups include 36–48 and 149–161, although availability varies by country and router.
Some channels require Dynamic Frequency Selection (DFS), a mechanism that helps Wi-Fi networks avoid interfering with radar systems.
If radar activity is detected on a DFS channel, a router may be required to change channels. This can temporarily interrupt wireless connectivity.
For most households, automatic channel selection is a sensible default.
Best Channel for 6 GHz Wi-Fi
The 6 GHz band is supported by compatible Wi-Fi 6E and Wi-Fi 7 devices.
It offers additional spectrum, but channel availability and permitted operating modes vary by region.
A concept called Preferred Scanning Channels (PSC) helps compatible devices discover 6 GHz networks efficiently.
When manually configuring 6 GHz, using a supported PSC can improve network discovery compatibility. NETGEAR specifically recommends PSC selection when changing channels manually on its compatible routers. NETGEAR Support
How to Find the Least Congested Wi-Fi Channel
Choosing a channel without checking the wireless environment can produce mixed results.
A Wi-Fi analyzer provides a clearer picture of nearby access points, their channels, and their received signal strengths.
Check Wi-Fi Channels on Windows
Windows includes basic wireless diagnostic commands.
Open Command Prompt and enter:
netsh wlan show networks mode=bssidDepending on your Wi-Fi adapter, driver, and Windows configuration, the output can display nearby wireless networks, channels, radio types, and signal strengths.
Look for strong neighboring networks using the same or overlapping channels as yours.
For more detailed information, a compatible Wi-Fi analyzer application can provide a channel graph.
Check Wi-Fi Channels on macOS
macOS provides wireless diagnostic capabilities.
On supported macOS versions, hold the Option key and select the Wi-Fi menu icon to access additional wireless information or Wireless Diagnostics.
The available menus vary by macOS release.
Wireless diagnostic tools can help identify nearby networks and possible channel conflicts.
Check Wi-Fi Channels on Android
Android users can use Wi-Fi analyzer applications that display:
- Nearby wireless network names.
- Channel numbers.
- Received signal strength in dBm.
- Frequency bands.
- Channel overlap.
Android permissions and device restrictions may affect which information these applications can collect.
Check Wi-Fi Channels on iPhone
iOS limits the wireless scanning capabilities available to ordinary third-party applications.
Apple’s AirPort Utility has offered a Wi-Fi scanning feature on supported devices and software versions.
Alternatively, use the router’s built-in wireless analysis features or perform the scan from a Windows, macOS, or Android device.
How to Interpret Wi-Fi Analyzer Results
A signal strength reading closer to 0 dBm indicates a stronger received signal.
For example:
| Signal strength | General interpretation |
|---|---|
| -30 dBm | Extremely strong |
| -50 dBm | Strong |
| -67 dBm | Generally suitable for many real-time applications |
| -75 dBm | Weaker connection |
| -85 dBm | Very weak and potentially unreliable |
These values are approximate reference points rather than guaranteed performance thresholds.
A neighboring network at -40 dBm is generally more relevant to interference analysis than one at -85 dBm.
However, channel utilization, traffic volume, and non-Wi-Fi interference also matter. A channel with fewer visible networks is not necessarily the fastest.
Should You Use Auto or Manual Wi-Fi Channel Selection?
Most modern routers support automatic channel selection.
In Auto mode, the router chooses a channel according to its own scanning and optimization process. Some devices evaluate channel conditions only during startup, while others periodically reassess their wireless environment.
Manual selection gives you more control but also requires monitoring and occasional adjustment.
| Feature | Auto channel | Manual channel |
|---|---|---|
| Ease of setup | Very easy | Requires configuration |
| Responds to interference | Depends on router | Requires user intervention |
| Control over channel | Limited | Direct control |
| Best suited for | Most home networks | Troubleshooting persistent congestion |
| Maintenance | Usually minimal | Occasional retesting |
Apple recommends Auto channel selection for compatible routers and 20 MHz channel width on the 2.4 GHz band. Apple Support (UK)
Manual channel selection is most useful when you have evidence that the router is repeatedly choosing a congested channel or when automatic channel changes create compatibility problems.
Wi-Fi Channel Width: 20 MHz vs. 40 MHz vs. 80 MHz vs. 160 MHz
Changing the channel number is only part of wireless optimization.
Channel width determines how much radio spectrum a Wi-Fi connection can use.
Wider channels can support higher data rates under favorable conditions, but they also occupy more spectrum and may encounter more interference.
| Channel width | Main advantage | Main limitation |
|---|---|---|
| 20 MHz | Better coexistence in congested environments | Lower maximum throughput |
| 40 MHz | More capacity than 20 MHz | Greater spectrum usage |
| 80 MHz | High throughput on supported bands | More exposure to congestion |
| 160 MHz | Higher potential speeds | Requires substantial clear spectrum |
| 320 MHz | Very high potential capacity on compatible Wi-Fi 7 systems | Limited availability and device compatibility |
Why 20 MHz Is Usually Better for 2.4 GHz
The 2.4 GHz band has relatively little available spectrum.
Using 40 MHz channels in a crowded environment can overlap with more neighboring networks, potentially reducing reliability rather than improving it.
A 20 MHz setting is therefore a strong default for most residential 2.4 GHz networks.
When Wider Channels Make Sense
On 5 GHz and 6 GHz, wider channels can be useful for high-speed transfers, modern laptops, gaming devices, and other demanding applications.
However, actual performance depends on signal quality, interference, supported Wi-Fi standards, and the number of simultaneous devices.
A stable 80 MHz connection may outperform an unstable 160 MHz connection.
For most users, leaving 5 GHz and 6 GHz channel width on Auto is a practical approach.
Why Can’t You Change Your Wi-Fi Channel?
Sometimes the Channel menu is missing, disabled, or refuses to save changes.
Several common explanations are worth checking before resetting your router.
Your Router Is Controlled by Your Internet Provider
Some internet service providers restrict advanced wireless settings on their supplied gateways.
You may be able to change the Wi-Fi password and network name but not the radio channel.
Check the provider’s official management application or contact its support team to determine whether manual channel control is available.
Smart Connect Is Enabled
Smart Connect typically combines management of multiple wireless bands and automatically directs compatible devices between them.
On certain routers, this feature can hide or combine advanced wireless controls.
If necessary, temporarily disable Smart Connect to inspect the available band-specific settings.
Remember that changing Smart Connect settings can affect how your devices connect.
Your Mesh Wi-Fi System Uses Automatic Optimization
Mesh systems often coordinate channel selection across multiple access points.
Manual changes could disrupt this coordination, so some manufacturers do not expose individual channel controls.
In these systems, automatic management may be preferable to forcing channels manually.
The Channel Is Restricted in Your Country
Wireless channel availability is regulated.
A router configured for one country may display a different set of channels than a router sold elsewhere.
Do not attempt to bypass regional restrictions by modifying firmware or changing the regulatory domain to an incorrect location.
Router Firmware Needs Updating
Outdated firmware can cause configuration errors, wireless instability, or missing functionality.
Check the manufacturer’s support website or router application for available firmware updates.
Before updating, save your existing settings where supported and follow the manufacturer’s instructions.
The Router Is in Access Point or Extender Mode
Some routers operating as wireless repeaters or extenders must follow the channel of the upstream network.
Others may disable certain wireless settings when operating in access point mode.
Check the operating mode and device documentation before troubleshooting further.
What to Do If Changing the Wi-Fi Channel Doesn’t Improve Speed
If the connection remains slow after changing channels, investigate the wider network.
Test Your Internet Connection Separately
Connect a computer to the router using Ethernet, if possible.
Run several speed tests and compare the results with Wi-Fi performance.
If Ethernet is also slow, the problem may involve your internet connection, router processing capacity, or service provider rather than wireless interference.
Improve Router Placement
Place your router in a reasonably central, elevated, open location.
Avoid positioning it behind large metal objects, inside enclosed cabinets, or near equipment that generates substantial radio interference.
Microwave ovens, some cordless phones, Bluetooth devices, and other electronics can affect the 2.4 GHz band.
Check Signal Strength and Distance
A channel change cannot compensate for severe signal loss caused by distance or obstacles.
If Wi-Fi works well near the router but poorly in another room, consider coverage improvements.
A better router position, additional wired access point, or properly configured mesh system may be more effective.
Review Connected Devices
Large downloads, cloud backups, video streams, and software updates can consume available bandwidth.
Check whether another device is using substantial network capacity during periods of poor performance.
Quality of Service (QoS) settings may help prioritize latency-sensitive traffic on supported routers, although they cannot increase the speed of the underlying internet connection.
Update Your Devices
Older wireless adapters and outdated drivers can cause connection instability.
Update operating systems, wireless drivers, and router firmware using official sources.
For persistent problems, test multiple devices to determine whether the issue affects the entire network or only one client.
Common Mistakes When Changing Wi-Fi Channels
One frequent mistake is assuming that a higher channel number automatically provides faster internet.
Channel numbers identify frequency positions, not performance rankings.
Another mistake is selecting a channel based only on the number of neighboring networks. A heavily used network can create more congestion than several nearly idle networks.
Avoid changing multiple wireless settings simultaneously. If you modify channel, width, security mode, and band steering together, it becomes difficult to identify which change improved or degraded performance.
Also avoid using unnecessarily wide channels on crowded 2.4 GHz networks.
Finally, do not assume that a channel selected today will remain ideal permanently. Neighboring routers, network usage patterns, and nearby equipment can change.
For reliable troubleshooting, record the original configuration, modify one setting, and compare the results.
How Often Should You Change Your Wi-Fi Channel?
There is no need to change Wi-Fi channels on a fixed schedule.
If your connection is stable and performs adequately, leave the current settings alone.
Consider reviewing channel selection when you notice repeated disconnections, increased latency, new neighboring networks, or significant changes to your home wireless setup.
Automatic channel selection is generally the easiest long-term option for ordinary home networks.
Manual selection makes sense when testing demonstrates a consistent improvement.
Conclusion
Understanding how to change wifi channel gives you a practical way to troubleshoot wireless interference and connection instability.
Start by opening your router’s administration interface and checking its current wireless channel. For 2.4 GHz, compare channels 1, 6, and 11 where permitted, using a 20 MHz width. For 5 GHz and 6 GHz, automatic channel selection is usually the best starting point.
Use a Wi-Fi analyzer when possible, test one change at a time, and compare performance under similar conditions.
The goal is not to find a universally perfect channel. It is to find a reliable configuration that works well in your particular wireless environment.
