
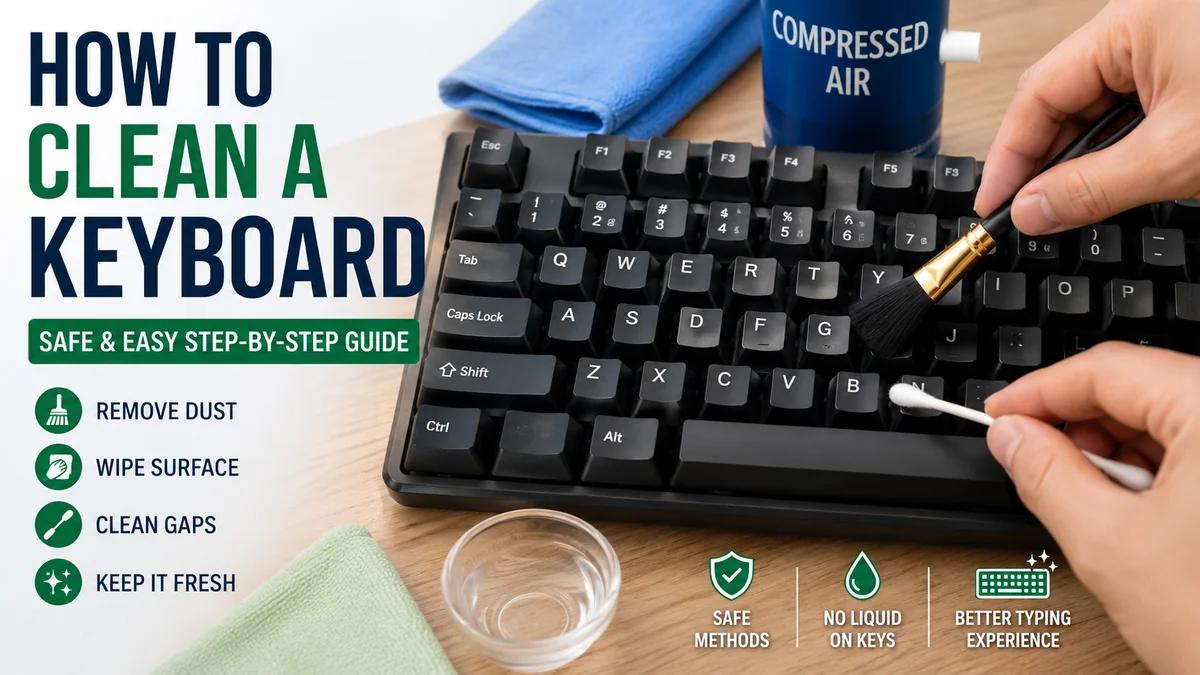

A keyboard can look fairly clean while hiding crumbs, hair, dust, skin oils, and sticky residue between and underneath its keys. The problem is that aggressive cleaning can cause more trouble than the dirt itself.
Learning how to clean a keyboard properly comes down to three things: disconnecting power, removing dry debris first, and using as little liquid as possible. For routine cleaning, use compressed air or a soft brush, followed by a microfiber cloth. For stubborn grime, lightly dampen the cloth or a cotton swab with isopropyl alcohol. Never spray liquid directly onto the keyboard.
The exact method depends on what you have. A standard desktop keyboard can usually tolerate a more thorough cleaning than a laptop keyboard, while a mechanical keyboard may allow you to remove its keycaps completely.
What You Need to Clean a Keyboard
You don’t need an elaborate electronics-cleaning kit. A few basic supplies handle most keyboard cleaning jobs.
| Cleaning item | Best use |
|---|---|
| Microfiber cloth | Fingerprints, oils, and surface grime |
| Compressed air | Dust and crumbs between keys |
| Soft-bristled brush | Loosening trapped debris |
| Cotton swabs | Cleaning narrow spaces and key edges |
| Isopropyl alcohol | Sticky residue and stubborn grime |
| Keycap puller | Removing compatible mechanical keycaps |
| Mild dish soap | Washing removable keycaps |
| Warm water | Washing removable keycaps only |
A clean, unused soft toothbrush can substitute for a dedicated cleaning brush when necessary. Dell recommends that any substitute brush be clean, dry, soft-bristled, and non-abrasive.
You generally don’t need bleach, window cleaner, furniture cleaner, or other aggressive household chemicals.
More liquid also doesn’t mean more cleaning power. With electronics, it usually means more risk.
how to clean a keyboard: The Safe Step-by-Step Method
For most desktop, wireless, and everyday computer keyboards, start with the least invasive cleaning method.
1. Turn Off and Disconnect the Keyboard
Always disconnect power before cleaning.
For a wired keyboard, unplug its USB cable. Switch off a wireless keyboard and remove replaceable batteries when appropriate. If you’re cleaning a built-in laptop keyboard, shut the computer down and disconnect its charger.
This prevents accidental keystrokes and reduces the risk associated with moisture reaching powered electronics.
2. Turn the Keyboard Upside Down
Hold the keyboard over a desk, towel, or wastebasket and gently turn it upside down.
Give it a few gentle taps or shakes.
You may be surprised by how much loose material falls out:
- Food crumbs
- Dust
- Hair
- Pet fur
- Small fibers
- Other loose debris
Don’t hit the keyboard hard against a desk. You’re trying to dislodge particles, not knock components loose.
This simple upside-down method is recommended for wired, wireless, and Bluetooth keyboards in Dell’s keyboard guidance.
3. Brush Between the Keys
Return the keyboard to a comfortable angle and use a soft cleaning brush to loosen particles trapped around the keys.
Brush toward an outside edge rather than repeatedly pushing dirt deeper into the keyboard.
A clean, soft toothbrush can work if you don’t have a dedicated electronics brush.
Pay particular attention to areas surrounding frequently used keys such as:
- Spacebar
- Enter
- Shift
- Backspace
- WASD keys on gaming keyboards
These areas often collect more debris simply because they’re touched so frequently.
4. Use Compressed Air
Compressed air is useful for particles a brush can’t easily reach.
Keep the can upright and use short, controlled bursts between rows of keys. Work systematically across the keyboard rather than blasting one area continuously.
Holding canned air incorrectly can cause liquid propellant to escape, so avoid turning the can upside down.
Angle the keyboard so dislodged particles have somewhere to escape instead of simply moving from one hidden area to another.
5. Wipe the Key Surfaces
Once the loose debris is gone, use a clean microfiber cloth to wipe the keycaps and keyboard case.
For light dust and fingerprints, a dry microfiber cloth may be enough.
For heavier grime, slightly dampen the cloth. It should feel barely moist, not wet.
Never pour or spray cleaner directly onto the keyboard. Dell specifically recommends applying cleaning solution to the cloth rather than the hardware because moisture can seep beneath keycaps and reach internal circuitry.
6. Clean Around the Keys
A cotton swab is useful for areas a microfiber cloth can’t reach.
Lightly moisten the swab with isopropyl alcohol and clean:
- Around key edges
- Between closely spaced keys
- Along the keyboard frame
- Around a sticky key
- In narrow grooves
The swab shouldn’t drip when squeezed.
Replace it when it becomes visibly dirty instead of spreading grime around the keyboard.
7. Let Everything Dry
Don’t immediately reconnect the keyboard.
Give any remaining moisture or alcohol time to evaporate. The keyboard should feel completely dry before you restore power.
Once dry, reconnect it and test the keys.
Quick Takeaway: The safest routine is power off → shake out debris → brush → compressed air → microfiber wipe → spot-clean stubborn grime → dry completely.
How to Clean a Keyboard Without Removing Keys
You do not need to remove keycaps for normal keyboard maintenance.
In fact, cleaning without removing keys is the safer choice for many keyboards, especially laptops and low-profile models.
Start by disconnecting power. Tilt the keyboard and shake loose particles out, then brush along each row. Follow with short bursts of compressed air.
Use a microfiber cloth for the key surfaces and a lightly moistened cotton swab for the narrow gaps.
A sticky note can sometimes pick up fine particles from shallow gaps: slide its adhesive edge gently between accessible keys rather than forcing it underneath the key mechanisms.
This approach is particularly useful when the keyboard has:
- Low-profile keys
- Scissor switches
- Non-removable keycaps
- An unfamiliar key mechanism
- A laptop-style integrated design
If you don’t know whether your keycaps are designed to come off, assume they aren’t until the manufacturer’s documentation says otherwise.
How to Clean a Laptop Keyboard
Laptop keyboards deserve more caution because the keyboard sits directly above sensitive internal components.
Start by shutting the laptop down completely and disconnecting the charger.
Tilt the laptop carefully and use compressed air to clear loose material from around the keys. Then wipe the keyboard with a clean microfiber cloth.
For stubborn grime, lightly moisten a cotton swab with isopropyl alcohol and work around the affected key edges.
Should You Remove Laptop Keys?
Usually, no.
Laptop keycaps often use delicate scissor-style mechanisms and small retaining clips. Dell specifically advises against removing laptop keycaps during routine cleaning because forcing them off can damage the underlying mechanism.
A removable-looking key isn’t necessarily a safely removable key.
If something substantial is trapped underneath a laptop key and compressed air can’t remove it, consult the laptop manufacturer’s service instructions before prying anything up.
What About Apple Laptop Keyboards?
For some Mac notebook keyboard cleaning procedures, Apple has recommended using compressed air while holding the notebook at roughly a 75-degree angle and changing its orientation so air reaches the keyboard from different directions.
For any specific MacBook model, however, follow the current instructions for that model rather than assuming every Apple keyboard uses exactly the same cleaning procedure.
How to Deep Clean a Mechanical Keyboard
Mechanical keyboards are often easier to deep-clean because many models use removable keycaps.
Before starting, confirm that your keyboard’s keycaps are intended to be removed.
Take a Photo First
Take a clear overhead picture of the complete keyboard.
This takes seconds and makes reassembly far easier, especially when your keyboard has:
- Custom keycaps
- Macro keys
- Unusual function keys
- Non-standard bottom rows
Then unplug the keyboard.
Remove the Keycaps
Use a proper keycap puller and pull each compatible keycap upward with controlled, even pressure.
Avoid twisting aggressively.
Large keys such as the spacebar, Enter, and Shift may use stabilizers, so they can require extra care.
If you’re unsure how one of these keys is attached, leave it in place rather than risking damage.
Remove Loose Debris
With the keycaps removed, you’ll have direct access to the switch plate.
Use compressed air and a soft brush to remove:
- Dust
- Hair
- Crumbs
- Fibers
- Other accumulated particles
Work gently around the mechanical switches.
Clean the Plate and Around the Switches
For oily or sticky areas, use a cotton swab lightly moistened with isopropyl alcohol.
Move around the switch housings and along the exposed plate without flooding anything.
Don’t pour alcohol into a mechanical switch or onto the printed circuit board (PCB).
Wash Removable Keycaps
If your keycap material and manufacturer’s instructions permit washing, place the removed keycaps in warm water with a small amount of mild dish soap.
HP’s cleaning guidance suggests soaking removable keycaps in warm soapy water for about 30 minutes before rinsing and drying them thoroughly.
Don’t wash:
- Switches
- The PCB
- USB connectors
- Electronic modules
- The entire keyboard
Rinse the keycaps and leave them until they are completely dry.
Don’t reinstall damp keycaps simply because their outer surfaces feel dry. Water can remain inside the underside structure.
Reassemble and Test
Use the photo you took earlier to reinstall each keycap.
Press the compatible caps straight onto their switch stems and check that larger stabilized keys move normally.
Reconnect the keyboard and test every key.
How to Clean Sticky Keyboard Keys
Sticky keys usually come from dried residue, skin oils, food contamination, or a small drink splash.
Start with the keyboard powered off.
Lightly moisten a cotton swab with isopropyl alcohol and wipe around the affected key. Work the key gently several times while cleaning around its edges.
Alcohol can help dissolve sticky residue and evaporates relatively quickly, but it should still be used sparingly. Dell recommends a lightly moistened swab rather than introducing liquid directly into the keyboard.
If the sticky key belongs to a mechanical keyboard with removable keycaps, remove the cap and clean underneath it.
If a laptop key remains sticky after external cleaning, don’t automatically pry it off. The contamination may be underneath the mechanism, where professional service may be safer.
Can You Use Alcohol to Clean a Keyboard?
Isopropyl alcohol is commonly recommended for keyboard cleaning when used carefully.
HP recommends isopropyl alcohol of 70% or higher for appropriate keyboard cleaning tasks, while Dell recommends applying it sparingly to a cotton swab for sticky residue.
The crucial word is lightly.
Don’t pour alcohol onto keys or soak the cloth until liquid can run into gaps.
You should also check manufacturer-specific guidance before using alcohol on unusual finishes, coatings, printed legends, or specialty keycaps.
Can You Use Disinfecting Wipes on a Keyboard?
This depends on the keyboard and the wipe.
Some manufacturer guidance permits suitable disinfecting wipes on certain surfaces, while other instructions warn against particular cleaners. That makes a universal “yes” risky.
Check the device manufacturer’s cleaning instructions first.
If an approved wipe is used, it should not be dripping wet. Prevent liquid from collecting around key edges, seams, openings, USB ports, or other electronic components.
Cleaning and disinfecting also aren’t identical tasks. Removing dust, crumbs, and oils is physical cleaning; disinfecting targets microorganisms and may require a specific product and contact procedure.
For ordinary home keyboard maintenance, a microfiber cloth, compressed air, and careful spot cleaning are usually sufficient.
What Should You Never Use to Clean a Keyboard?
Knowing what not to do can save an expensive keyboard or laptop.
Don’t Spray Cleaner Directly Onto It
Spraying liquid across the keys makes it easy for moisture to seep underneath them.
Put an appropriate cleaner on the cloth or cotton swab instead.
Don’t Soak the Keyboard
A removable plastic keycap may be washable. The electronic keyboard underneath it isn’t.
Never submerge an ordinary keyboard in water.
Don’t Put a Normal Keyboard in the Dishwasher
You may find videos showing people washing keyboards this way. That doesn’t make it a safe general cleaning method.
Water, detergent, heat, and prolonged moisture can damage electronic components, adhesives, coatings, switches, and connectors.
Don’t Pull Off Laptop Keycaps Without Checking
Mechanical keycaps and laptop keycaps aren’t interchangeable concepts.
Many mechanical keyboards are intentionally designed for keycap removal. Laptop keyboards often use fragile clips and scissor mechanisms.
Don’t Scrub With Abrasive Materials
Avoid rough scouring pads or abrasive cleaners.
They can scratch surfaces, polish away textured finishes, or damage printed legends.
Don’t Use Excessive Compressed Air
More pressure isn’t necessarily better.
Use controlled bursts that move debris outward. Keep canned-air products upright according to their instructions to reduce the chance of propellant discharge.
How to Clean a Keyboard After a Liquid Spill
A spill is different from routine cleaning.
If you spill water, coffee, soda, or another drink on the keyboard, speed matters more than making it look clean.
First, disconnect power immediately.
For an external keyboard, unplug the cable. For a wireless keyboard, switch it off and remove accessible replaceable batteries when appropriate.
For a laptop, shut it down and disconnect external power as quickly and safely as possible.
Turn an external keyboard so liquid can drain rather than continue moving deeper inside. Blot accessible moisture with a lint-free cloth instead of pushing it around.
Sugary drinks, milk, and coffee with additives are particularly troublesome because evaporation can leave sticky residue behind.
Don’t reconnect a wet keyboard merely to “see if it still works.”
HP advises allowing a spill-affected keyboard to dry completely—its general guidance specifies at least 48 hours—before attempting to use it again.
A substantial laptop spill can reach components far beyond the keyboard. If that happens, professional inspection may be more appropriate than simply waiting for the keys to dry.
Quick Takeaway: A spill is an electrical problem first and a cleaning problem second. Disconnect power immediately and don’t keep testing a wet device.
How to Clean a Wireless or Bluetooth Keyboard
The basic cleaning procedure is similar to a wired keyboard, but power management deserves extra attention.
Switch the keyboard off first. If it uses replaceable batteries and the design allows easy removal, take them out before a deep clean.
Use a dry cloth around the battery compartment. Don’t introduce cleaning liquid around battery contacts, charging ports, switches, or other openings.
After cleaning, make sure everything is dry before replacing the batteries or turning the keyboard back on.
How Often Should You Clean Your Keyboard?
There’s no single schedule that suits everyone.
A keyboard used for eight hours every day will accumulate dirt faster than one used occasionally. Eating at your desk, pets, dusty rooms, shared computers, and oily hands can also increase buildup.
A practical routine looks like this:
| Cleaning task | Reasonable schedule |
| Wipe key surfaces | Weekly or when visibly dirty |
| Remove crumbs and dust | Every few weeks |
| Clean sticky areas | As soon as noticed |
| Thorough external-keyboard clean | Every few months as needed |
| Mechanical keyboard deep clean | When debris builds up under keycaps |
| Spill cleanup | Immediately |
HP recommends at least monthly cleaning as a general maintenance baseline, with more frequent quick cleaning for heavily used keyboards.
Visual condition matters more than a rigid calendar. If the keyboard looks grimy or keys begin feeling sticky or sluggish, clean it sooner.
How to Keep a Keyboard Cleaner for Longer
Preventing buildup is easier than repeatedly deep-cleaning it.
Wash or clean your hands before long computer sessions, especially after eating. Avoid eating directly over the keyboard, and keep open drinks away from laptops and expensive mechanical boards.
A quick microfiber wipe also prevents skin oils from gradually turning into stubborn grime.
If you have pets, occasional compressed-air cleaning can remove hair before it becomes packed beneath the keys.
Keyboard covers can help in environments with lots of dust or debris, although some people dislike how they affect typing feel. If you use one, remove and clean the cover itself periodically.
The Safest Approach to how to clean a keyboard
Once you know how to clean a keyboard, regular maintenance is straightforward: disconnect the power, remove dry debris first, use compressed air or a soft brush for tight spaces, wipe the keys with microfiber, and use only a small amount of isopropyl alcohol when stubborn grime requires it.
The biggest difference comes from matching the cleaning method to the hardware. A mechanical keyboard may safely allow full keycap removal, while a laptop keyboard usually requires a much gentler surface-cleaning approach.
Above all, keep liquids away from internal electronics, never spray cleaner directly onto the keys, and let the keyboard dry completely before restoring power. Those simple precautions remove most everyday dust and grime without turning routine cleaning into an expensive repair.
