
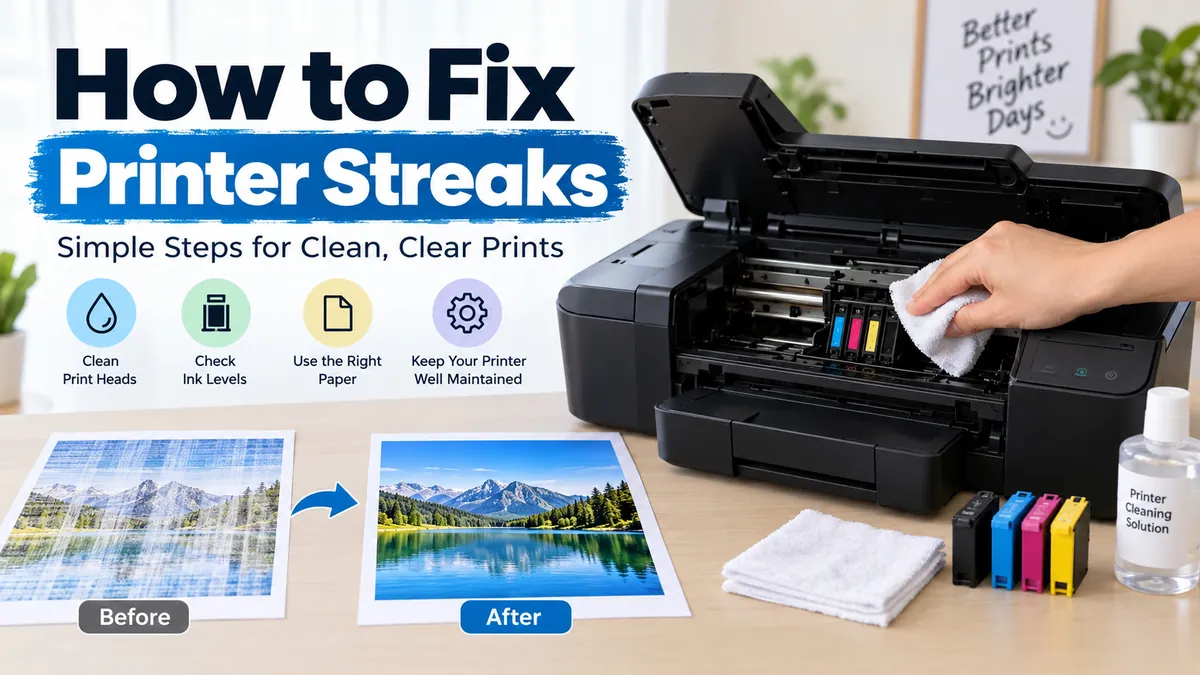

A printer can seem perfectly normal until the page comes out covered with horizontal bands, vertical black lines, faded sections, or colored streaks. The pattern may look serious, but it often points to a specific maintenance issue rather than a failed printer.
If you’re trying to learn how to fix printer streaks, start by printing a test page, checking ink or toner levels, and identifying whether you have an inkjet or laser printer. Inkjet streaks commonly involve clogged printhead nozzles, while laser streaks can involve toner, the imaging drum, corona wire, transfer components, or contamination inside the paper path.
Quick answer: To fix printer streaks, print a diagnostic page, check the ink or toner, and run the printer’s built-in cleaning function. On an inkjet, perform a nozzle check and clean the printhead. On a laser printer, inspect the toner cartridge and follow the manufacturer’s procedure for cleaning the drum, corona wire, or paper path.
The key is diagnosing the pattern before cleaning or replacing parts. A missing-color band needs a different solution from a repeating black mark, for example.
How to Fix Printer Streaks Step by Step
Before opening the printer or buying a new cartridge, work through the simplest causes first.
- Print a test or diagnostic page.
- Check the paper for moisture, wrinkles, dust, or an incorrect type.
- Check ink or toner levels.
- Identify whether the streak is horizontal, vertical, colored, faded, or repeating.
- For an inkjet, print a nozzle-check pattern.
- Run the built-in printhead cleaning cycle if the nozzle check shows missing segments.
- For a laser printer, inspect and reseat the toner cartridge.
- Use the printer’s approved cleaning procedure for the drum, corona wire, or other accessible components.
- Print another test page after each change.
- Replace the affected consumable or arrange service if the defect remains.
This order matters. Repeatedly running cleaning cycles without checking the pattern can waste ink without addressing the actual cause.
Start With a Printer Test Page
A test page separates printer hardware problems from problems involving a particular document, application, or computer.
Print a test or print-quality report directly from the printer’s control panel or maintenance software. Exact menu names vary, but look for options such as:
- Test Print
- Print Quality Report
- Diagnostic Page
- Nozzle Check
- Print Test Pattern
If the streak appears on the printer-generated test page, the issue is probably within the printing system. If the test page looks perfect but a particular document does not, investigate the application, driver, print settings, or source file instead.
Brother, for example, uses test prints as part of its diagnostic process for identifying the color and source of vertical streaks on laser printers.
Quick Takeaway: Don’t replace parts based only on one bad document. A printer-generated diagnostic page gives you a much cleaner starting point.
What Causes Streaks on Printed Pages?
Printer streaks are not one single defect. “Streaking” can describe missing ink, excess toner, repeated marks, color bands, smears, or straight lines running across the paper.
Common causes include:
| Streak pattern | Likely cause | First thing to check |
|---|---|---|
| White horizontal bands | Clogged inkjet nozzles | Nozzle check |
| Missing color | Ink cartridge or color-channel blockage | Ink level and nozzle pattern |
| Faded areas | Low ink/toner or blocked nozzles | Supplies and test page |
| Black vertical line | Toner, drum, corona wire, or contamination | Laser consumables |
| Colored vertical line | Corresponding toner/color system | Color test page |
| Repeating dots or marks | Drum, roller, or another rotating component | Repeat interval |
| Ink smears | Paper, platen, wet ink, or dirty paper path | Paper and internal contamination |
| Streaks only on copies | Scanner/ADF glass contamination | Scanner glass |
| Irregular marks | Debris or damaged consumable | Visual inspection |
On supported Brother laser models, black or colored vertical lines may be associated with the corona wire, toner cartridge, or drum unit. HP’s laser troubleshooting guidance likewise distinguishes light vertical streaks from dark vertical lines and recommends checking the cartridge, cleaning functions, and toner level.
Does the Direction of Printer Streaks Matter?
Yes. The direction and repetition of a defect provide useful diagnostic clues.
Horizontal bands on an inkjet frequently appear when individual printhead nozzles fail to deposit ink consistently as the carriage moves across the page. A nozzle-check pattern can expose gaps in the affected color.
Vertical streaks on laser output more often direct attention toward toner and imaging components. However, orientation can be confusing because the apparent direction depends on how the page travels through the machine.
Instead of relying on direction alone, combine it with color, repetition, and the diagnostic page.
How to Fix Printer Streaks on an Inkjet Printer
Inkjet printers from manufacturers such as HP, Canon, Epson, and Brother create an image by depositing tiny droplets of liquid ink through printhead nozzles.
When ink dries around those nozzles or ink flow becomes inconsistent, you can see banding, missing colors, white gaps, or faded sections. Manufacturer maintenance utilities are designed to address many of these problems before manual intervention becomes necessary. HP, for example, recommends its printhead-cleaning utility for print-quality problems that include streaking and faded output.
1. Check the Ink Levels
Start with the printer’s display, companion application, or driver utility.
A nearly empty cartridge can cause weak or incomplete output. If one color is missing consistently, check that specific cartridge or ink tank.
Keep in mind that an estimated ink level doesn’t prove that ink is flowing correctly. A cartridge can contain ink while the corresponding printhead nozzles remain partially blocked.
2. Print a Nozzle Check
A nozzle check is one of the most useful tests for an inkjet.
Load plain paper and open the printer’s Maintenance, Tools, or Print Quality menu. Select Nozzle Check, Print Test Pattern, or the equivalent option.
Examine the pattern closely.
If every line is continuous and each color is complete, a clogged printhead becomes less likely. If there are gaps, broken lines, or a missing color, cleaning the printhead is the logical next step.
3. Run the Printhead Cleaning Utility
Use the printer’s built-in cleaning function rather than immediately attempting to clean the printhead manually.
The exact controls depend on the model. On supported HP printers, for example, print-quality tools can be accessed through the manufacturer’s printer software, where a Clean Printhead or similar command runs an automated cycle and produces a test page.
A sensible sequence is:
- Run one cleaning cycle.
- Print another nozzle check.
- Compare it with the first pattern.
- Run a deeper cleaning only if your printer provides that option and the manufacturer’s instructions recommend it.
Don’t continuously run cleaning cycles. Printhead cleaning consumes ink, and repeated cycles won’t repair a physically damaged printhead.
4. Check Printhead Alignment
Not every visible line is caused by a clog.
Poor printhead alignment can produce uneven edges, misregistered colors, or visible banding. If the nozzle check looks complete but regular lines remain, run the printer’s Align Printhead or Printhead Alignment utility.
Use clean plain paper unless the printer specifically asks for another paper type.
5. Inspect the Paper and Print Settings
Paper can create print-quality symptoms that resemble mechanical problems.
Check that the paper is:
- Clean and dry
- Flat rather than curled
- Appropriate for inkjet printing
- Loaded correctly
- Compatible with the selected media setting
Also confirm that the driver isn’t set to an inappropriate paper type or very low-quality printing mode.
If streaks appear only on photos or heavy paper, but ordinary documents look clean, the problem may involve media compatibility or print settings rather than a blocked nozzle.
6. Check the Platen and Paper Path
Ink, dust, scraps of paper, or other contamination inside the print area can leave marks on sheets as they pass through the printer.
Brother notes that vertical lines on some inkjet models can result from dirt or debris in the print engine interfering with printhead travel, and its model-specific instructions include cleaning the printer platen with a dry, soft, lint-free cloth.
Never assume every printer can be cleaned in exactly the same way. Turn the printer off or unplug it when the manufacturer instructs you to do so, and follow the maintenance procedure for your specific model.
Quick Takeaway: For inkjet streaks, the most useful sequence is nozzle check → printhead cleaning → nozzle check again → alignment/paper-path inspection.
How to Fix Printer Streaks on a Laser Printer
A laser printer works differently from an inkjet. It uses toner powder and imaging components rather than liquid ink and inkjet nozzles.
That means running “printhead cleaning” instructions intended for inkjets is the wrong approach.
Laser streaks can involve the toner cartridge, imaging drum, corona wire on applicable models, transfer system, fuser, environmental conditions, or contamination in the paper path.
1. Check the Toner Cartridge
Low or unevenly distributed toner can cause light areas and streaks.
Check the toner status first. If your manufacturer permits redistribution, remove the cartridge using the documented procedure and gently move it as instructed before reinstalling it.
For certain HP LaserJet models, HP recommends removing and gently redistributing toner when troubleshooting vertical streak defects.
Don’t aggressively shake a cartridge. Toner is a fine powder, and mishandling can create leaks and contamination.
2. Identify Which Toner Color Is Causing the Streak
On a color laser printer, the color of the line is valuable evidence.
A cyan line, for example, points toward the cyan imaging path rather than all four toner cartridges. The same principle applies to magenta, yellow, and black defects.
Brother’s troubleshooting process for some color laser models specifically asks users to print a test page and identify the color of the vertical line before proceeding with cleaning or cartridge diagnosis.
This can prevent unnecessary replacement of unaffected cartridges.
3. Inspect the Drum Unit
The imaging drum plays a major role in transferring the toner image during laser printing.
A contaminated or damaged drum can create consistent lines, spots, or repeating defects. If the same mark reappears at regular intervals down the sheet, a rotating component such as the drum becomes a strong suspect.
Some printers have a drum integrated into the toner cartridge. Others use a separate drum unit.
Follow your model’s instructions before touching or removing it. Drum surfaces can be sensitive to scratches, oils from fingers, and prolonged exposure to bright light.
4. Clean the Corona Wire If Your Printer Uses One
Certain laser printers use an accessible corona wire as part of the imaging system.
A contaminated corona wire can cause vertical lines or print-quality defects. Brother specifically identifies a dirty corona wire as one possible cause of black or colored vertical streaks on supported laser models.
If your printer includes a corona-wire cleaning tab or mechanism, follow its documented procedure. Return any cleaning slider to its specified home position afterward.
Do not attempt this step if your model doesn’t provide user-accessible corona-wire maintenance.
5. Run the Laser Printer’s Cleaning Page
Many laser printers provide an internal cleaning function or cleaning page.
This process can help remove loose toner and contamination from parts of the paper path. On supported HP LaserJet models, printing a cleaning page is among the recommended steps for persistent dark vertical lines.
Check your printer’s Maintenance, Service, or Print Quality menu for an equivalent feature.
6. Consider the Fuser and Transfer System
If toner smears, rubs off easily, or creates persistent marks even after cartridge and drum checks, the problem may lie deeper in the imaging path.
The fuser uses heat and pressure to bond toner to the paper. Transfer components help move the toner image onto the sheet. Problems with these components can cause smearing, uneven density, ghosting, or repeating defects.
These parts can become hot and may not be intended for user servicing.
If basic manufacturer-approved maintenance doesn’t solve the issue, professional service is safer than dismantling the printer.
How to Fix Black Lines and Vertical Printer Streaks
A solid black line from the top to the bottom of every printed page deserves a different diagnostic approach from ordinary faded banding.
First, print a test page directly from the printer.
If the black line is present there too, inspect the toner and imaging system on a laser printer or run the nozzle/platen checks appropriate for an inkjet.
For laser printers, likely areas include:
- Black toner cartridge
- Drum unit
- Corona wire on applicable models
- Contaminated paper path
- Imaging or transfer components
For inkjets, check:
- Nozzle-test pattern
- Printhead
- Printer platen
- Ink residue
- Debris in the print engine
If the line remains in exactly the same location on every page, that consistency is especially useful. It suggests a fixed contamination point or component problem rather than a random software error.
Why Does My Printer Leave White Lines?
White lines represent missing printed material rather than unwanted material.
On an inkjet, missing sections in the nozzle pattern usually indicate that one or more nozzles aren’t firing correctly.
On a laser printer, white vertical streaks may indicate a toner-distribution or imaging problem.
Look at whether the white line affects every color or only one. A defect limited to one color narrows the diagnosis significantly.
How to Fix Horizontal Lines and Banding
Horizontal bands are particularly common on inkjet printers.
Start with a nozzle check. If the pattern contains gaps, run the recommended printhead cleaning procedure.
If the nozzle pattern is complete but banding remains, investigate:
- Printhead alignment
- Print-quality settings
- Paper type
- Paper-feed consistency
- Driver or application settings
Try printing the same test image at a standard or higher quality setting. If the banding changes substantially, print settings or paper feeding may be contributing to the problem.
Don’t assume maximum print quality is a permanent “fix.” The goal is to identify why the normal setting isn’t producing consistent output.
Printer Streaks Only When Copying or Scanning
This is one of the easiest printer problems to misdiagnose.
Suppose documents printed from your computer are clean, but copies made through the automatic document feeder contain a vertical black line. In that case, cleaning the printhead or replacing toner may accomplish nothing.
The scanner can be the source.
Clean the Scanner and ADF Glass
Dust, correction fluid, adhesive residue, or even a tiny speck on the narrow scanner-glass strip used by an automatic document feeder can become a continuous line on a copied or scanned page.
HP states that debris on the document-feeder glass strip is responsible for the overwhelming majority of line and streak problems it encounters on copies made through the document feeder for the affected product guidance.
Brother similarly identifies dirt on scanner components as a potential cause of vertical lines on copies.
A useful diagnostic comparison is:
| Test | Result | Likely area |
|---|---|---|
| Computer print has streak | Yes | Printing system |
| Flatbed copy has streak | Yes | Printing system or main scanner area |
| ADF copy has streak | Yes, flatbed is clean | ADF scanner-glass strip |
| Scan has streak but print is clean | Yes | Scanner system |
| Printer test page has streak | Yes | Printer hardware/consumables |
This distinction can save considerable troubleshooting time.
How to Fix Printer Streaks Without Wasting Ink or Toner
The most common troubleshooting mistake is performing every maintenance operation repeatedly.
A better approach is diagnostic.
Use the Pattern to Decide the Next Step
If a nozzle check has missing cyan segments, focus on the cyan ink path rather than cleaning unrelated components.
If a laser test page contains a solid magenta vertical line, investigate the magenta toner/imaging path.
If prints are perfect but ADF copies contain one black line, inspect the scanner strip.
Each test should narrow the problem.
Change One Thing at a Time
After every adjustment, print another test page.
If you simultaneously replace the paper, run three cleaning cycles, reinstall the cartridge, change the driver, and clean the printer, you won’t know which action fixed the defect.
A simple sequence produces better information:
Test → change one variable → retest → compare.
Don’t Overuse Printhead Cleaning
Automatic cleaning is useful, but it consumes ink.
HP recommends using printhead cleaning when print-quality symptoms warrant it, while its troubleshooting guidance directs users to examine the resulting test output before continuing.
If several properly performed cleaning attempts produce no meaningful improvement, stop repeating them and investigate the cartridge, printhead condition, or manufacturer-specific service procedure.
Should You Manually Clean a Printhead?
Manual cleaning should not be your first step.
Run the printer’s automated maintenance routine first. If that fails, check the manual or official support instructions for your exact model before removing or wiping anything.
Some printers have removable printheads; others do not. Some cartridges incorporate printing components themselves.
Using the wrong liquid, touching electrical contacts unnecessarily, applying pressure to delicate nozzles, or reinstalling components while wet can create a larger problem than the original streak.
If your manufacturer provides a manual cleaning procedure, use only the materials and method specified for that printer.
Can Bad Paper Cause Printer Streaks?
Yes, although paper is frequently overlooked because users naturally suspect ink or toner first.
Paper that is damp, dusty, curled, wrinkled, coated incorrectly, or unsuitable for the printer can affect toner transfer, ink absorption, feeding, and drying.
HP’s laser print-quality guidance recommends checking paper condition and trying a different or freshly opened paper type for certain print defects.
If streaks began immediately after switching paper, test a fresh stack of manufacturer-compatible plain paper before changing printer components.
Also check the media setting in the print driver. A laser printer may adjust temperature and feed behavior based on the selected paper type.
Can Printer Drivers Cause Streaks?
They can contribute to some print-quality problems, but physical streaks that appear on the printer’s own diagnostic page are unlikely to originate from a computer driver.
That’s why the internal test page is so useful.
If the printer’s test page is clean but normal documents have lines:
- Restart the printer and computer.
- Try another document.
- Print from another application.
- Check print-quality and paper settings.
- Update or reinstall the manufacturer’s recommended printer driver if appropriate.
- Reset customized driver settings and test again.
Software troubleshooting should move higher on your list only when the printer proves it can generate a clean internal page.
Why Printer Streaks Keep Coming Back
A streak that disappears temporarily and then returns deserves closer attention.
The Printer Sits Unused
Inkjet nozzles are more susceptible to dried ink when the machine sits idle for extended periods.
Periodic normal printing can help keep ink moving through the system. Avoid repeatedly running cleaning cycles merely as preventative maintenance, because cleaning itself consumes ink.
A Consumable Is Near the End of Its Life
Cleaning can’t repair a physically worn or damaged drum indefinitely.
If a toner cartridge, drum, maintenance unit, or other consumable has reached its expected replacement point and the defect repeatedly returns, replacement may be more appropriate than repeated cleaning.
The Paper Environment Is Poor
Moisture and environmental conditions can affect print quality, especially with laser printers and paper stored in humid conditions.
HP notes that temperature or humidity outside a printer’s specified operating range can contribute to both light and dark vertical streaks on certain LaserJet models.
Store paper flat in a dry environment and keep unopened paper in its packaging until needed.
Toner or Ink Is Contaminating the Paper Path
If you repeatedly see smears in the same position, inspect accessible areas according to the manufacturer’s cleaning instructions.
A leaking toner cartridge or recurring ink contamination should be addressed at the source rather than continually wiping the resulting marks.
When Should You Replace the Ink or Toner Cartridge?
Replacement makes sense when diagnostics point specifically to the cartridge.
Consider replacement when:
- The cartridge is empty or nearly empty.
- One color consistently fails despite appropriate cleaning.
- The cartridge is leaking.
- Reseating it doesn’t change the defect.
- The same streak follows the affected toner color.
- The printer identifies the cartridge as faulty.
- The cartridge has visible physical damage.
Don’t replace every color cartridge because one color has a problem.
On supported Brother laser printers, the pattern and color of a test print are specifically used to determine whether a toner cartridge should be replaced or whether other cleaning should be attempted first.
When Is the Drum the Problem?
Suspect the drum when a laser printer produces persistent lines, spots, or repeating defects that remain after toner checks and approved cleaning.
Repeating marks are particularly informative because the same damaged or contaminated point on a rotating component can contact the imaging process repeatedly as the page moves through the printer.
However, don’t touch the drum surface simply to test this theory.
Check your printer documentation to determine whether the drum is:
- Separate from the toner cartridge
- Integrated into the cartridge
- User replaceable
- Intended for technician servicing
Brother lists the drum unit alongside toner and corona-wire contamination as a potential source of vertical streaks on applicable laser models.
When to Stop Troubleshooting and Get the Printer Serviced
Basic maintenance can solve many streaking problems, but there is a point where continuing to disassemble or clean components becomes counterproductive.
Consider professional service when:
- Built-in maintenance produces no improvement.
- A new, correct cartridge doesn’t solve the problem.
- A known-good drum doesn’t eliminate the defect.
- Toner is leaking inside the printer.
- The fuser appears damaged.
- Prints contain severe repeating defects.
- The printer makes unusual mechanical noises.
- Paper repeatedly jams along with streaking.
- An internal component is visibly scratched or damaged.
- The required component isn’t designated as user-serviceable.
Fusers can operate at high temperatures, while drums and transfer components can be delicate. Avoid touching internal assemblies that your manufacturer’s documentation doesn’t identify as user-serviceable.
How to Prevent Printer Streaks
Once you’ve learned how to fix printer streaks, a few habits can reduce the chance of the problem returning.
Keep paper sealed and dry until you need it. Use paper compatible with the printer and select the correct media type in the driver.
For inkjets, avoid leaving the machine unused for very long periods. Occasional normal printing keeps ink moving without wasting large amounts through unnecessary cleaning cycles.
Keep the printer covered or positioned away from excessive dust, but don’t block ventilation openings.
When replacing cartridges or drums, avoid touching sensitive surfaces. Follow the manufacturer’s installation procedure rather than forcing components into place.
Most importantly, respond to early symptoms. A small missing segment on a nozzle check or a faint repeating laser mark is easier to diagnose than a heavily contaminated printer.
Final Takeaway
The fastest way to understand how to fix printer streaks is to diagnose before replacing anything. Print an internal test page, identify the streak pattern, and determine whether you’re dealing with an inkjet, laser, or scanner-related problem.
For an inkjet, start with the nozzle check, ink level, printhead cleaning, alignment, paper, and platen. For a laser printer, focus on toner, the drum, approved corona-wire maintenance, cleaning functions, paper, and the imaging path.
If prints from the computer are clean but copies or scans contain lines, inspect the scanner and ADF glass instead of the printing system.
Work one step at a time and print a test page after each change. When manufacturer-approved cleaning and consumable checks no longer improve the output, stop repeating them and have the printer inspected rather than risking damage to internal components.
